Mission Briefing: Processing Hub
Welcome back to our series of articles where we break down the contested locations and their accompanying missions for Phase 1 of the Shattergrounds Campaign. We’re over halfway through the locations and missions for Phase 1 of the Campaign, have you enjoyed playing any of the missions we’ve discussed so far?
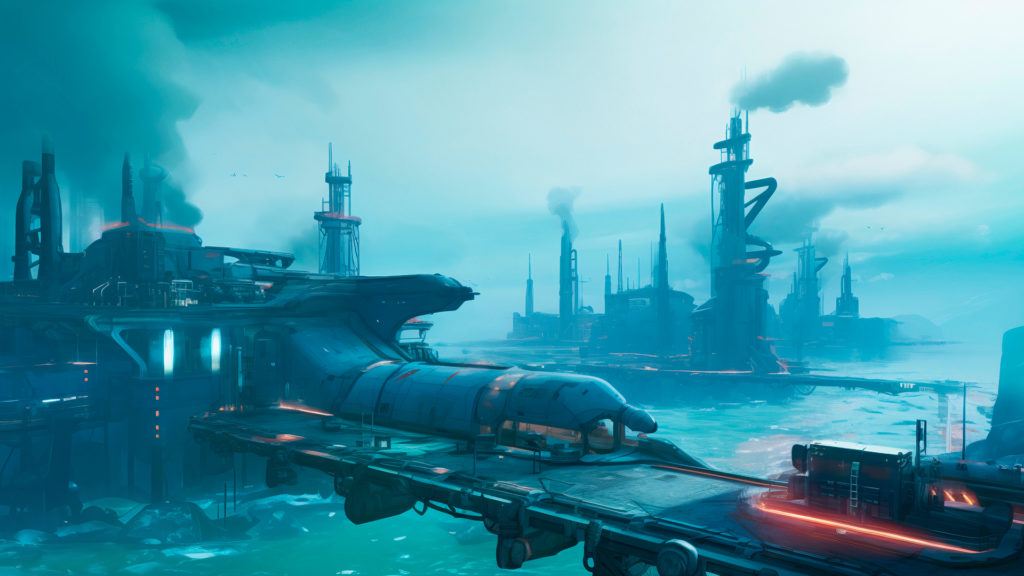
Let’s crack on with the conflict in Location 4: Processing Hub in the fishing port of Okolnir
AquaHarvesters are of little use if their catches are not properly processed, packaged, and distributed to the rest of the system, which includes not only the planet but also the orbital rings of Concilium Nova, the stations around the Renkonto satellite, the Brísingamen asteroid belt, and the further reaches of the system. This is made possible thanks to the Okolnir Processing Hub, an industrial complex where the catches of the AquaHarvesters are processed, which makes this location one of Concilium Prima’s main food supply hubs.
Faction Goals and Starting Influence
PanOceania have deployed a great number of their aquatic troops from Varuna to guard the seaports to ensure that trade in and out of the port can continue.
Ariadna were initially relegated to secondary policing duties but are seeking to gain influence with both criminal gangs and disconcerted dock workers in order to increase their power.
PanOceania starts with the advantage in this area with Ariadna 2nd and all other factions 3rd.
Mission Overview
The mission for this location is Looting & Sabotaging on Page 18 of Phase 1 PDF.
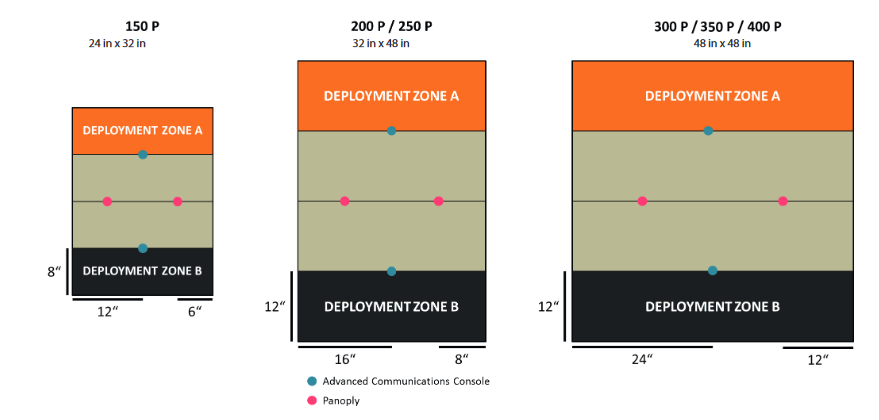
Time to get cool weapons & blow stuff up! This mission is all about destroying the opponents Advanced Communications Console (AC2) while protecting your own AC2 from harm..
The scoring for this mission is as follows
- 1 Objective Point per point of STR left on your AC2 at the end of the game.
- 1 Objective Point per point of STR lost by the opponents AC2 at the end of the game (to a maximum of 3 Objective Points.)
- 2 Objective Points extra if you completely destroy the opponents AC2 .
- 1 Objective Point if at the end of the game you have acquired more weapons or items from the Panoplies than your opponent
- 1 Classified Objective worth 1 Objective Point.
In order to score maximum Objective Points in this mission you will need to:
- Completely destroy the opponent’s AC2 Unit
- Have your AC2 Unit in a pristine 3 STR condition.
- Have grabbed more goodies from the Panoplies.
- Have got the Classified Objective.
Destroying the big static targets that are the AC2 units is not as simple as it initially appears.
- The AC2 units can only be destroyed in Close Combat by units that have weapons with the Anti-Material trait. So time to bring out the heavy hitters in your faction.
- That means Close Combat Weapons that have Double Action, T2 or Explosive traits but strangely not Armour Piercing or Monofilament traits.
- Units with access to D-Charges are a must for this mission but don’t forget that TAG’s in this mission benefit from the Armored Fury rule and get Anti-material CC fists.
- The rare but valuable Multi-Pistol is also able to be used in CC and is Anti-Material as is the mightyTrench Hammer.
Any attack against an AC2 unit also triggers its defense protocols which means it will always be an opposition roll where the AC2 automatically rolls an 8.
- This applies even when the attacking unit uses Berserk and what’s more no CC mods from Martial Arts can be used!
- If the roll is failed the attacking unit can be stunned unless they save twice against a DAM 15 BTS save which will probably put them out of action for the rest of that turn.
- If that wasn’t hard enough the AC2 has ARM 6 and 3 Structure Points meaning it will take a few hits to destroy them.
- Friendly Engineers can also fix a damaged AC2 so it would be worth taking at least one Engineer in this mission.
To aid in blowing up the AC2’s and for fun times there are 2 Panoplies full of weapons on the table.
- Any unit, not just specialists can make a WIP roll to get D-Charges from the Panoplies or they can roll on the Panoply chart to get some nice weapons.
- Units can get anything from extra armor, 8-4 Movement, Mimetism or a HMG! If a unit rolls something they already have they can roll again.
- Any unit with the Booty skill doesn’t have to make a roll.
General Mission Tips
The status of the AC2 only counts for Objective Points at the end of the game so have an Engineer or two on standby to fix any damage caused to your AC2, ideally with a servant bot placed within fixing range. You can spend your last turn fixing up your AC2 to secure 3 Objective Points.
Station some units around the AC2 to intercept any units going for it. If an attacking unit reaches Silhouette contact with one of your units before the AC2 then you’ll stop them in their tracks.
Any infiltrating units or units with Combat Jump who are packing D-Charges or Anti-Material weapons are very useful in this mission. Examples include:
- Yu-Jing have the Liú Xīng have a very tough Specialist Operative option with D-Charges who can clear their landing area with their Combat Jump(Explosion).
- Tohaa get the Gao-Tarsos who have two profiles with D-Charges and are pseudo 2 Wound units because of their Symbioarmour.
- Rasyat’s have D-Charges, DA Close Combat Weapons and the ability to attack the AC2 under a cloud of their thrown Eclipse Smoke Grenades!
Units like Ajax and Mc Murrough are AC2 destroying machines in this mission because they have high damage Anti-Material weapons and good mobility.
If you need some cheap Anti-Material Close Combat units, all versions of the Beasthunters have them with the special Yu-Jing Beasthunter having an Explosive Close Combat Weapon with +1 Burst!
Each unit can only use a Panoply once but it’s worth doing as it contributes towards an Objective point and your units can get some nice additional weapons.
- It’s sometimes better to take the D-Charges unless the unit already has them or an Anti-Material weapon, as the more units you have who can destroy the ACS the more likely you are to succeed in destroying it.
- TAG’s get some different results on successful rolls than other units, otherwise there could potentially be an ARM 14 Johtum, but rolling an 18 gives TAG’s Total Immunity and that dramatically increases the potency of any TAG.
Reinforcements don’t have as much of an impact on this mission as there is no area based scoring to consider. However bringing in units to grab stuff from Panoplies or as emergency Engineers to fix an AC2 would be worth considering if using this modification.
Special Campaign Rules
There are two special Campaign Rules for this mission, RESTRICTED RANGE and FLOOD
RESTRICTED RANGE means any BS Attack where the range to the target is 32 inches or more is considered an automatic failure with no need to roll the die.
- Obviously this restricts the usefulness of Snipers, Missile Launchers and other long range weapons.
- It also means that any vital Engineers who you want to use to fix the AC2 can be kept back out of range of most long range threats until needed.
- Not massively impactful to the mission beyond the first turn since most units who deploy close to the edges for the Deployment Zones will be in range if not straight away then after their first movement skill.
FLOOD means all Troopers possessing Terrain (Aquatic) or Terrain (Total) get a +1 inch Bonus to their first MOV value when using the Move Common Skill.
- It’s time for PanOceania players to break out those Varuna troops again!
- The bonus applies to ALL troops with those two terrain skills but only for regular moment skills and not for things like Climbing Plus or Super Jump which use the Movement skill.
- Terrain (Total) shows up at least once in most factions however Terrain (Aquatic) is less common outside of a few sectorials.
- Most factions will get access to Beasthunters and the Triphammer TAG’s who are ideal for this mission.
- The inch of extra movement doesn’t seem like much but it will make getting to the Panoplies and then to the AC2 a bit more order efficient for units who benefit from the skill.
Faction Focus
Lets focus on PanOceania and Ariadna units who will be most impactful in this mission.
PanOceania
PanOceania has plenty of TAGs to choose from who can be beneficial in this mission with the Armored Fury rule. While the Cutter might be the go to option for this mission, given it will benefit from the FLOOD rule, a Jotum, Squalo, Seraphs or one of the S6 TAGs like an Uhlans is also a good choice.
PanOceania can take Maximus who will absolutely annihilate an AC2 if he gets in range to hit it as can Shona Carano with her EXP close combat weapon who can also pretty reliably kill anyone she meets on the way to it.
PanOceania have some good assault units with Anti-Material weapons or D-Charges including;
- The Guarda de Assalto, who has D-Charges in addition to being BS15 with Spiotfire or MULTI-Rifle and is the only PanOceania unit to have access to smoke grenades!
- Knights of Santiago (who has a Combat Drop option in MO), with D-Charges and DA Close Combat Weapons.
- Knights of Montesa, an ARM 4 Knight on a Bike who has a DA Close Combat Weapon.
- Father-Inquisitor Mendoza with his Double Action “Flaming Sword” CC Attack (Continuous Damage) which can potentially take out an AC2 in one swing.
For PanOceania Varuna troops are the most obvious units to benefit from the FLOOD Special Rule howeverPanOceania have access to a few interesting units with Terrain (Total) as well.
- Kamau fireteams are extra maneuverable with this rule as are the MOV 7-2 Varuna ORC options who come with hard hitting heavy weapons.
- Camouflaged Zulu-Cobras or Croc-Men are able to get to advantageous attack positions faster.
- Nisses, Bolts and Bagh-Mari have Terrain (Total) which makes Fireteams with these units a bit more maneuverable.
- Locusts have both Terrain (Total) with access to D-Charges and DA Close Combat weapons. This makes them ideal for a quick push to damage the AC2 early in the game.
- And obviously the Cutter, the Hidden Deployment, Mimetism -6 TAG with its BS15 MULTI Heavy Machine Gun, only gets better with MOV 7-4 and excels at taking out the opponents best units.
Ariadna
Ariadna only has the one TAG in the form of the Chernobog but this unit is best used at range to take out units with its AP Heavy Machine Gun and Heavy Rocket Launcher option, rather than attempting to charge the AC2.
Instead look to your Anti-Material equipped Close Combat specialists and “Actual Goddam Werewolves” who can make very quick work of an AC2. Special mention goes to the following units;
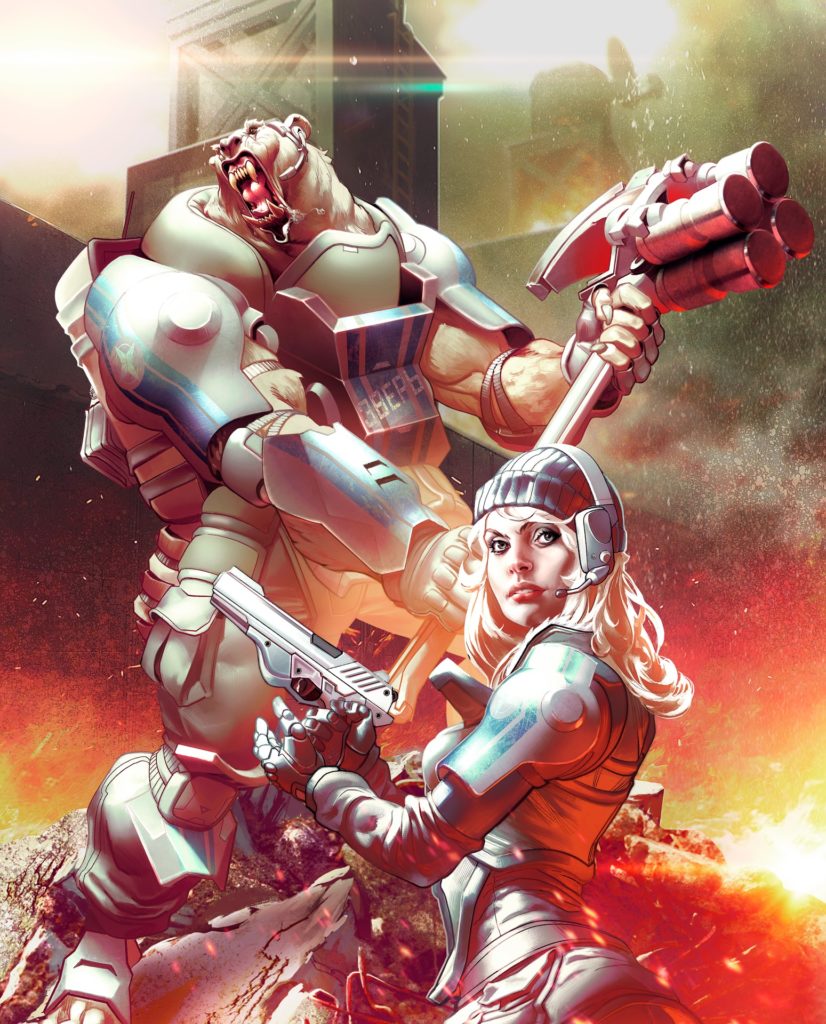
- The Polaris Bearpode who will just annihilate an AC2 with either its Trench Hammer or AP Close Combat Weapon on DAM 18 (Since the CC Attack +2 DAM is not a Martial Arts Skill) and who can Berserk Charge from 10 Inches away.
- The Unknown Ranger has a T2 Close Combat Weapon and is a great all around hunting piece as well with MSV Lv1, Natural Born Warrior and Mimetism (-3).
- Cadin ‘Firststrike’ Donn who has a T2 Close Combat weapon which will also be Armour Piercing as he has the CC Attack (AP) skill.
- McMurrough is a pure assault piece who can potentially take out an AC2 in a single turn with his AP+DA Close Combat Weapon, his PH 16 and Berserk.
If you want to be more sneaky about it, Ariadna has access to some exceptional infiltration units who really shine in this mission.
- Uxia Mc Neil and Pavel McMannus are two camouflaged units who can either infiltrate or forward deploy with D-Charges and a T2 CC Weapon in the case of Pavel.
- SAS and Chasseurs have a unit option with D-Charges as do all the venerable Ariadna Scouts. All can Camo Infiltrate for first turn strikes on the AC2.
- The not often seen Irmandinhos have the Booty skill and come with D-Charges as standard meaning they can get extra weapons out of the Panoplies for free.
Ariadna has more access to cheap units with D-Charges than perhaps any other faction and their ability to take hard hitting assault units means the AC2 is very vulnerable to first turn Alpha Strikes. If you play the Kosmoflot Sectorial in this mission you’ll have access to many of the units mentioned above so this mission will be a breeze.
Can you think of any units I’ve not mentioned who are must haves for this mission? If so feel free to mention them in the comments below, now go forth and break stuff!
Check in soon for more Shattergrounds Mission Briefings.

Sabotage operations, our day to day basis in Ariadna
Bearpode truly makes this mission rough for me lol
Played this last night. Ariadna with Uxia and double Irmadhinos vs a x4 TAG PanO list. It was awesome.
Packing my Explosive Close Combat Weapons and the Double Action one also, AC2 won’t know what hit it.
Just remember folk, it’s all fun and games in Okolnir until you wake up the bearpode den!
Small changes but big impact for the mission. I really like it.
(°∀°)b
Ahh, sweet home Okolnir. Our Okolnir.
I like the campaign special rules for this one, make it a bit easier than it usually is.
good intel, to get the location from the atek riots