Mission Briefing: Marina and Yacht Club
Welcome back to our series of articles where we break down the contested locations and their accompanying missions for Phase 2 of the Infinity Shattergrounds Online Campaign. The end of the Campaign is days away now and things are really beginning to hot up in several of the contested locations. Who do you think is going to come out on top in this campaign?
We’ll continue with our penultimate mission briefing for Location 5: Marina and Yacht Club in Montalbán.

Come and experience the Montalbán Marina Yacht Club, located in the heart of Concilium’s most popular archipelago and vacation spot. A prestigious, internationally acclaimed marina, renowned for the quality of its services and amenities, perfectly located for easy access to the sea and convenient travel connections. A paradise for sailing enthusiasts by day, and a lively promenade full of nightlife by night. An intoxicating combination of luxury hotels, high-rise condos, and cafés. After dark, its skyscrapers gleam in spectacular fashion, resembling a set of gemstones. Enjoy dinner on the beach or have a drink at the bar on a hotel rooftop, overlooking the magnificent view of the gulf and the amazing yachts and boats in the marina.
The Montalbán Marina Yacht Club, the most glitzy joint on Concillum where the well heeled hang out on expensive super yachts or parade on the promenade. If you have to ask home much the drinks cost in the Marina Bar then you can’t afford to drink there.
PanOceania are looking out for their rich citizens and CEO’s who probably own the biggest yachts in the Marina.
Nomads are wondering how difficult it would be to get one of those yachts off planet and space worthy.
PanOceania starts in control of the location with Nomads 2nd and all other factions 3rd.
Mission Overview
The mission for this location is “Unmasking” on page 16 of the Phase 2 PDF.
An interesting mission where the objective is to find and eliminate the enemy HVT who is the “Designated Target”.
Each player deploys 3 HVT’s in this mission instead of the normal 1 with the normal rules for deploying HVT’s in effect.
- One of these HVT’s as secretly chosen by the controlling player will be the “Designated Target” while the other 2 HVT’s will be the “Target Decoys”.
The scoring in the mission is all based on finding and killing the opponents HVT while keeping your own HVT’s alive.
- There are 3 Objective points for finding and eliminating the opponents Designated Target.
- There’s 1 Objective Point each for finding and eliminating the two Target Decoys.
- There is 1 additional Objective Point for killing more of the opponents Target Decoys than they do of yours.
- There are 2 Objective points for having more Activated Consoles than your opponent at the end of the game.
- If at the end of the game you both have the same number of Activated Consoles you and your opponent each score 1 Objective Point.
- There are 2 Objective points if at the end of the game your Designated Target is not Killed.
- There’s no Classified Objectives in this mission.
To score the maximum number of Objective Points in this mission you will have to:
- Find and eliminate the opponents Designated Target .
- Eliminate the opponents two Target Decoys.
- Not lose more than one of your Target Decoys.
- Have your Designated Target alive at the end of the game.
- Have more Activated Consoles than your opponent at the end of the game.
This mission features an Exclusion zone over the central 16 inches of the game table which prevents any units with Airborne Deployment (AD) or Superior Deployment skills from deploying in them.
Also it is not allowed to deploy in base contact with any HVT’s in this mission.
In order to reveal which of the opponents HVT’s is the Designated Target, players must first Activate one of the 3 Consoles on the centreline of the table and then make a guess.
- The Consoles require a Specialist troop to Activate them with a normal WIP roll.
- Units with the Engineer or Hacker Skill get a +3 WIP bonus to Activate the Consoles and get two make two rolls then they do.
- Once a player has Activated a Console they cannot activate it again to Reveal another HVT unless it is Activated by the other player.
- After Activating a Console the player must choose one of the opponents HVT’s and Reveal if it is the Designated Target or one of the Target Decoys.
- An Activated Console can be Activated by the other player meaning it changes control for scoring purposes.
The HVT’s in this mission cannot be the target’s of any attacks until after they are Revealed as the Designated Target or the Target Decoys.
- Once revealed the opponents HVT’s become targetable and will also react as hostile to the player using the Designated Target HVT Profile on Page 11 of the ITS 15 Rules.
- Basically they are a BS 8, PH 11, 1 Wound unit armed with a Stun Pistol.
General Mission Tips
HVT’s always get placed first by each player ahead of the deployment of the rest of their units, so in this mission all three HVT’s will need to be deployed at least 4 inches outside the Deployment Zone and not inside or on top of any terrain.
- It goes without saying that you’ll need to carefully consider where you deploy your HVT’s especially if going first.
- Try not to make it too obvious who your Designated Target is but on the other hand you can play mind games with your opponent through canny deployment.
- If going second you’ll know the position of all of your opponents HVT’s before you deploy so use this to your advantage.
Nigher the player or their opponent can target any HVT’s until they are revealed by Activating a Console.
- This means that denying your opponent the ability to Activate Consoles by either eliminating his Specialist Troops or keeping the Consoles well guarded is a viable tactic.
Even if you reveal the Designated Target, you can’t attack the other two HVT’s until you Reveal them as Target Decoys by Activating Consoles.
- This means to get full points you have to successfully activate all three Consoles or reactivate a console after your opponent Activates it.
Getting to the Consoles early is advisable as the more orders you have available to spend eliminating the opponents HVT’s the more likely you are to do so.
Because a revealed HVT is considered an enemy unit, they can be hit by template weapons either directly or in the blast. Use this to your advantage by positioning units with large template weapons like Chain Rifles and Heavy Flamethrowers so that they can catch a Revealed HVT in the blast.
- Also be cautious when moving your own units near HVT’s in case they get Revealed and your units get caught in a missile template.
If a Revealed HVT is the target of an attack, don’t forget that they can Dodge it with a PH 11.
- Likewise they can trigger FTF against BS attacks by firing their Stun Pistol.
The often overlooked CaseVac skill (ITS 15 PDF, Page 10 ) can be of use in this mission to grab HVT’s, Revealed or not and move them to positions of safety.
Having Infiltrated units beyond the Exclusion Zone, Combat Jump units or Parachutists ready to land and quickly eliminate revealed HVT’s is a good tactic.
Note that the ITS Season 15 BORDER SKIRMISHES extra is in effect for this mission which affects units with the Airborne Deployment skill.
- This rule can come in very handy for getting a Combat Jump unit next to the Exclusion Zone and ready to eliminate one or more HVT’s very quickly.
- This will also be important when we get to the Special Campaign Rules for this mission.
Also a hidden deployment Sniper ready to headshot a Designated Target or Target Decoy is a good way to surprise an opponent and gain Objective Points.
This mission does not work great with the Reinforcements mod due to the presence of the Exclusion Zone.
- Having said that, if you can CaseVac all your own HVT’s back into your Deployment Zone then dropping in a defensive Reinforcements fireteam to slow the opponents advance is a good tactic.

Special Campaign Rules
The two Campaign Special Rules for this mission are AQUATIC ADVANTAGE & ARMORED REINFORCEMENTS.
AQUATIC ADVANTAGE allows one unit with Terrain (Aquatic) AND one unit with Terrain (Total) to gain the Parachutist Special Skill.
- We’ve covered this Special Rule before in the previous Mission Briefing article for Location 4: Maritime Traffic Control Center.
- Very useful in this mission to get a unit who can do a lot of damage deployed next to the opponents deployment zone and in HVT killing range.
- Terrain (Aquatic) is less common outside of a few factions but lots of factions have powerful units, including TAG’s with Terrain (Total) who can take full advantage of walking on from a table edge next to the opponents deployment zone and making quick work of a revealed HVT’s.
ARMORED REINFORCEMENTS means all TAGs have a SWC value of 0.5, regardless of the value shown in their Unit Profile.
- Time to bring all the TAG’s!
- PanOceania , Combined Army and Nomad Players will love this given their access to many high SWC TAG units. A Cutter, Salamandra, Johutm or Avatar for 0.5 SWC, YES PLEASE.
- Don’t forget that most armies have access to mercenary Triphammers as well though there are a few TAG profiles that go from 0 SWC to 0.5 SWC so keep this in mind.
- More economical than you’d imagine as though TAG’s are still expensive they come with additional Tactical Awareness orders to offset the cost.
- Remember in some sectorials you can take multiple large S7 and smaller cheaper S6 TAGS, Like PanOceania & Nomads for instance….
- Combined with the AQUATIC ADVANTAGE rule this can greatly enhance the effectiveness of one or perhaps two TAG’s for this mission.
Faction Focus
Let’s take a look at the Nomad & PanOceania units that could be most effective in this mission.
Nomads
Nomads have a couple of excellent long range units who can wait for their opportunity to take out a HVT as soon as it’s revealed as the Designated Target or a Target Decoy.
- A Spektr with MULTI Sniper Rifle can start the game in Hidden Deployment and choose the right moment to headshot a HVT if you can draw a bead on them.
- Intruders are always brilliant units and one hidden as a Camo Token with a HMG or MULTI Sniper Rifle is a threat to most units HVT’s included.
- The Lizard TAG has a Grenade Launcher option that has +1 Damage and can lob grenades at HVTs using Speculative Fire.
- Units with Missile Launchers like Grenzers, Hollow Men, Riot Grrls and even the humble Alguacil can target opponent’s units near a hidden HVT and catch them in the circular blast template.
- Lastly Nomads are renowned for their ability to deploy wide hacking area nets and using the Spotlight hacking program to set up units for Guided Missile Launcher hits. Since the HVT is a valid target once revealed it’s fairly easy to get one into the Targeted State and fire away a missile.
As we’ve mentioned before Nomads have few if any units with Terrain (Aquatic), spending most of your life in Deep Space will do that. However they do have a lot of powerful units with Terrain (Total) who can use the AQUATIC ADVANTAGE rule to bypass the deployment restriction of the Exclusion Zone.
- Bandits, Zeros, Spektrs, Prowlers & Moran Massi are all variations of the infiltrating camouflaged specialist with Terrain (Total) who unfortunately won’t be able to make the most of their infiltration skills in this mission due to the Exclusion Zone.
- However you could choose one of them to walk on as a parachutist in this mission in the Camo Token state and with the BORDER SKIRMISHES rule in effect one of these units can enter inside the Exclusion Zone.
- Kriza Boracs have Terrain (Total) and can walk on with +1 Burst Mk 12 & SMG which are effective HVT killing weapons if ever there were.
- Wildcats can bring a nasty Hacker, Killer Hacker or Engineer with MSV1 and a light flamethrower to threaten revealed HVT’s or Activate a Console if needed..
- Libertos are available for Vanilla Nomads and are their only unit who have Terrain (Aquatic) and bring a SMG and template weapon for 8 Points!
- We’ve mentioned Bran do Castro before and he has Terrain (Total) to access the Parachutist Skill and walk on as a Camo Marker with no roll required, or just make use of his usual +6 to Infiltration rolls.
- His Specialist Operative ability will allow him to hack a console if needed, though he acts better in this mission as a Designated Target assassin.
- His Boarding Shotgun option for 32 Points can catch multiple units in its small template or get a Surprise Attack bonus to eliminate a HVT.
- Even though he has only 1 Wound, he has No Wound Incapacitation so is survivable as well.
Behind PanOceania’s ridiculous access to 10 TAG units, both Nomads and Combined Army are tied for the second most TAG availability with 7 units each, (I’m counting Triphammers here as well FYI). So Nomads have some great options to make the most of the ARMORED REINFORCEMENTS rule, here’s a few of them.
- The Lizard Squadron TAG is a remarkably versatile TAG that suffers from being in dire need of a new sculpt.
- It has the standard TAG bonuses of BS Attack(+1 Dam) and Tactical Awareness on a statline with ARM 8 and BTS 6 which is pretty standard for the S7 TAG’s.
- Its weapon loadouts are versatile depending if you want to take a MULTI Heavy Machine Gun for 72 Points or an AP Spitfire for 68 Points as the primary weapon, backed up by either a Grenade Launcher or Heavy Flamethrower depending if you want long range templates or direct temples.
- The Grenade Launchers are all (+1 Dam) which stacks with the usual BS Attack(+1 Dam) for DAM 15 Grenades which can be fired with Speculative Attack!
- The AP Spitfire profiles also get the ability to deploy E/M Mines which is always welcome.
- The reduction of SWC from 1.5 to 0.5 is very welcome in this mission and makes this venerable TAG with its venerable sculpt a valid option.
- The Szalamandra TAG almost needs no introduction, its an absolute beast of a unit carrying the most lethal BS weapon in the game, the king of the battlefield, the Hyper-Rapid Magnetic Cannon.
- Again the TAG bonuses of BS Attack(+1 Dam) and Tactical Awareness come on a statline with ARM 8 and BTS 9 which is a much needed bonus over BTS 6 since this unit is a primary hacking target.
- The Hyper-Rapid Magnetic Cannon is the only native Burst 5 weapon in the game and does a massive DAM 16 Ap/Shock when mounted on a TAG. That makes it lethal to just about everything and indeed very little survives a full burst from this weapon.
- The Szalamandra has a Heavy Flamethrower for close range defense but really this is a unit you want to keep back and punish anything that walks into line of sight.
- You can put this unit into Suppressive Fire as well just in case you want to lock down the entire table this unit can see.
- Costing 72 Points and only 0.5 SWC in this mission is an absolute bargain.
- Play Tunguska and take two of them just because you can.
- We’ve mentioned the Gator before in our last Location 5 Mission Briefing and it’s a fantastic all around TAG.
- In addition to the usual TAG bonuses it gets CC Attack(+1 Dam), Dodge(+2″), and Natural Born Warrior, the last of which is a huge advantage against the other big threat to TAG’s which is close combat specialists armed with AP or EXP weapons.
- Armed with a MULTI Heavy Machine Gun, Chain Rifle(+1B), Mine Dispenser and E/M Close Combat weapon the Gator can take on just about any role needed.
- The icing on the cake is the NCO profile which means that with Tactical Awareness this unit gets access to 3 orders by itself as long as the Lieutenant order is available.
- It’s more expensive than the Szalamandra at 74 or 76 points but at 0.5 SWC those are points well spent.
- Lastly I’ll highlight the Stigmata the Silhouette 6 TAG that packs a big punch for a cheap price.
- The big thing this TAG unit has going for it is that in addition to the usual TAG bonuses it is a Hacker which means it’s also a Specialist capable of grabbing Objectives in most missions.
- Having a Hacking Device does open the unit up to attacks from Killer Hackers in addition to normal Hackers but with BTS 6, ECM: Hacker (-3) and the Carbonite (+2 Damage) upgrade program the Stigmata can hold its own in quantronic combat.
- It’s also the only Nomad TAG with Remote Presence instead of a pilot and that extra level of Unconscious can often make all the difference if you have an Engineer nearby.
- With a Heavy Flamethrower (+1B), Heavy Rocket Launcher (+1B) the Stigmata can hold its own in ranged combat as well as being a threat to bunched up units in Fireteams.
- For 58 Points and 0.5 SWC in this mission it is more than viable to take two of these TAGs if playing the Bakunin sectorial.
PanOceania
PanOceania also has some excellent units ideally suited for taking out a revealed HVT.
- The Hexa with MULTI Sniper Rifle or Spitfire is an excellent unit with Hidden Deployment who can be positioned to take a shot at a Designated Target as soon as they are revealed.
- Croc Men are an excellent unit who have a great deal of versatility in this mission, they have Terrain (Total) meaning you can bring them on with the Parachutist skill in their Camo Token form or you can use their Infiltration Skill to set them up in one of the areas outside the Exclusion Zone in Hidden Deployment. Don’t forget that all their profiles have X-Visors so even their cheap Boarding Shotgun and Combi Rifle profiles are effective at range.
- Neoterra Bolts have Marksmanship as a base skill meaning they ignore cover modifiers and have profiles with both MULTI Sniper Rifle with MSV 1 and Missile Launcher options. Very effective in a pure 5 person Fireteam where they’ll be hitting on BS 19 at optimum ranges.
- Lastly the terror of unsuspecting fireteams and HVT’s alike is the Swiss Guard with its Hidden Deployment, BS 15, HMG or Missile Launcher profiles. Being able to come out of nowhere and fire either 4 HMG shots or a single Explosive circular template on a roll of 18 or less most of the time is devastating.
The previous Mission Briefing discussed which PanOceania units could make good use of the AQUATIC ADVANTAGE special rule so consult that article for suggestions that are equally valid in this mission.
This gives us more time to talk about every PanO player’s favorite unit type, TAGS! As previously mentioned PanO has the most unique TAG profiles of any faction in the game and with the ARMORED REINFORCEMENTS rule they become much more economical to take multiples of. I could and would list the advantages of each one but I have to keep these articles at a decent length so I’ll concentrate on just a few.
- We’ve mentioned the mighty Cutter TAG before several times in previous articles so I’ll just reiterate that;
- It’s amazing..
- It’s even better in this mission.
- If you play the Varuna sectorial you can take two of them for a whopping 194 Points and just 1 SWC if you were so inclined.
- The Squalo and its younger sibling the Squalo MkII are like the basic Silhouette 6 & 7 frames on which all other PanO TAGs are built but that’s not to say they are boring units.
- The larger S7 Squalo TAGcomes with all the usual TAG bonuses of BS Attack(+1 Dam) and Tactical Awareness with ARM 8, BTS 6 and STR 3.
- Its standout features are BS15 for winning most face to face rolls and Remote Presence which gives it the extra level of unconscious.
- It comes with a MULTI HMG with optional Grenade Launcher (+1 DMG) which is very effective on this unit when using Speculative Fire shots which will hit on 12 at optimal range. All profiles also get MULTI Pistols for close range as well.
- The NCO profile is extra order efficient but unfortunately doesn’t come with the Grenade Launcher.
- If you’re playing Varuna then you’ll have the option of taking the Squalo with Terrain (Aquatic) which can be combined with the AQUATIC ADVANTAGE to great effect. You also get an E/M template weapon in the form of a Zapper which is OK but I wish it had been its larger brother the E/Marat instead.
- Profiles cost between 75 to 79 points and getting one for 0.5 SWC is a bargain.
- The smaller and newer Squalo MkII is the lighter, smaller and cheaper version of its big brother.
- It has exactly the same statline and skills as the regular Squalo but with ARM 6 instead of ARM 8 and gaining the Dodge (+1 inch) skill.
- Iits armed with nearly the same weapon loadouts as well except the Grenade Launcher is paired with a regular HMG instead of a MULTI HMG and it gets a cheap MULTI Marksman Rifle profile.
- It also gets +1 Burst to its MULTI Pistols which makes it quite effective at short range.
- Profiles range from 57 Points for the MULTI Marksman to 71 Points for the useful NCO profile.
- I usually don’t talk about the Reinforcement profiles but the Squalo MkII has very effective ones armed with AP Spitfires which on a unit with BS 15 is astoundingly good.
- The larger S7 Squalo TAGcomes with all the usual TAG bonuses of BS Attack(+1 Dam) and Tactical Awareness with ARM 8, BTS 6 and STR 3.
- The Tikbalang and Uhlan are two of the best S6 TAGs in the game and each is uniquely effective in its own way.
- The Tikbalang is built on the Squalo MkII frame so shares its skills and stats apart from CC 17 instead of 18 and loses the Dodge (+1 inch) skill.
- What it gains however is Mimetism -3, and Climbing Plus which makes this TAG a very fast and nimble fighter.
- It’s armed with a HMG, Heavy Flamethrower, Shock Mines and an AP Close Combat weapon which is a great combination of weapons for this versatile TAG.
- For just 68 points and 0.5 SWC in this mission you get a very versatile TAG that can attack from unexpected angles due to its Climbing Plus and can tip firefights in its favor due to its Mimetism -3. Put one in Suppressive Fire in a good spot and it will be very difficult to dislodge.
- Military Orders get their own custom Tikbalang variant armed with an AP Spitfile and DA Close Combat weapon but losing the Mines.
- This unit costs the same as the regular variant and is better suited for hunting the opponents armored assets.
- The Uhlan is like a Tikbalang but more focused on long range engagements and taking out opposing TAGs.
- It has the same stats as the Tikbalang but further drops to just CC15 and loses Climbing Plus.
- Instead it upgrades its Mimetism -3 to the full Camouflage skill meaning it can be deployed as a 40mm Camo Token and gets the advantage of Surprise Attack (-3).
- It drops the more rounded weapon loadout of the Tikbalang for a HMG and Feuerbach(+1 Burst) which gives it a significant punch against other TAGs’
- That +1 Burst Feuerbach can fire 2 DAM 15 Explosive shots or a nasty 3 DAM 15 AP+DA shots which are leathaly effective against high ARM units.
- The Uhlan costs a whopping 88 Points and 1.5 SWC (0.5 SWC in this mission) but for that you get a dedicated TAG hunting unit that can make the most of its Camo Token state to get into the ideal location for unleashing its armor cracking ordnance.
- The Tikbalang is built on the Squalo MkII frame so shares its skills and stats apart from CC 17 instead of 18 and loses the Dodge (+1 inch) skill.
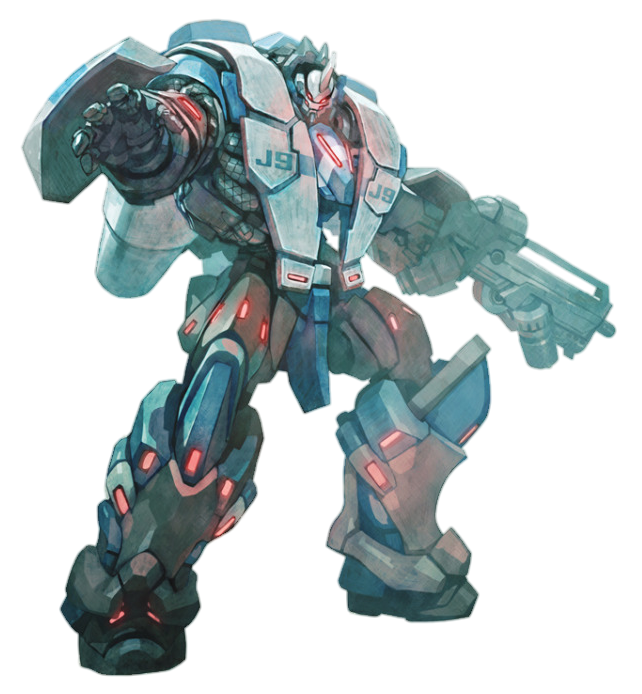
- Let’s cover the Big Lad himself, the walking wall of steel that is the Jotum.
- The only unit in the entire game with ARM 10, the Jotum is the armored fist of PanOceania that they use to break through any obstacle.
- Take the S7 Squalo with all its bonuses and give it PH 17, BTS 9 and the aforementioned ARM 10.
- Then equip it with a MULTI Heavy Machine Gun, Heavy Flamethrower, AP CC Weapon and a Panzerfaust for good measure.
- When this unit is in cover it is an effectively ARM 13 which makes it basically immune to rifles and Combi Rifles.
- The inclusion of the Panzerfaust seems unnecessary at first given the MULTI HMG has AP ammo, but the AP+EXP DAM 15 hit from the Panzerfaust can knock out an opponent’s TAG in one hit in ARO.
- For 87 Points it’s actually cheaper than its little brother the Uhlan and if you want an absolutely rock solid Lieutenant option, in this mission you’ll get a 2 SWC discount.
- Lastly let’s look at the poster boy for PanOceania, the guy they put on cereal boxes, the man who is a TAG, Maximus.
- Maximus is a beast, all the benefits of a TAG with none of their weaknesses.
- He gets all the usual TAG perks of BS Attack(+1 Dam) and Tactical Awareness but also Immunity (Critical) and Immunity (Possession) which makes him immune to the two biggest threats TAGS usually face.
- He’s technically an S6 TAG but gets a boost from ARM 6 to ARM 7 on account of his shield.
- On top of this he has CC Attack +2 DAM, Dodge +2 Inches and Natural Born Warrior, which with a CC of 24 and armed with a AP+DA Close Combat weapon mean he will be fighting anything stupid enough to come at him with DAM 15 hitting twice, halving armor and critting on anything above 16.
- For ranged combat he’s got a MULTI Marksman Rifle +1 Burst and a Panzerfaust all with his BS of 14 making him effective against all unit types.
- Even if he steps out of his TAG suit, where he gains Specialist Operative meaning he can grab Objectives, he still keeps most of his skills on a pretty solid Medium Infantry profile.
- His reinforcement profile also gets Chain Of Command which makes him a Specialist in the TAG suit as well.
- For just 71 points he is an absolute bargain however the only black mark against him in this mission is that you’ll save nothing on SWC for any of his profiles due to the ARMORED REINFORCEMENTS rule and you’ll actually pay 0.5 SWC more of you take his Lieutenant option.
That’s all for this Mission Briefing, I hope you’ve enjoyed this lengthy rundown of the “Unmasking in Montalbán”, which sounds like an Ian Flemming novel now that I think of it. What units would you take for this mission and how many TAG’s do you think you could squeeze into your list? Let us know in the comments below.
We’ll hopefully be back with our final Mission Briefing article before the Campaign ends on Monday the 23rd, until then enjoy the last few days of the Infinity Shattergrounds Online Campaign.

Perfect mission to show the strenght of the Hyperpower! GO TAG TEAM GO!!
(*⌒▽⌒*)θ~♪
One of the best tactics is to get the first turn. Thanks to the Exclusion Zone your specialists don’t need to worry about any midfield threats and basically have a free way to the consoles. If you then are able to place repeaters you can kill all three Targets in Turn one with the guided missile bot.