Fought At Huaqiao: Experimental Energy Research Center
200 days 16 hours 57 minutes ago
Morat Incursion in Huaqiao! Potential Hostage Crisis Averted!
300 POINTSHello Citizens of Concilium Prima, This is Sleve McDichael of the Channel 8 6 O'clock News. Breaking News this evening as reports of a terrorist attack occurred at one of the Shipping and Distribution hubs of Huaqiao's Experimental Energy Center. Sources have confirmed a rogue band of Morats sabotaged a power relay and attempted to hold the workers hostage. Local Gubei task forces, lead by a mysterious Masked Woman on Motorcycle deployed Tactical Armored Gear to the area and liberated the site from terrorist control. Representatives from the Combined Army have disavowed this band of renegades, claiming these Morats were acting against the interest of both the Human sphere, and a peaceful coexistence between Humanity and the Ur Hegemony.

JSA Turn 1- Wall of Metal, Engines Roar!
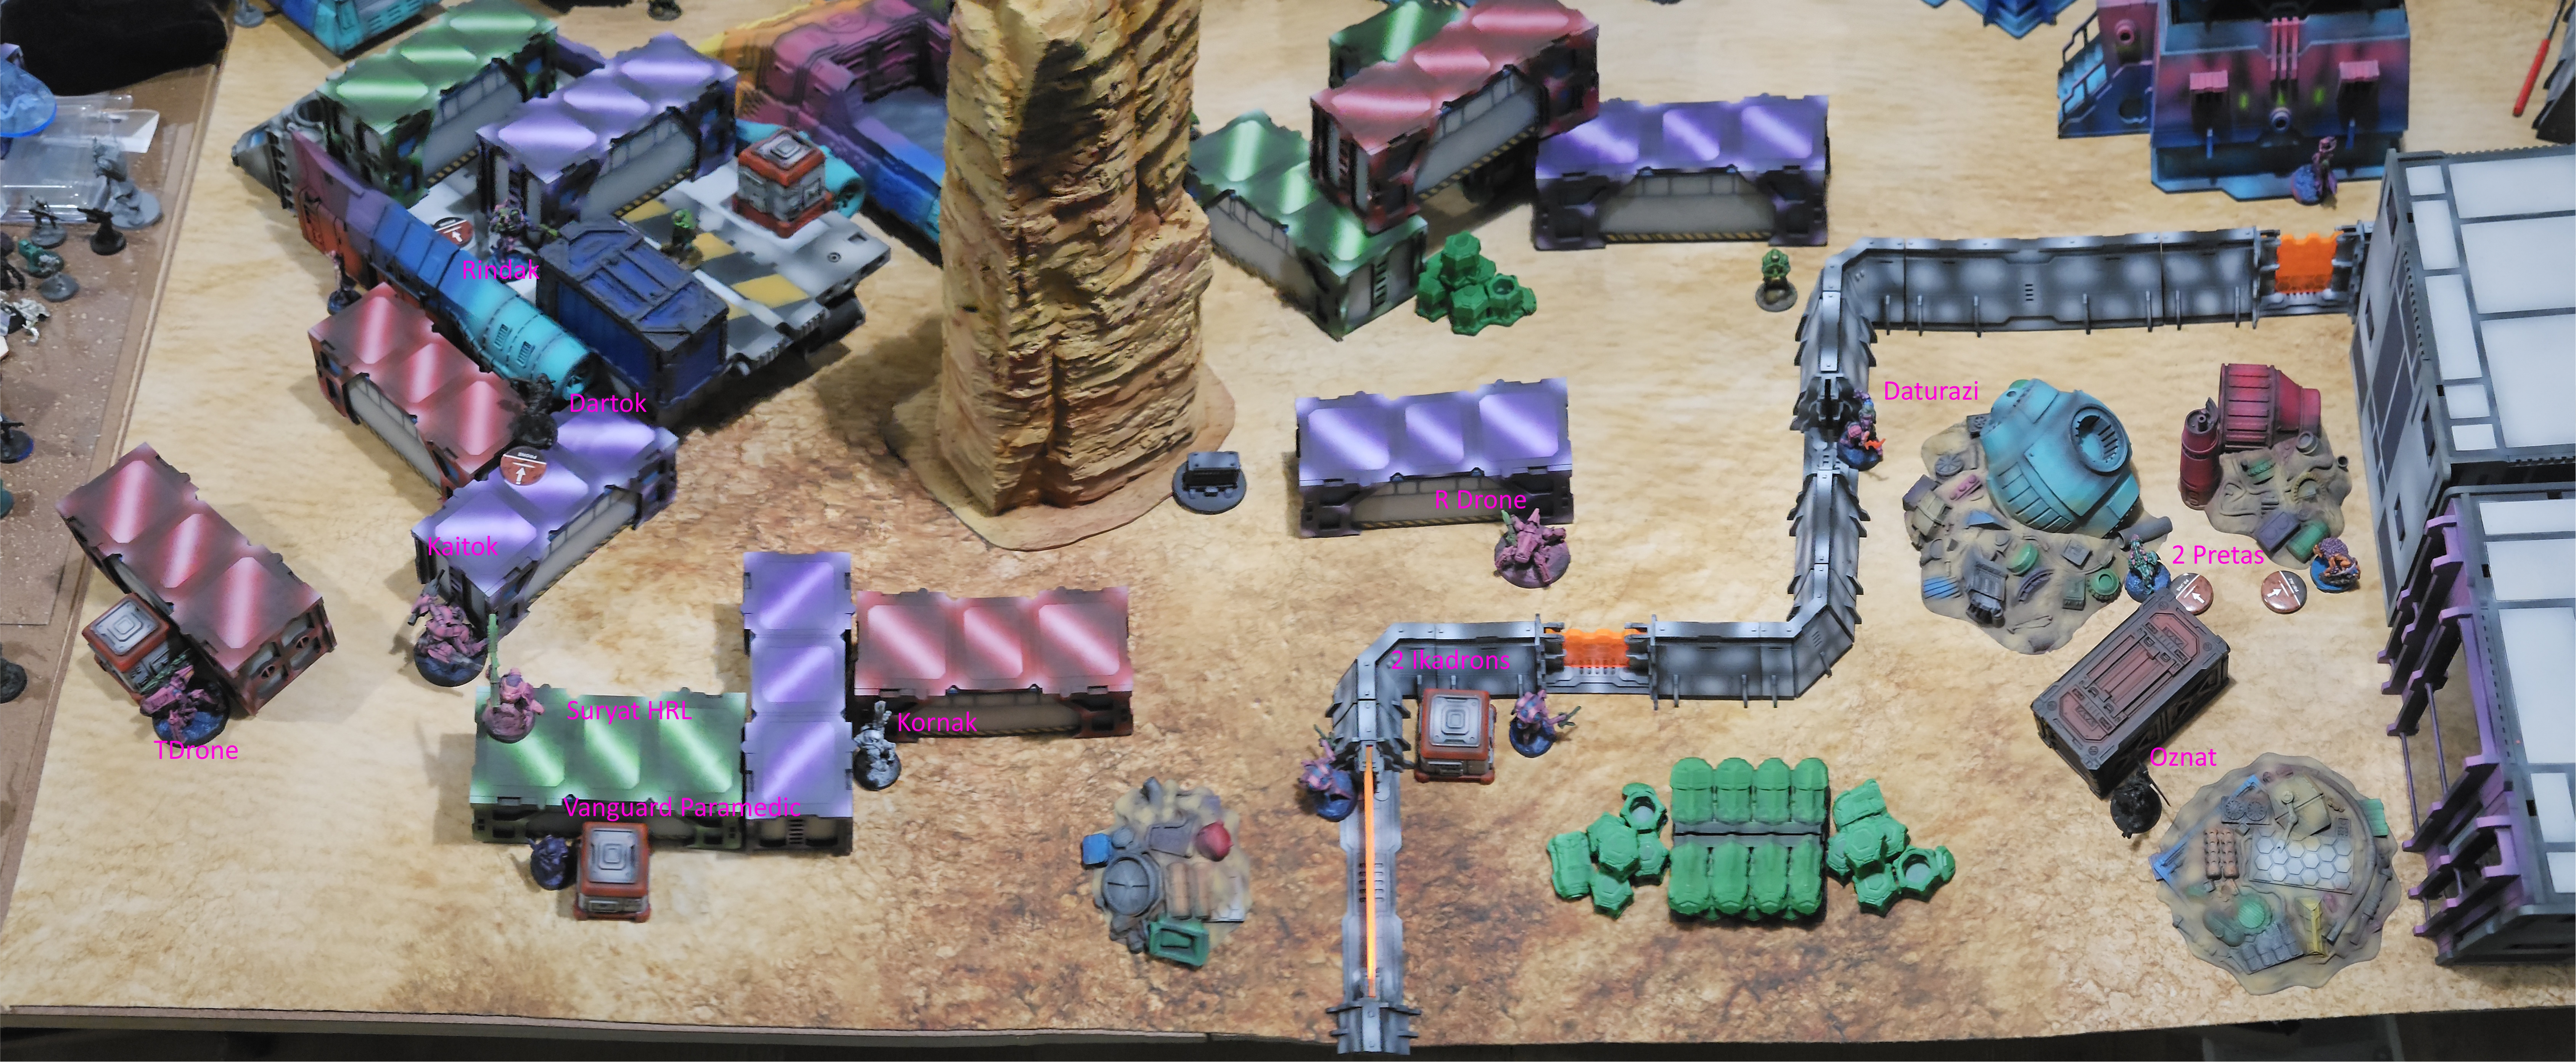
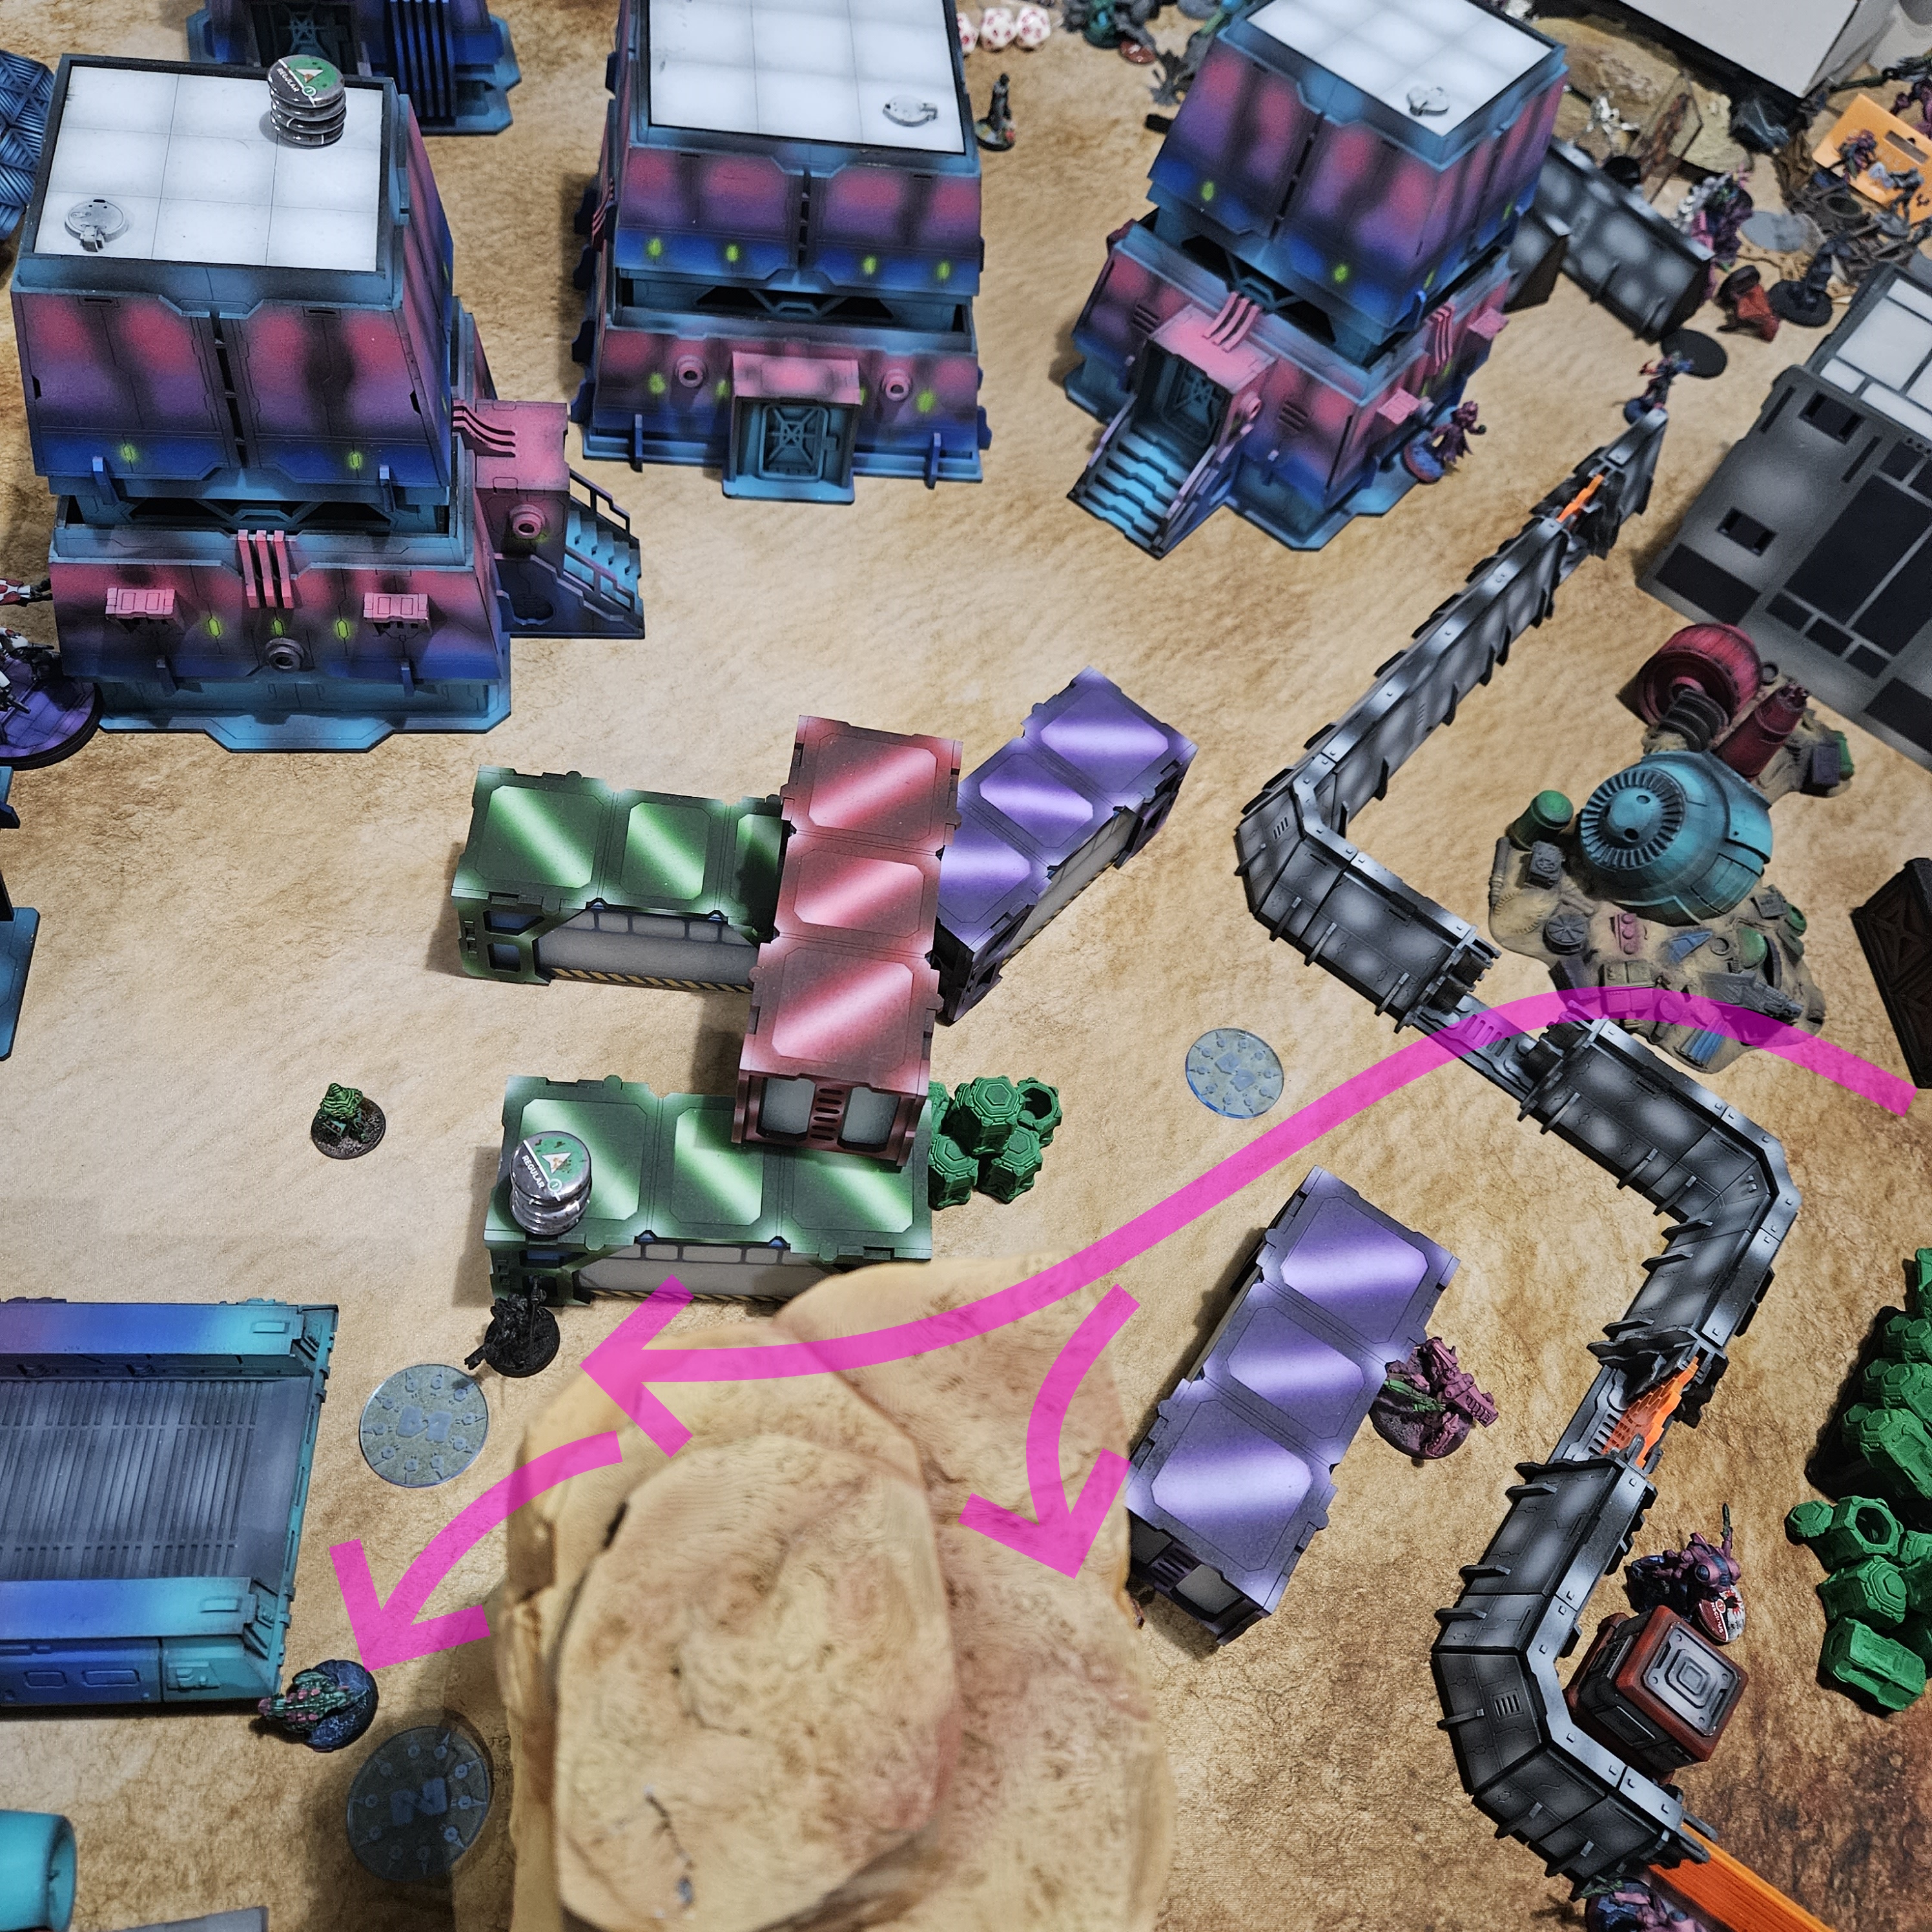
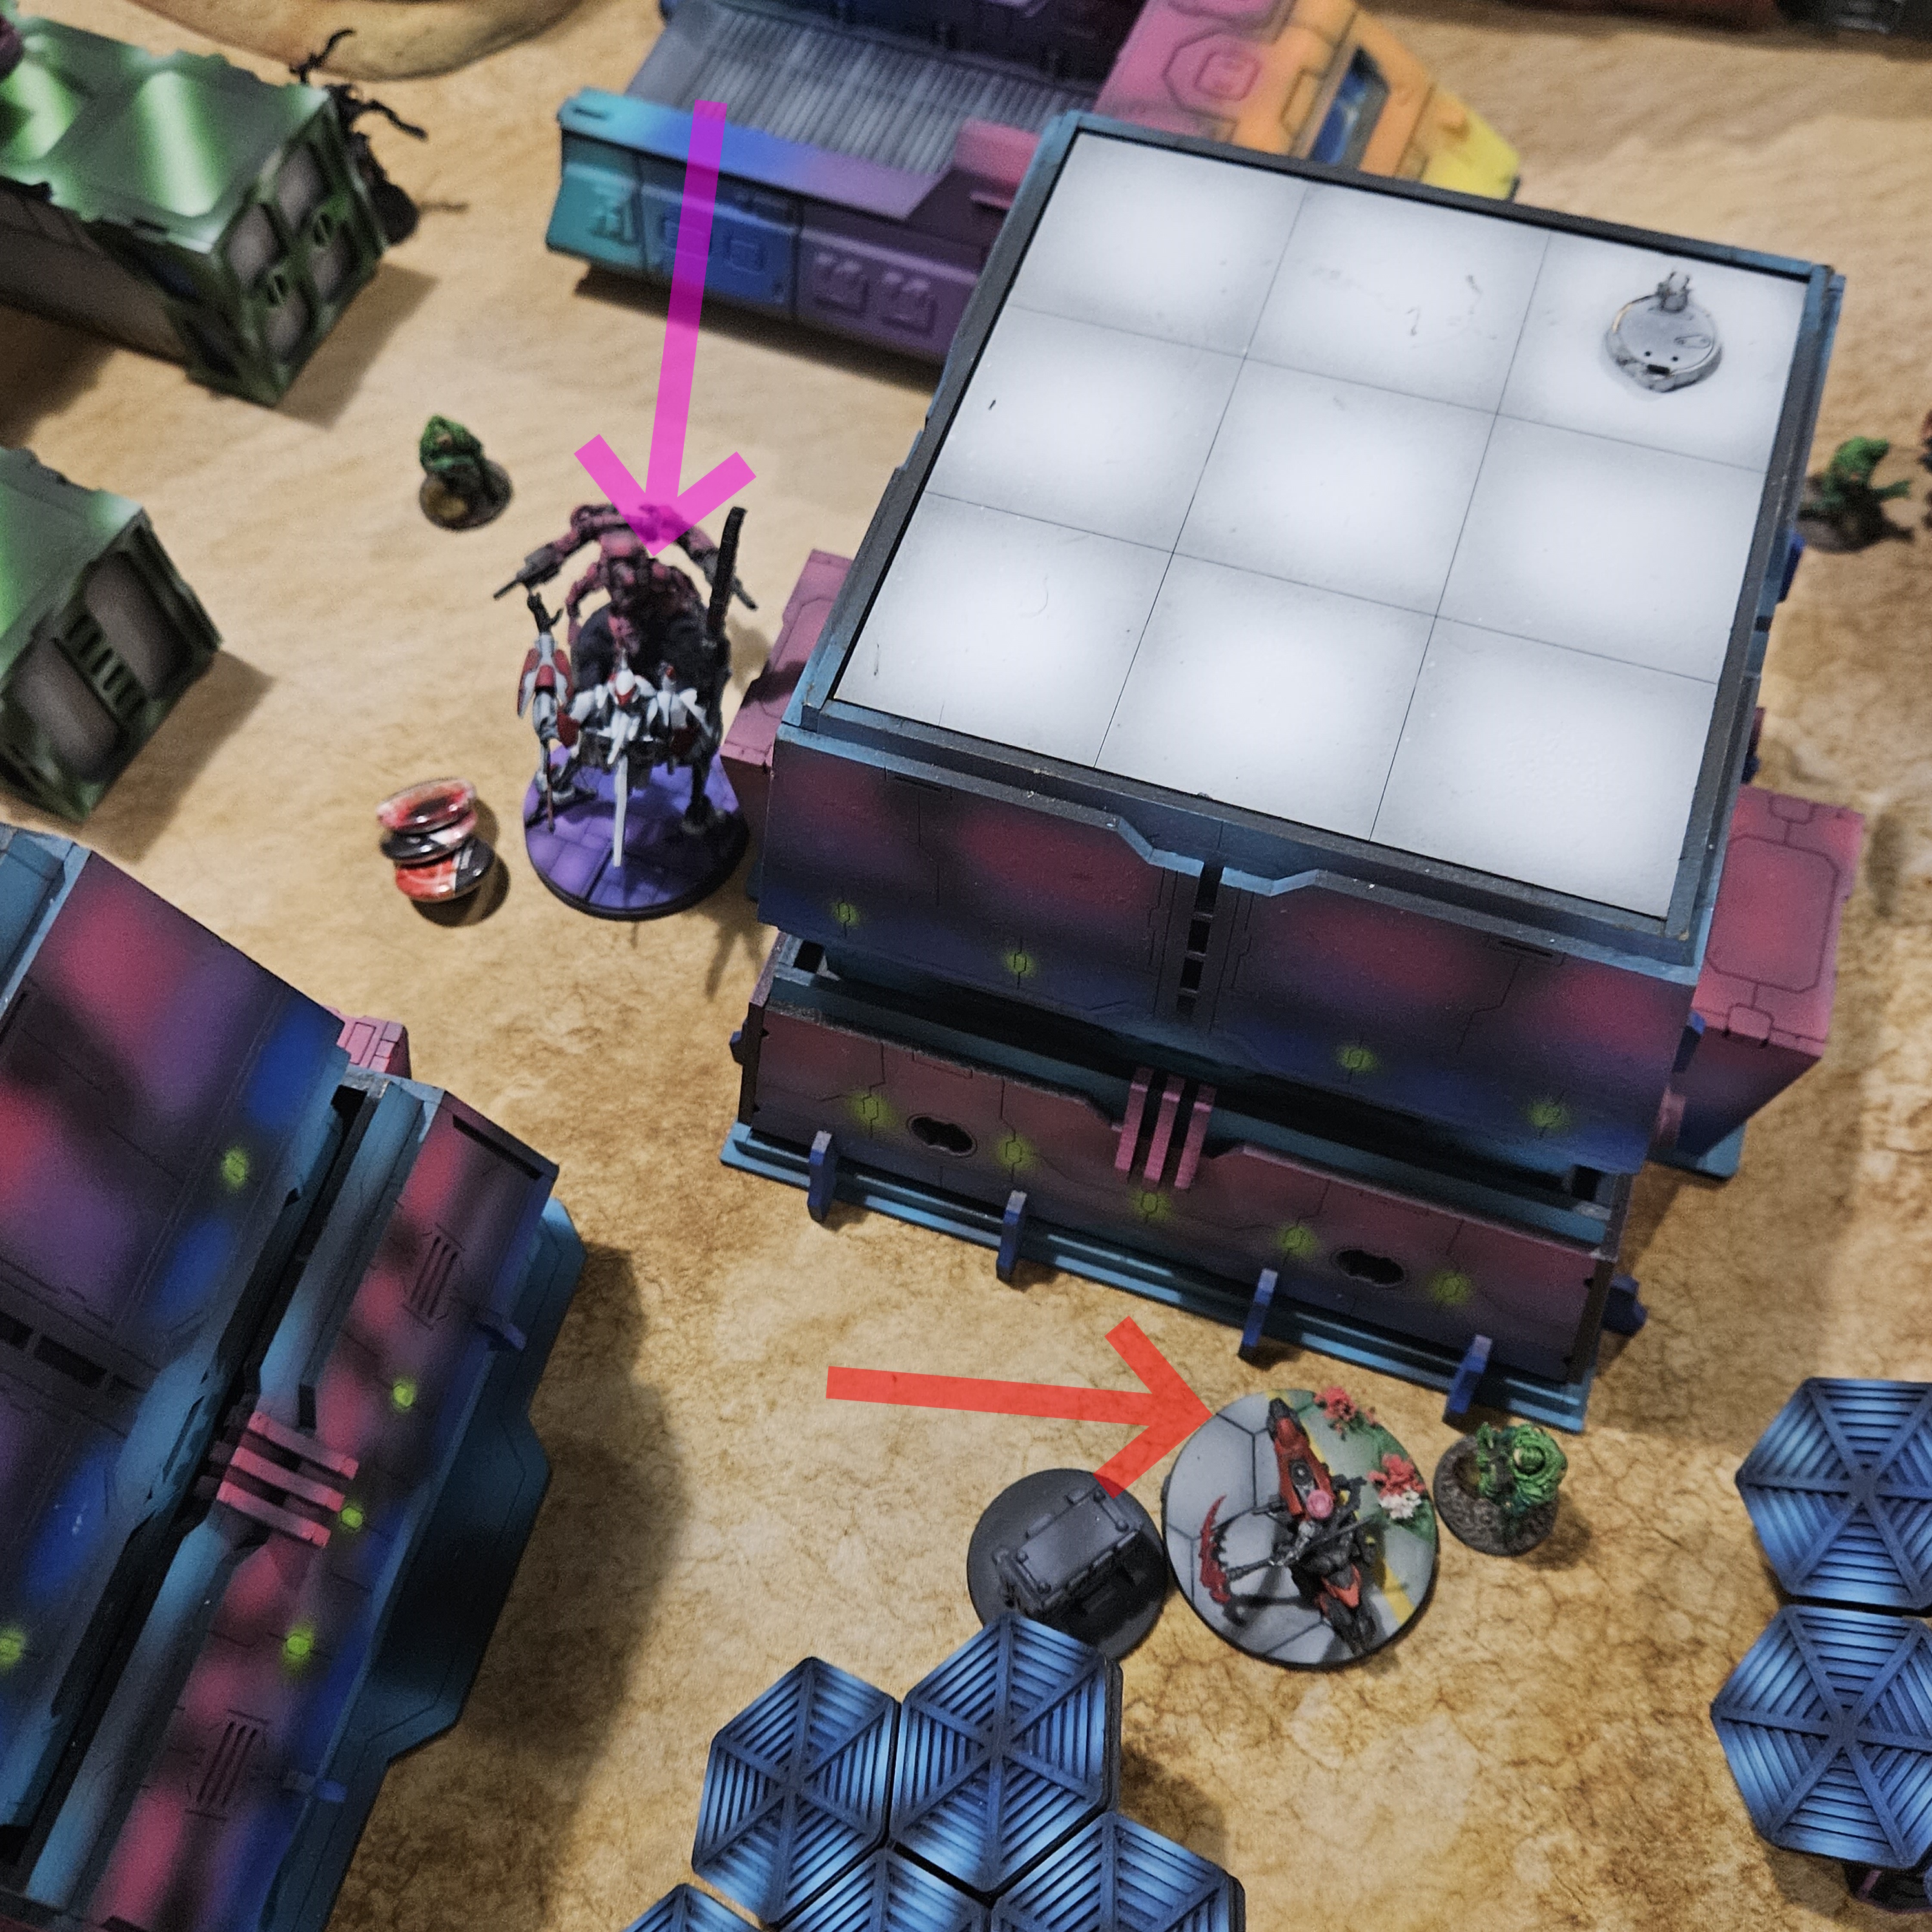
The Suryat HRL is gutting half the table, and with it's MSV I don't have the option to smoke around it. I employ a tactic some may call "Pano Smoke" and reroute my O-Yoroi to block it's most aggressive line. and free up Kuroshi Rider to flank. She makes a run up, grabs 2 Civilians and dashes back into the JSA DZ. The O-Yoroi spends a ton of G1 orders to knock the Suryat down, Yojimbo moves up, and my G2 Keisotsu Duo Rasyat-proofs my DZ.
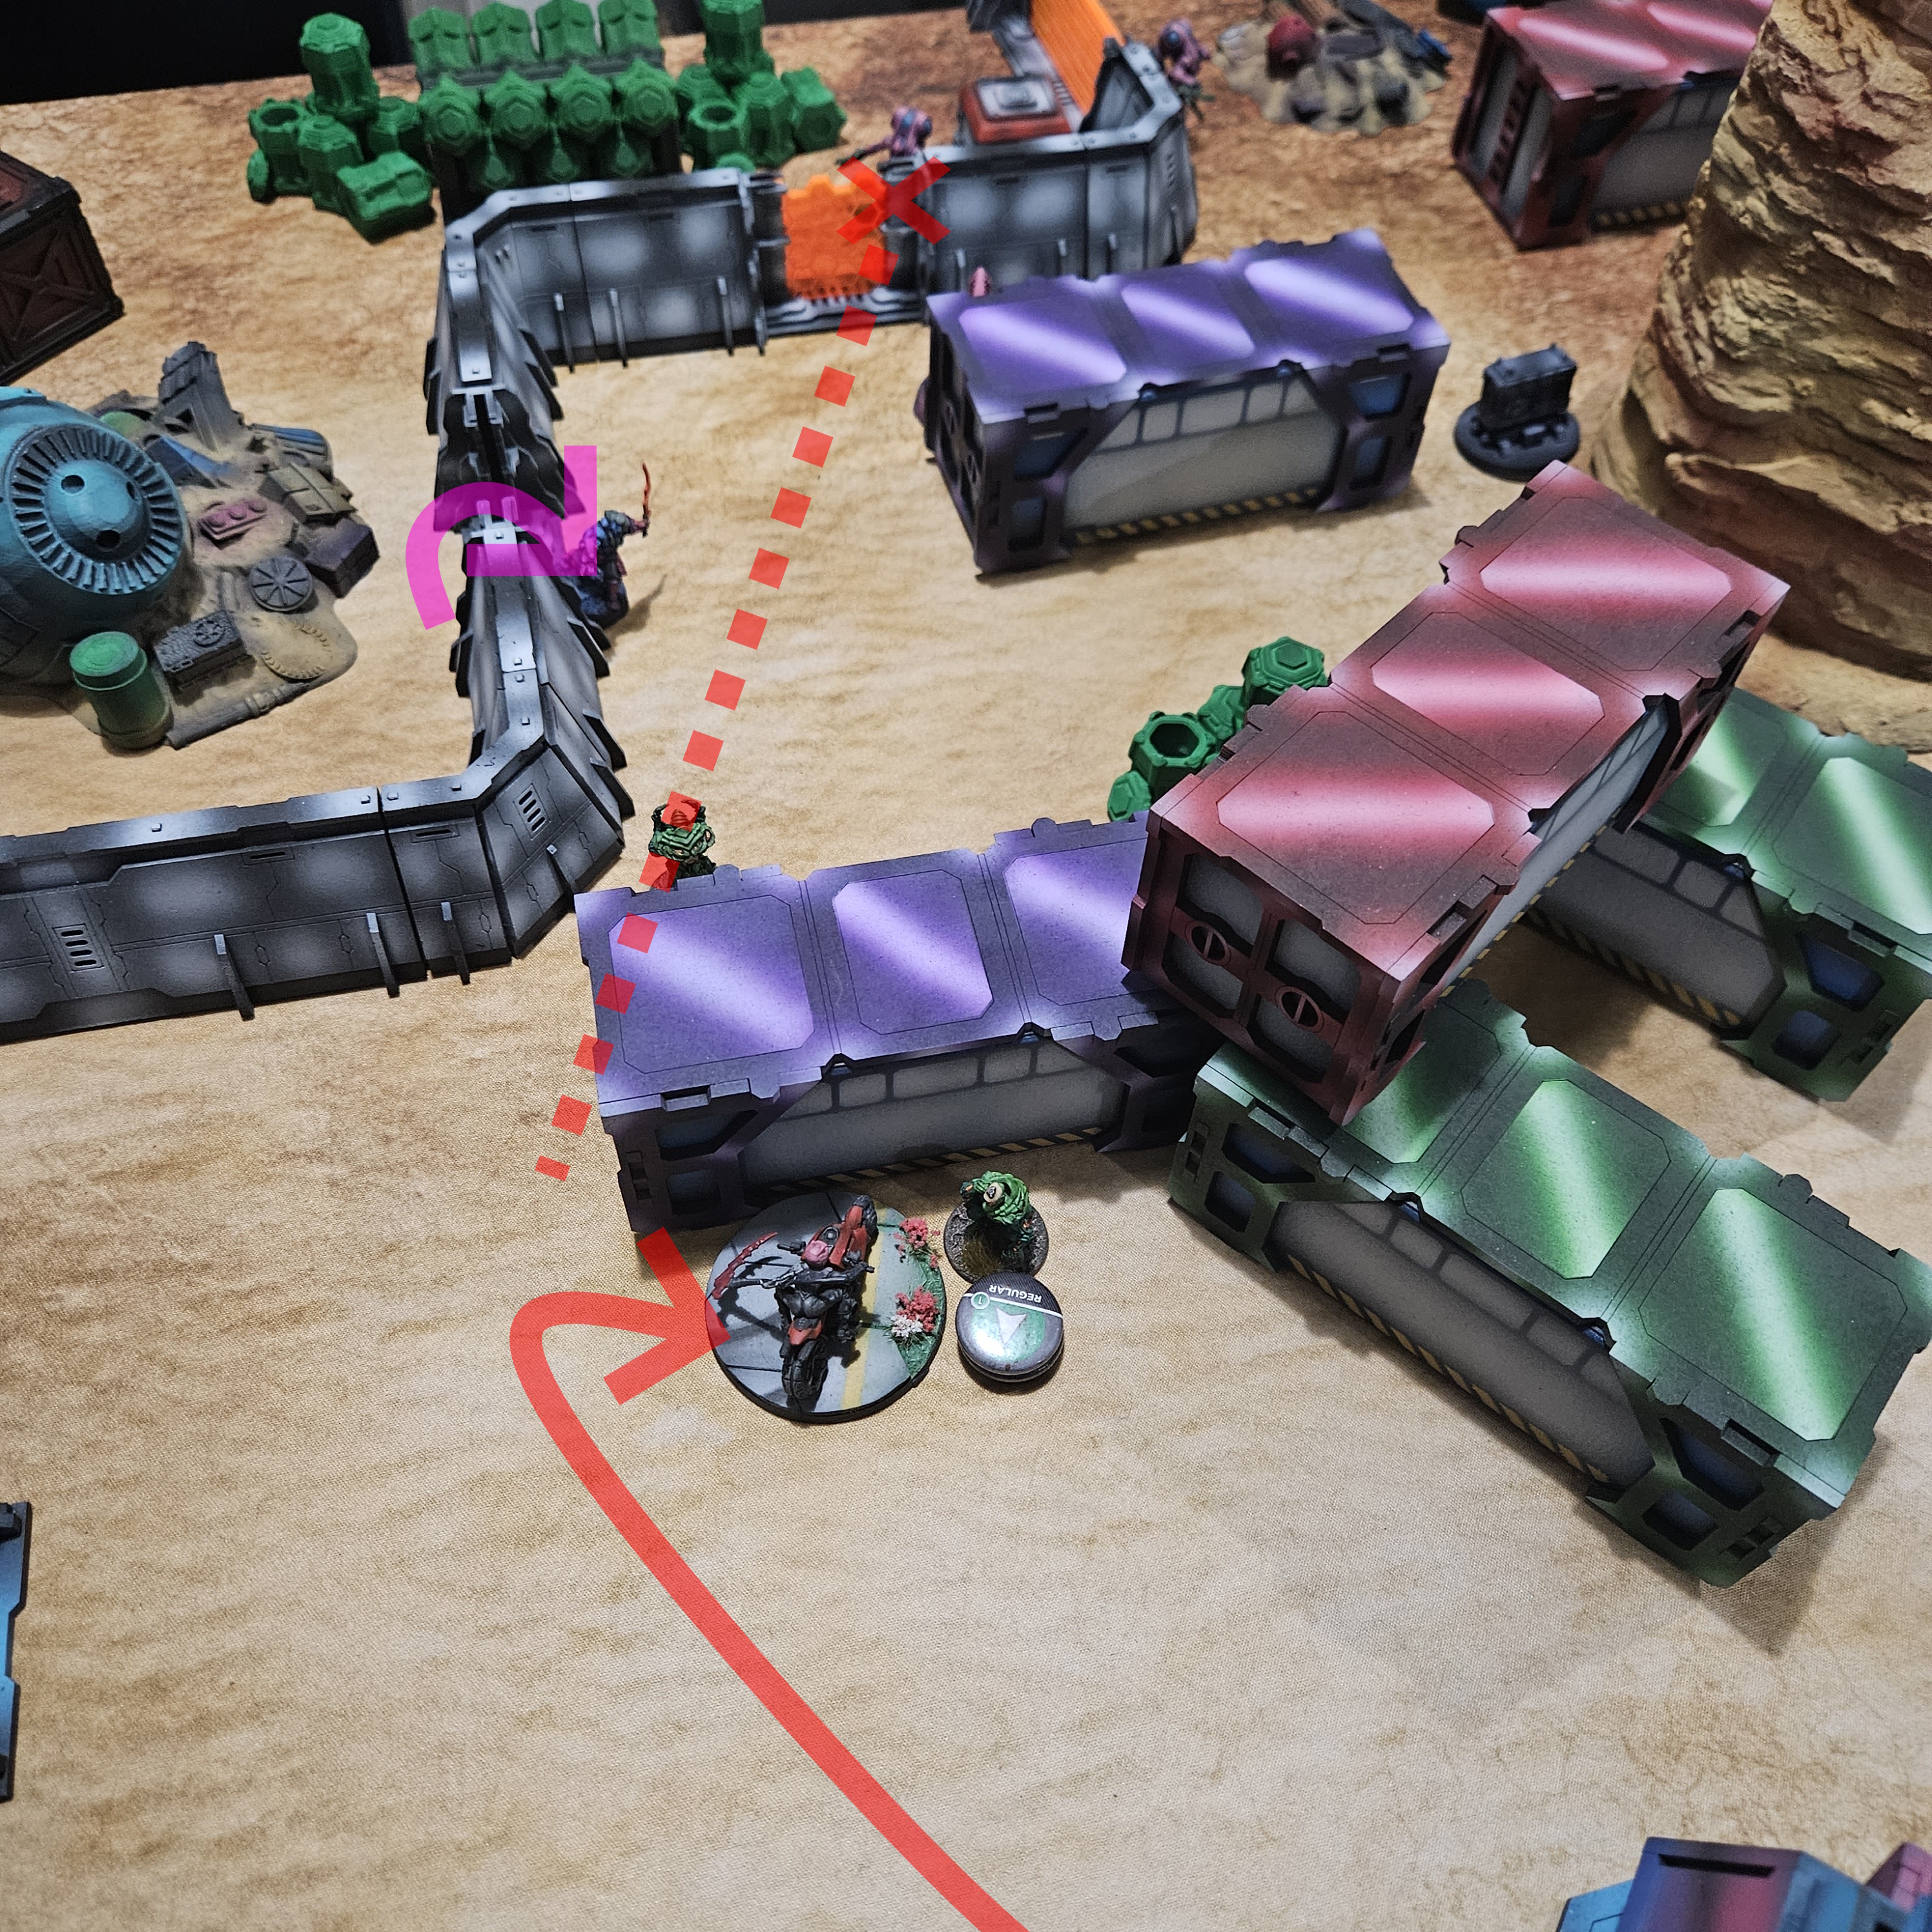
 Samsa provides Kuroshi covering fire, Downing the Daturazi that interposed himself with a hail of plasma.
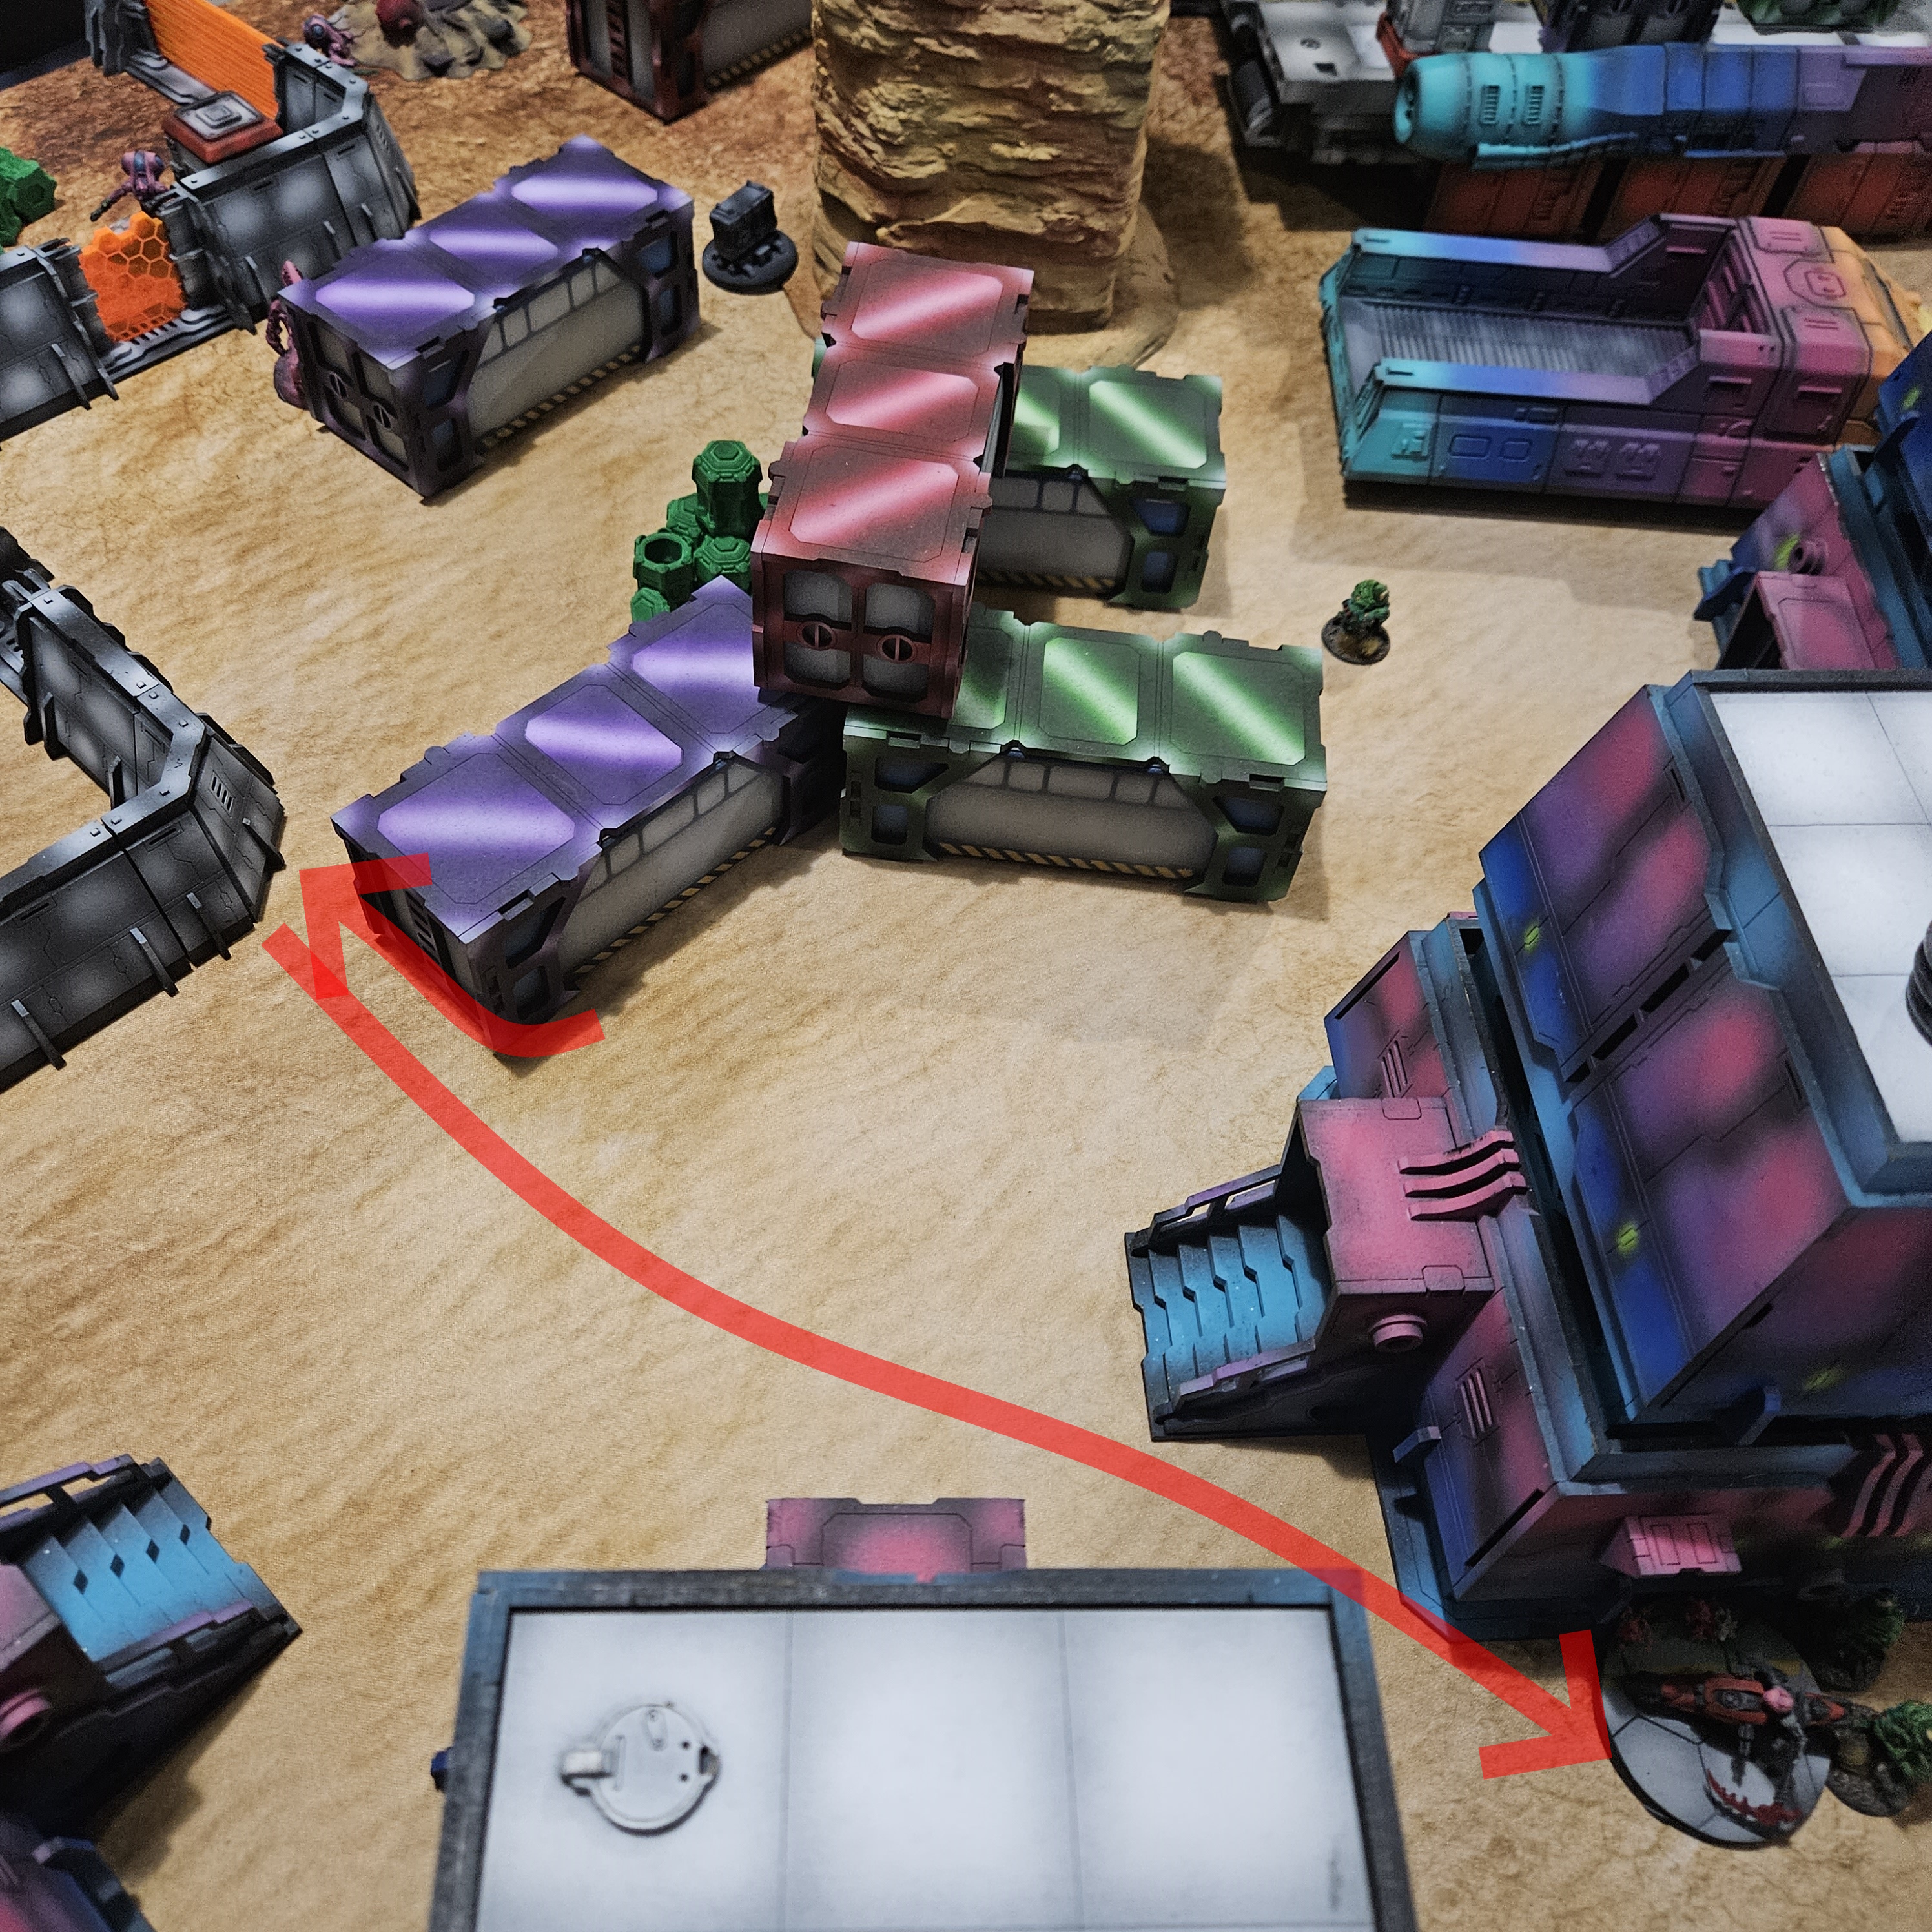
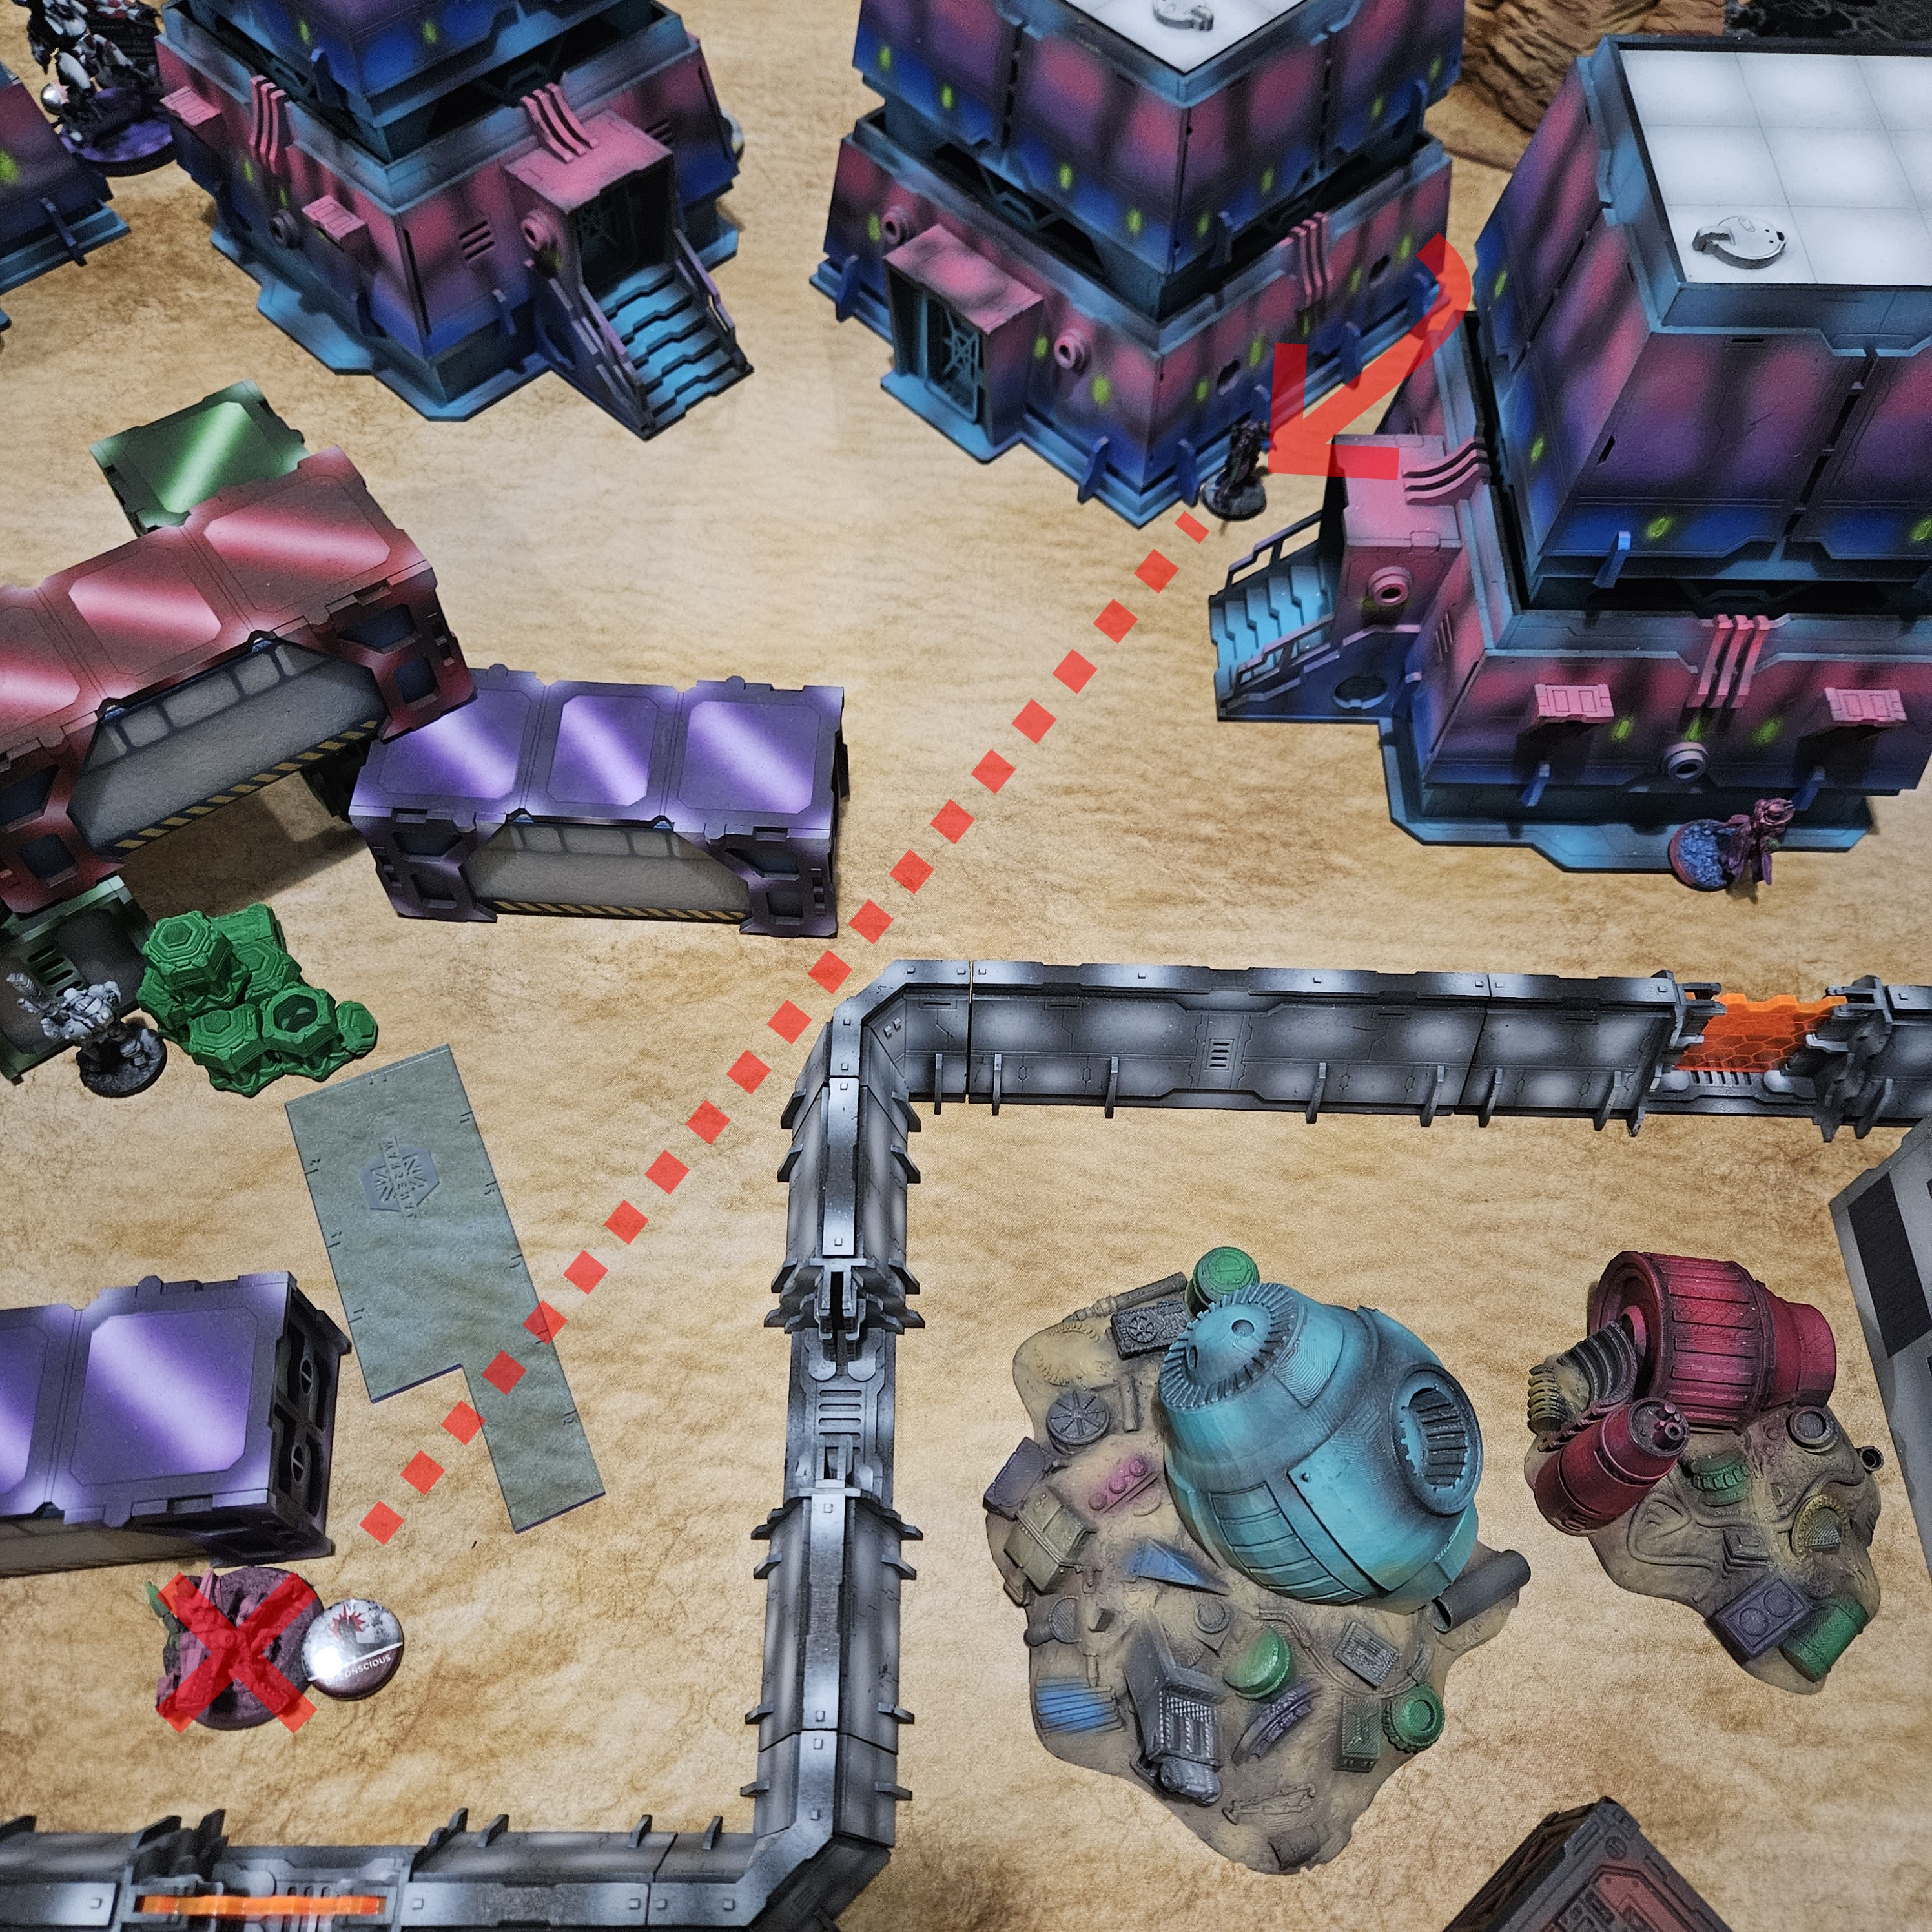
 Keisotsu split up, then the left flank Keisotsu goes in to Suppressive Fire. There are no safe DZ entry points for a Rasyat anymore
MAF Turn 1- Glorious Nippon Steel, Folded One Thousand Times
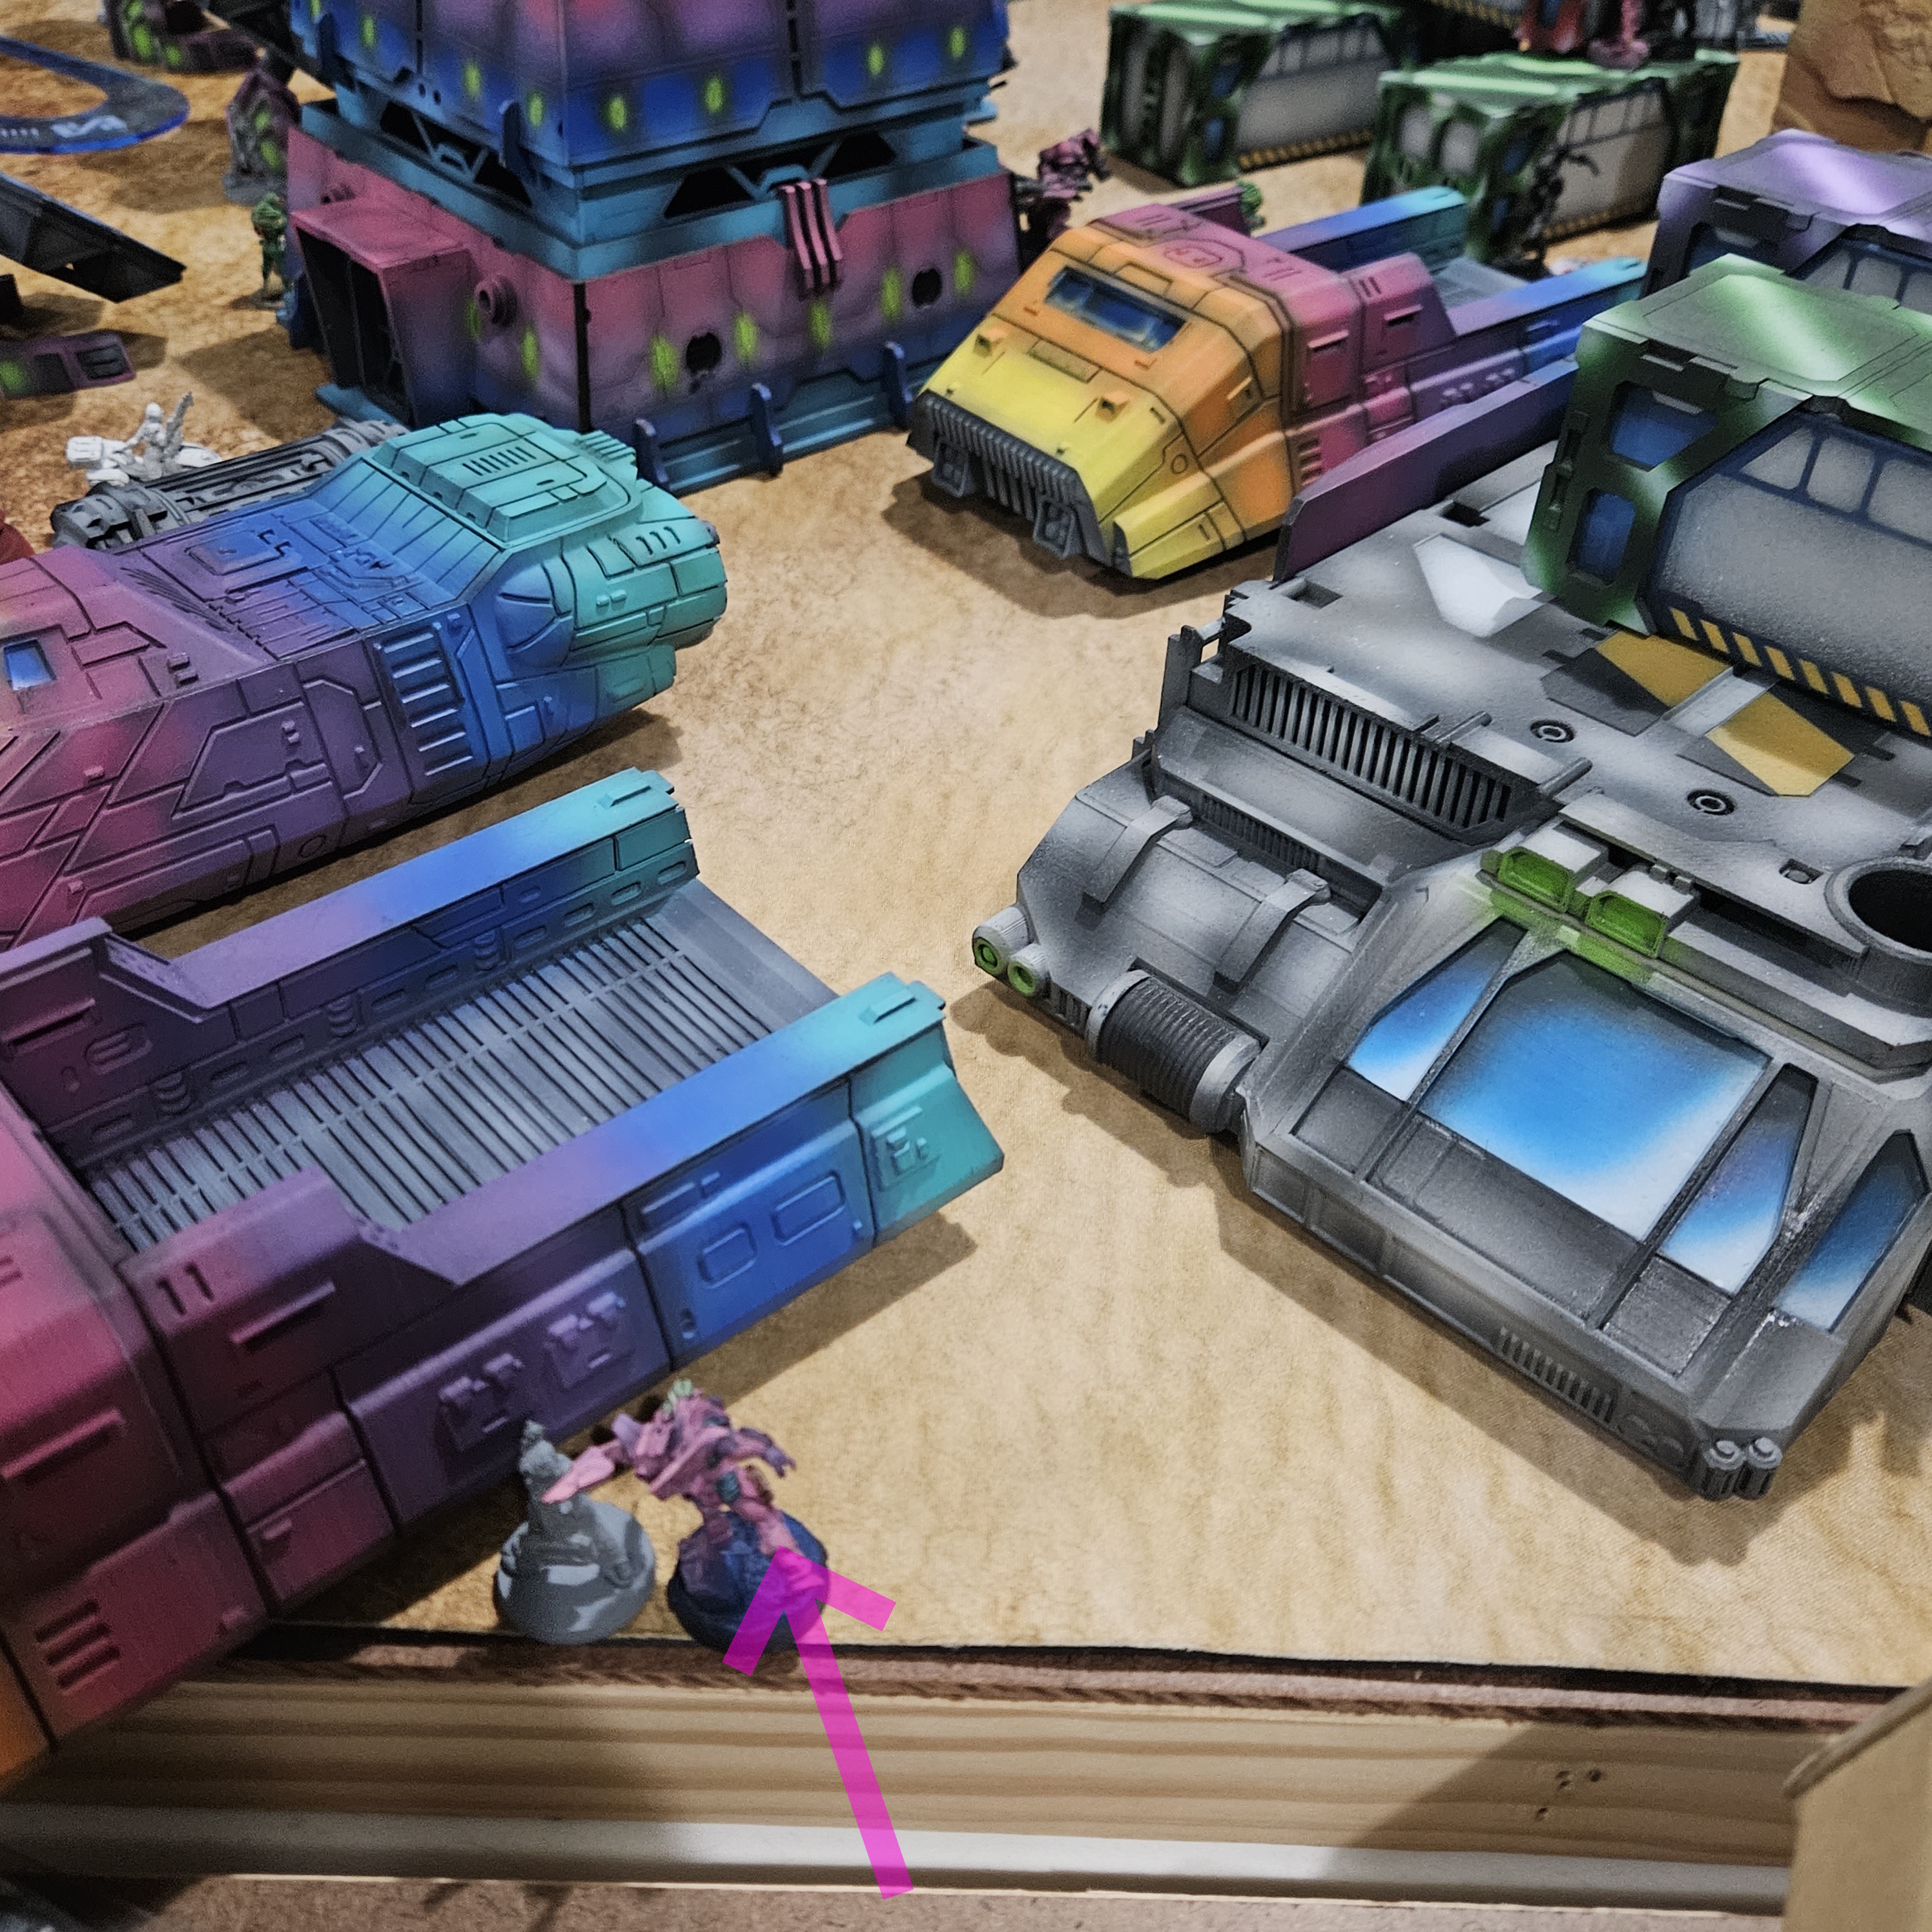
The Oznat reroutes over to the center of the battlefield to provide smoke and allow the Core Team to advance. Rindak picks up the Suryat, and the Link spends a token to reform as a Pure 5Core. Suryat takes a couple shots through smoke, Dartok climbs up to get an angle, lands a Pitcher, and Spotlights the O-Yoroi. The Third Morat token is spent on a Guided Missile attack, which only deals 1 Wound to the O-Yoroi. The Fireteam gets into an entrenched central position, but at the end of the day, O-Yoroi stands strong at 1 STR.
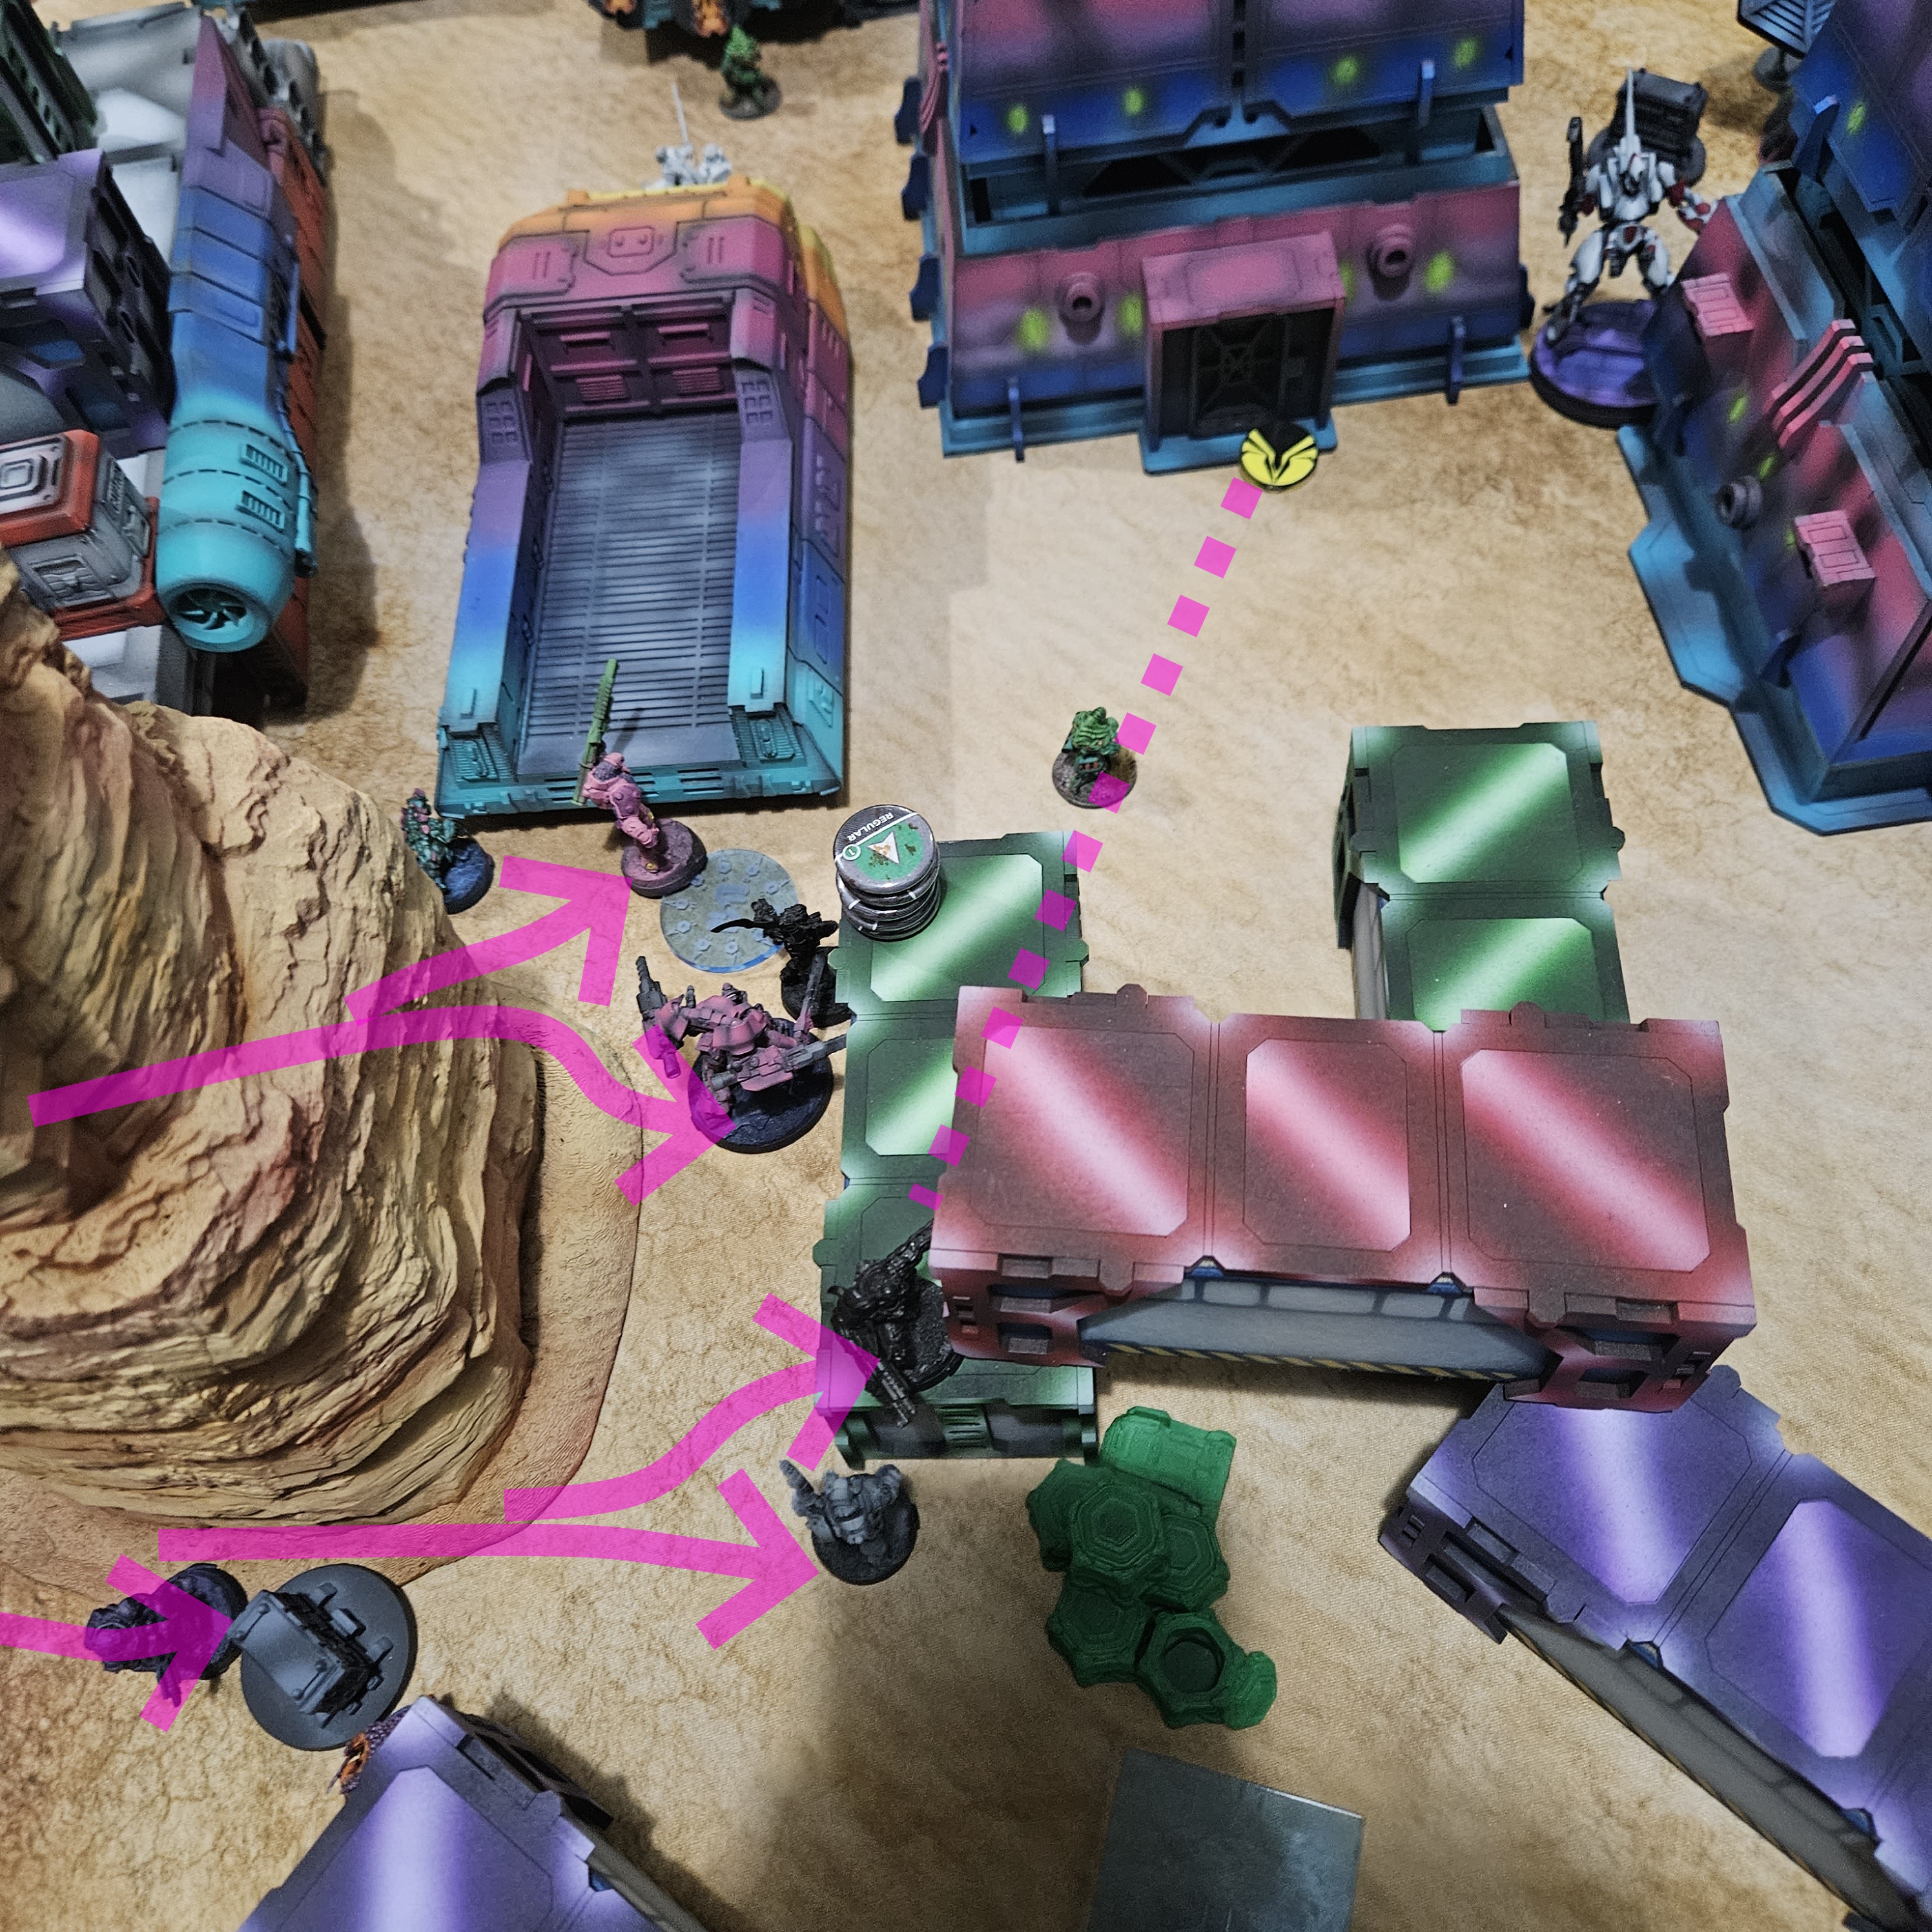
 Guided missile hits for 1 Damage, then HIs reroute, and after a couple firefights and a dozen or so successful ARM7 Saves, O-Yoroi is standing at 1 STR
JSA Turn 2- Where did you learn, 'Repulse the Monkey'?
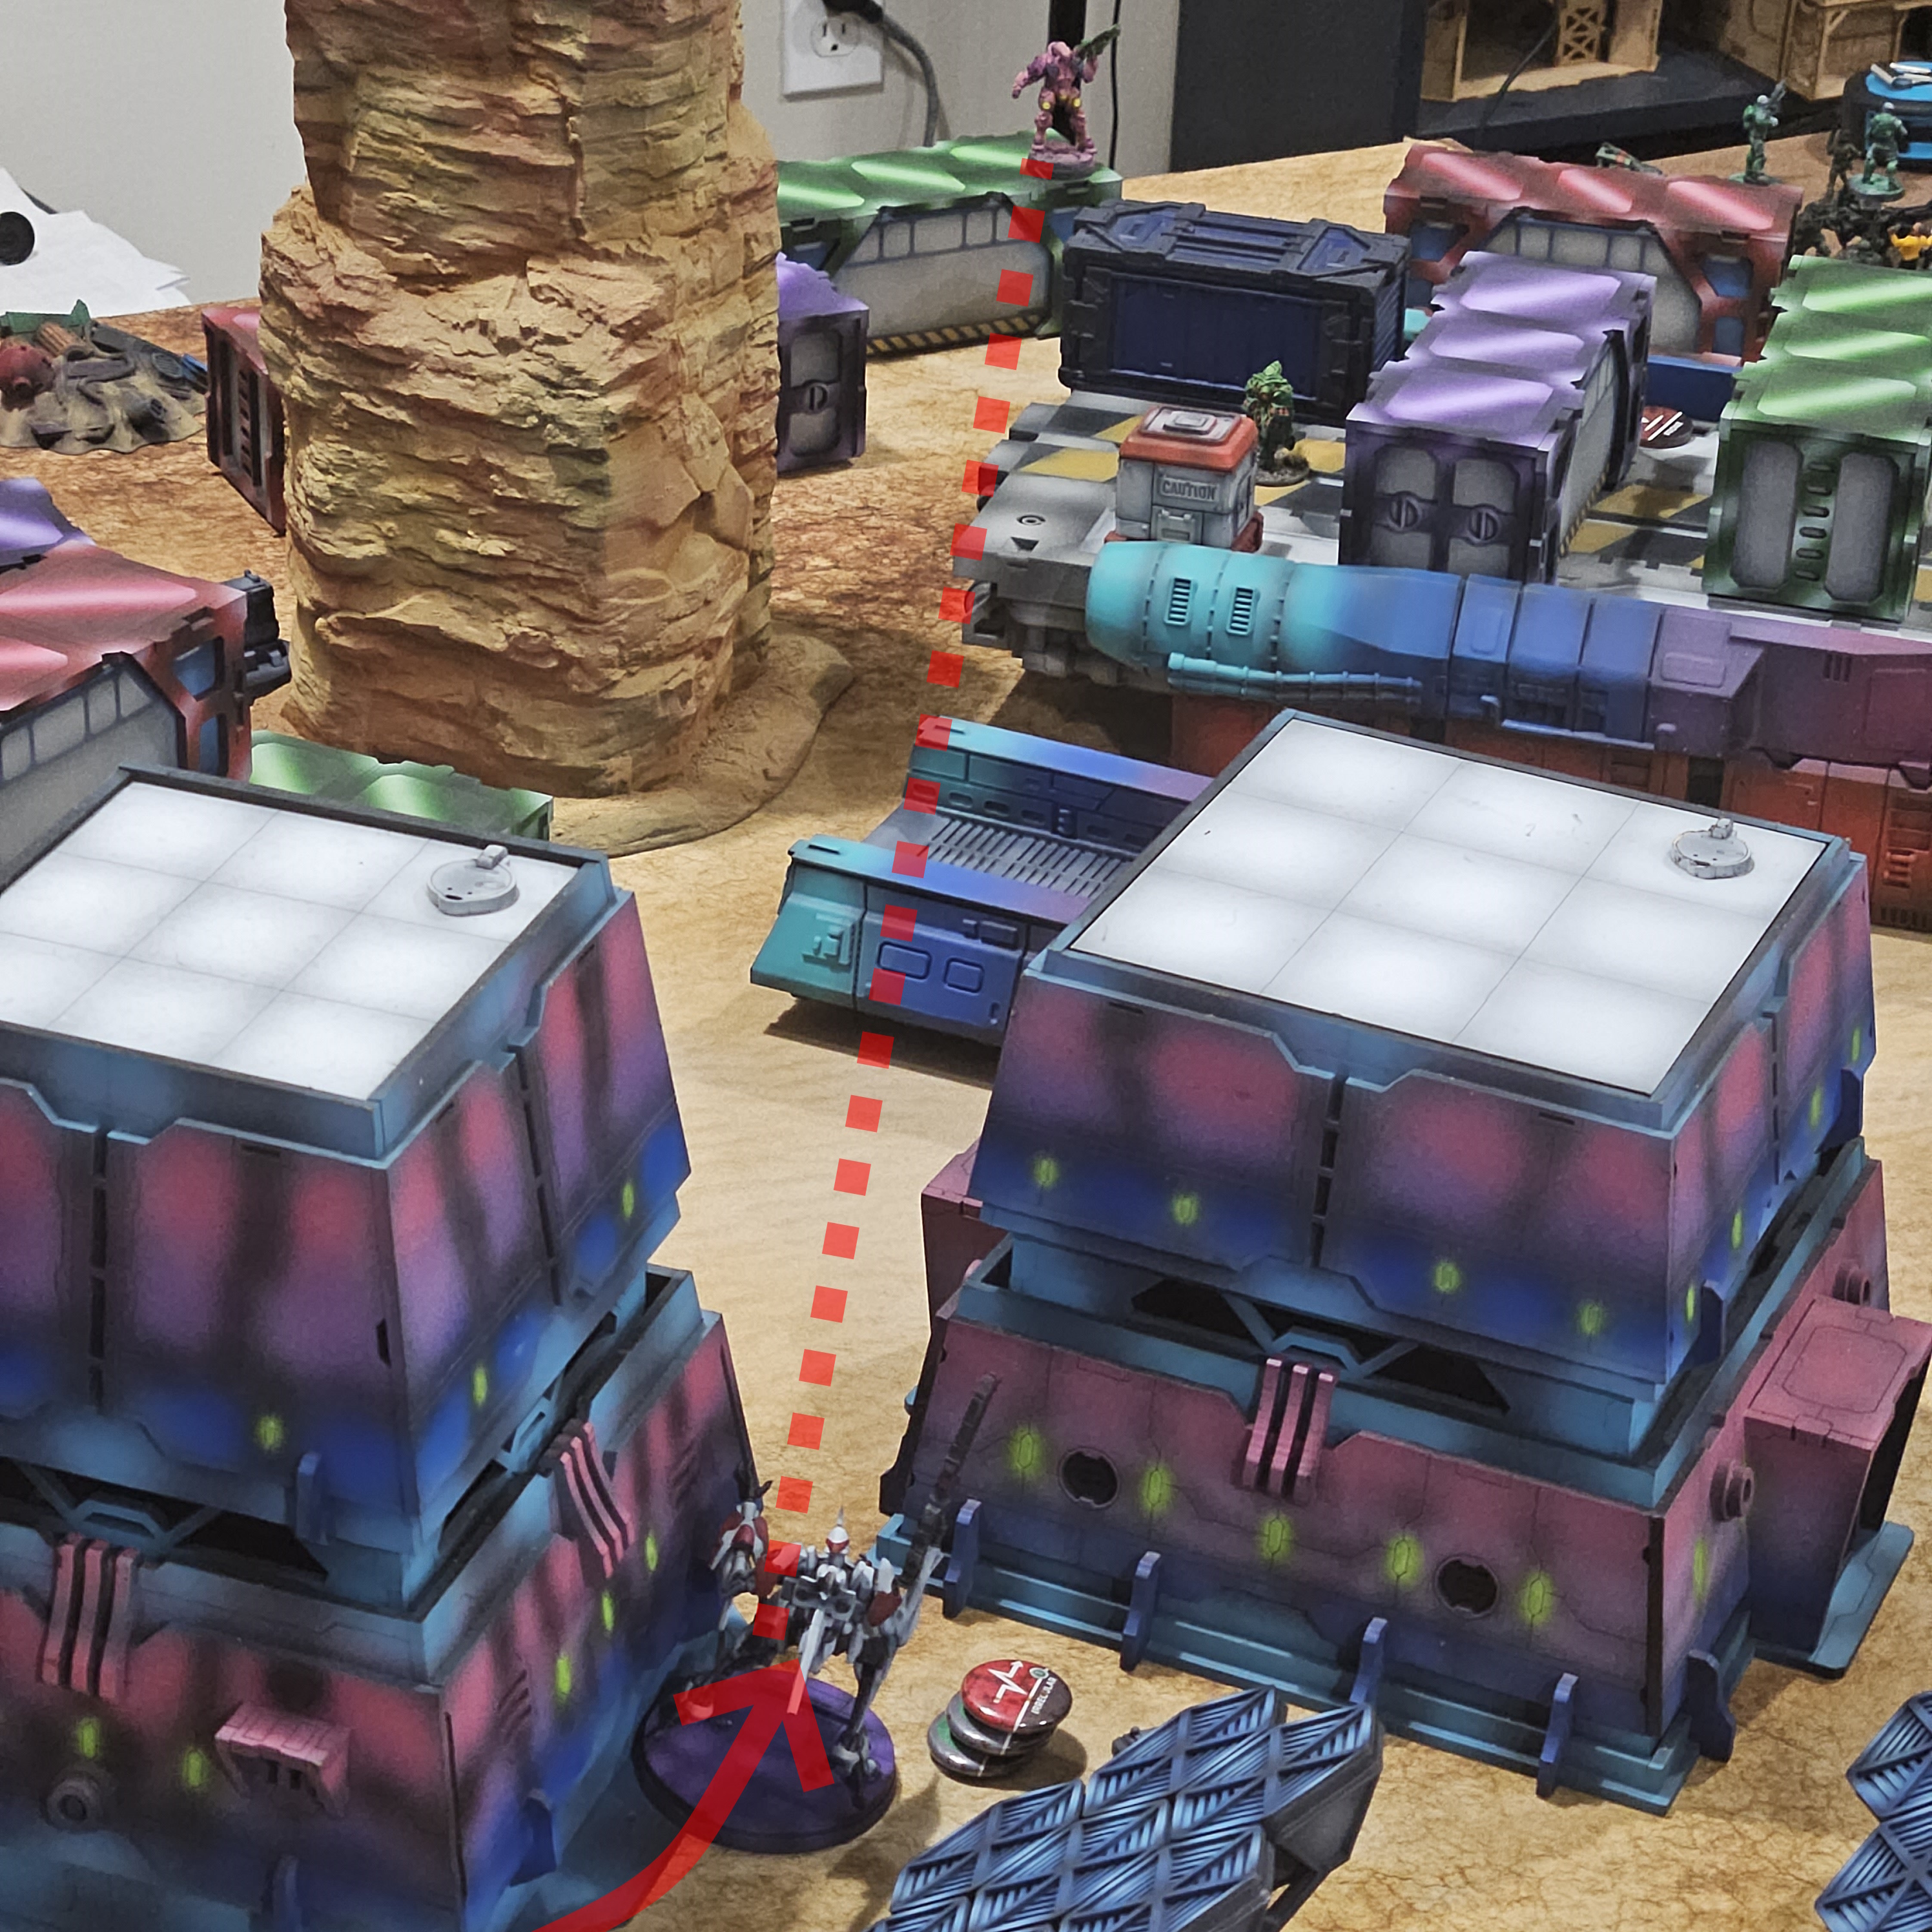
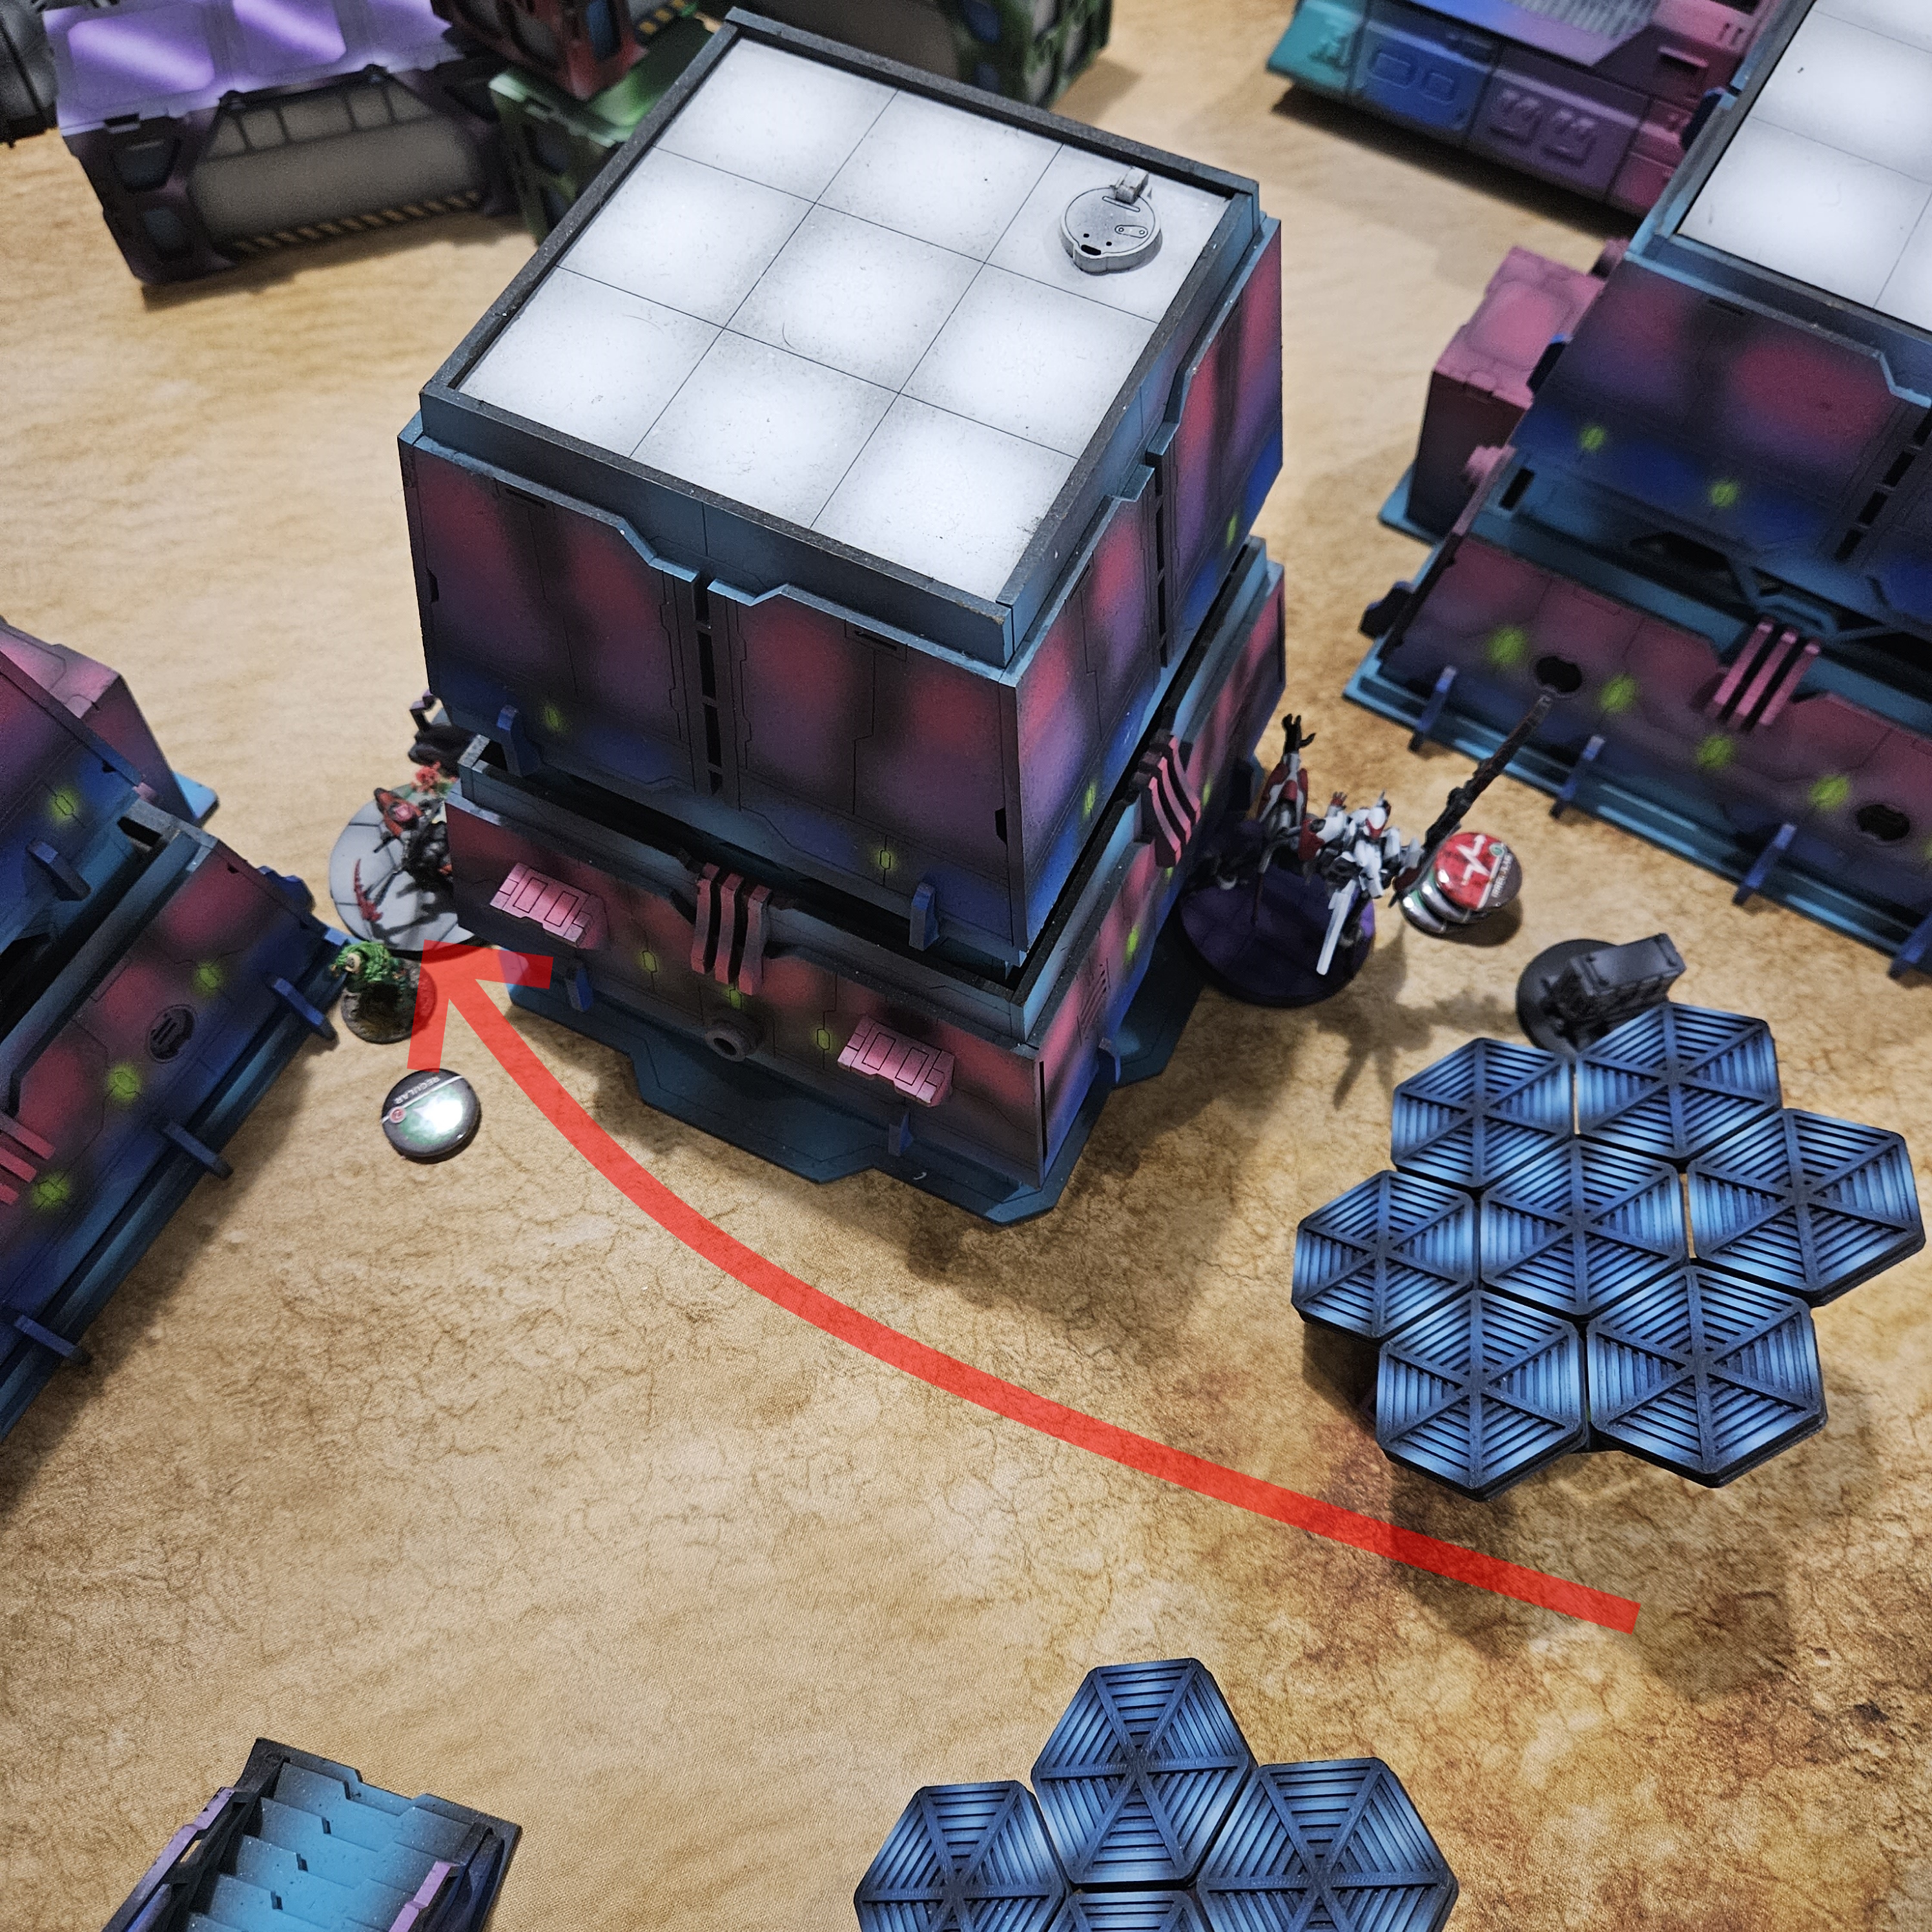
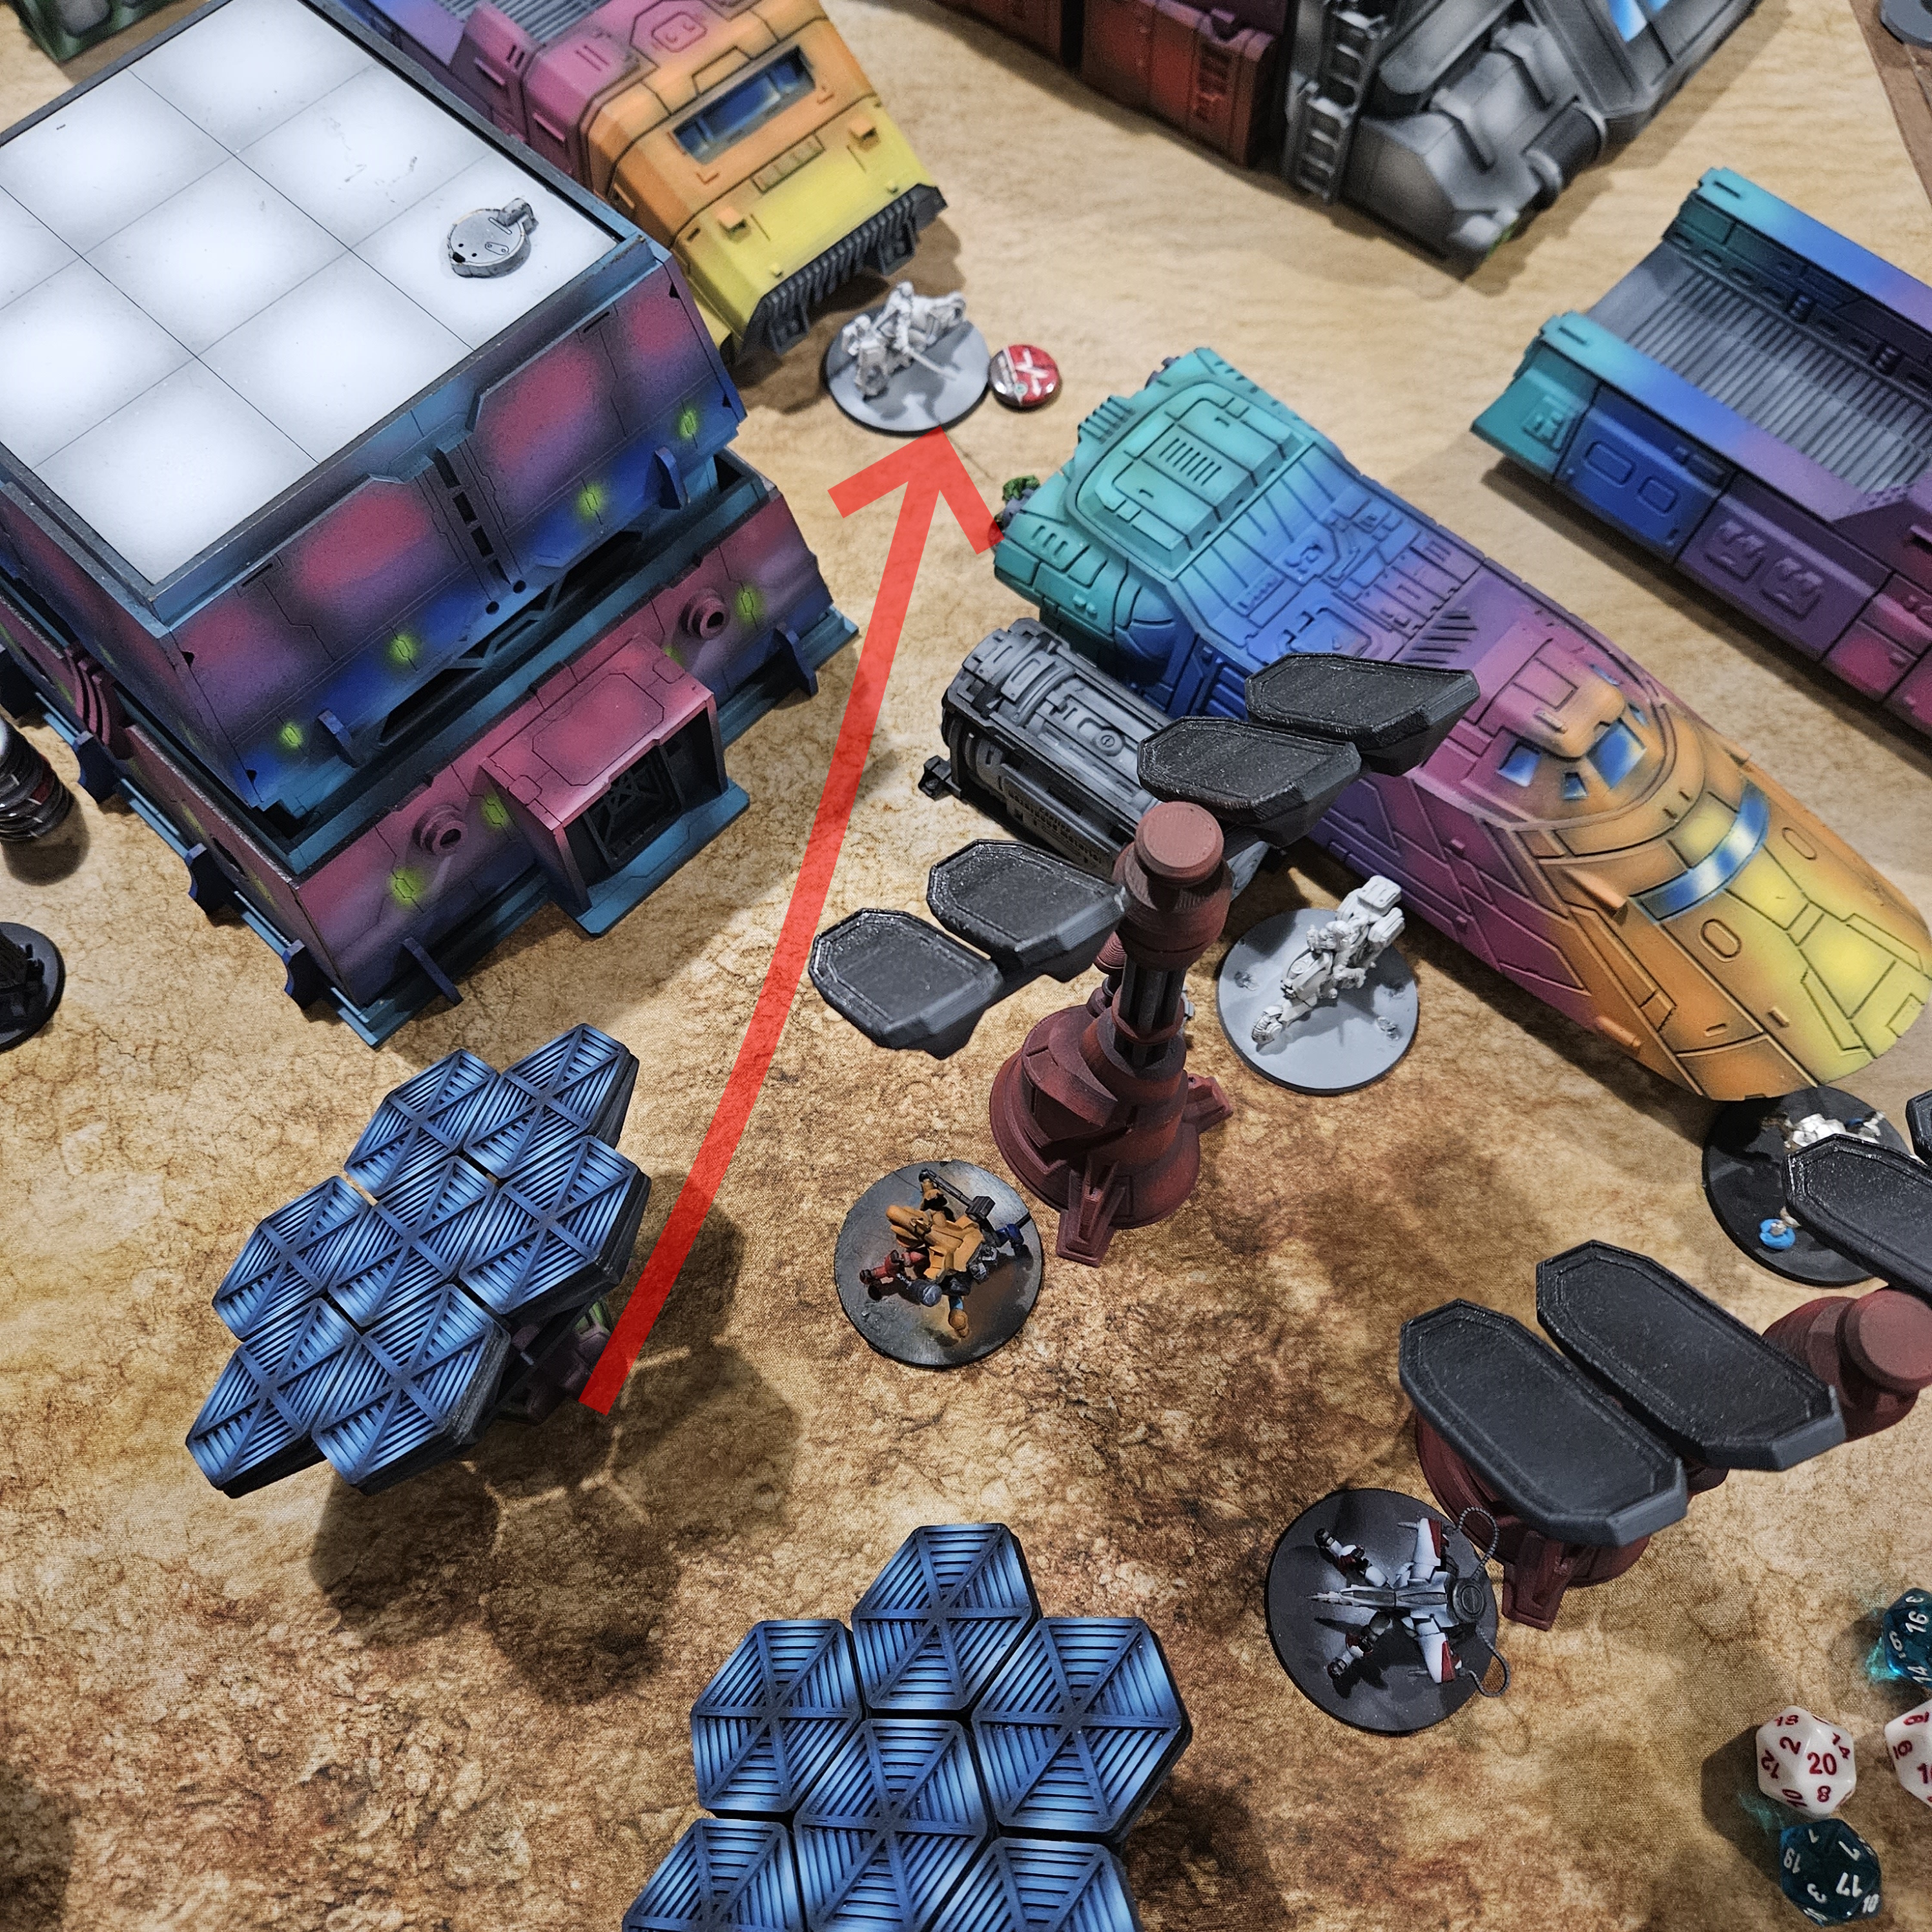
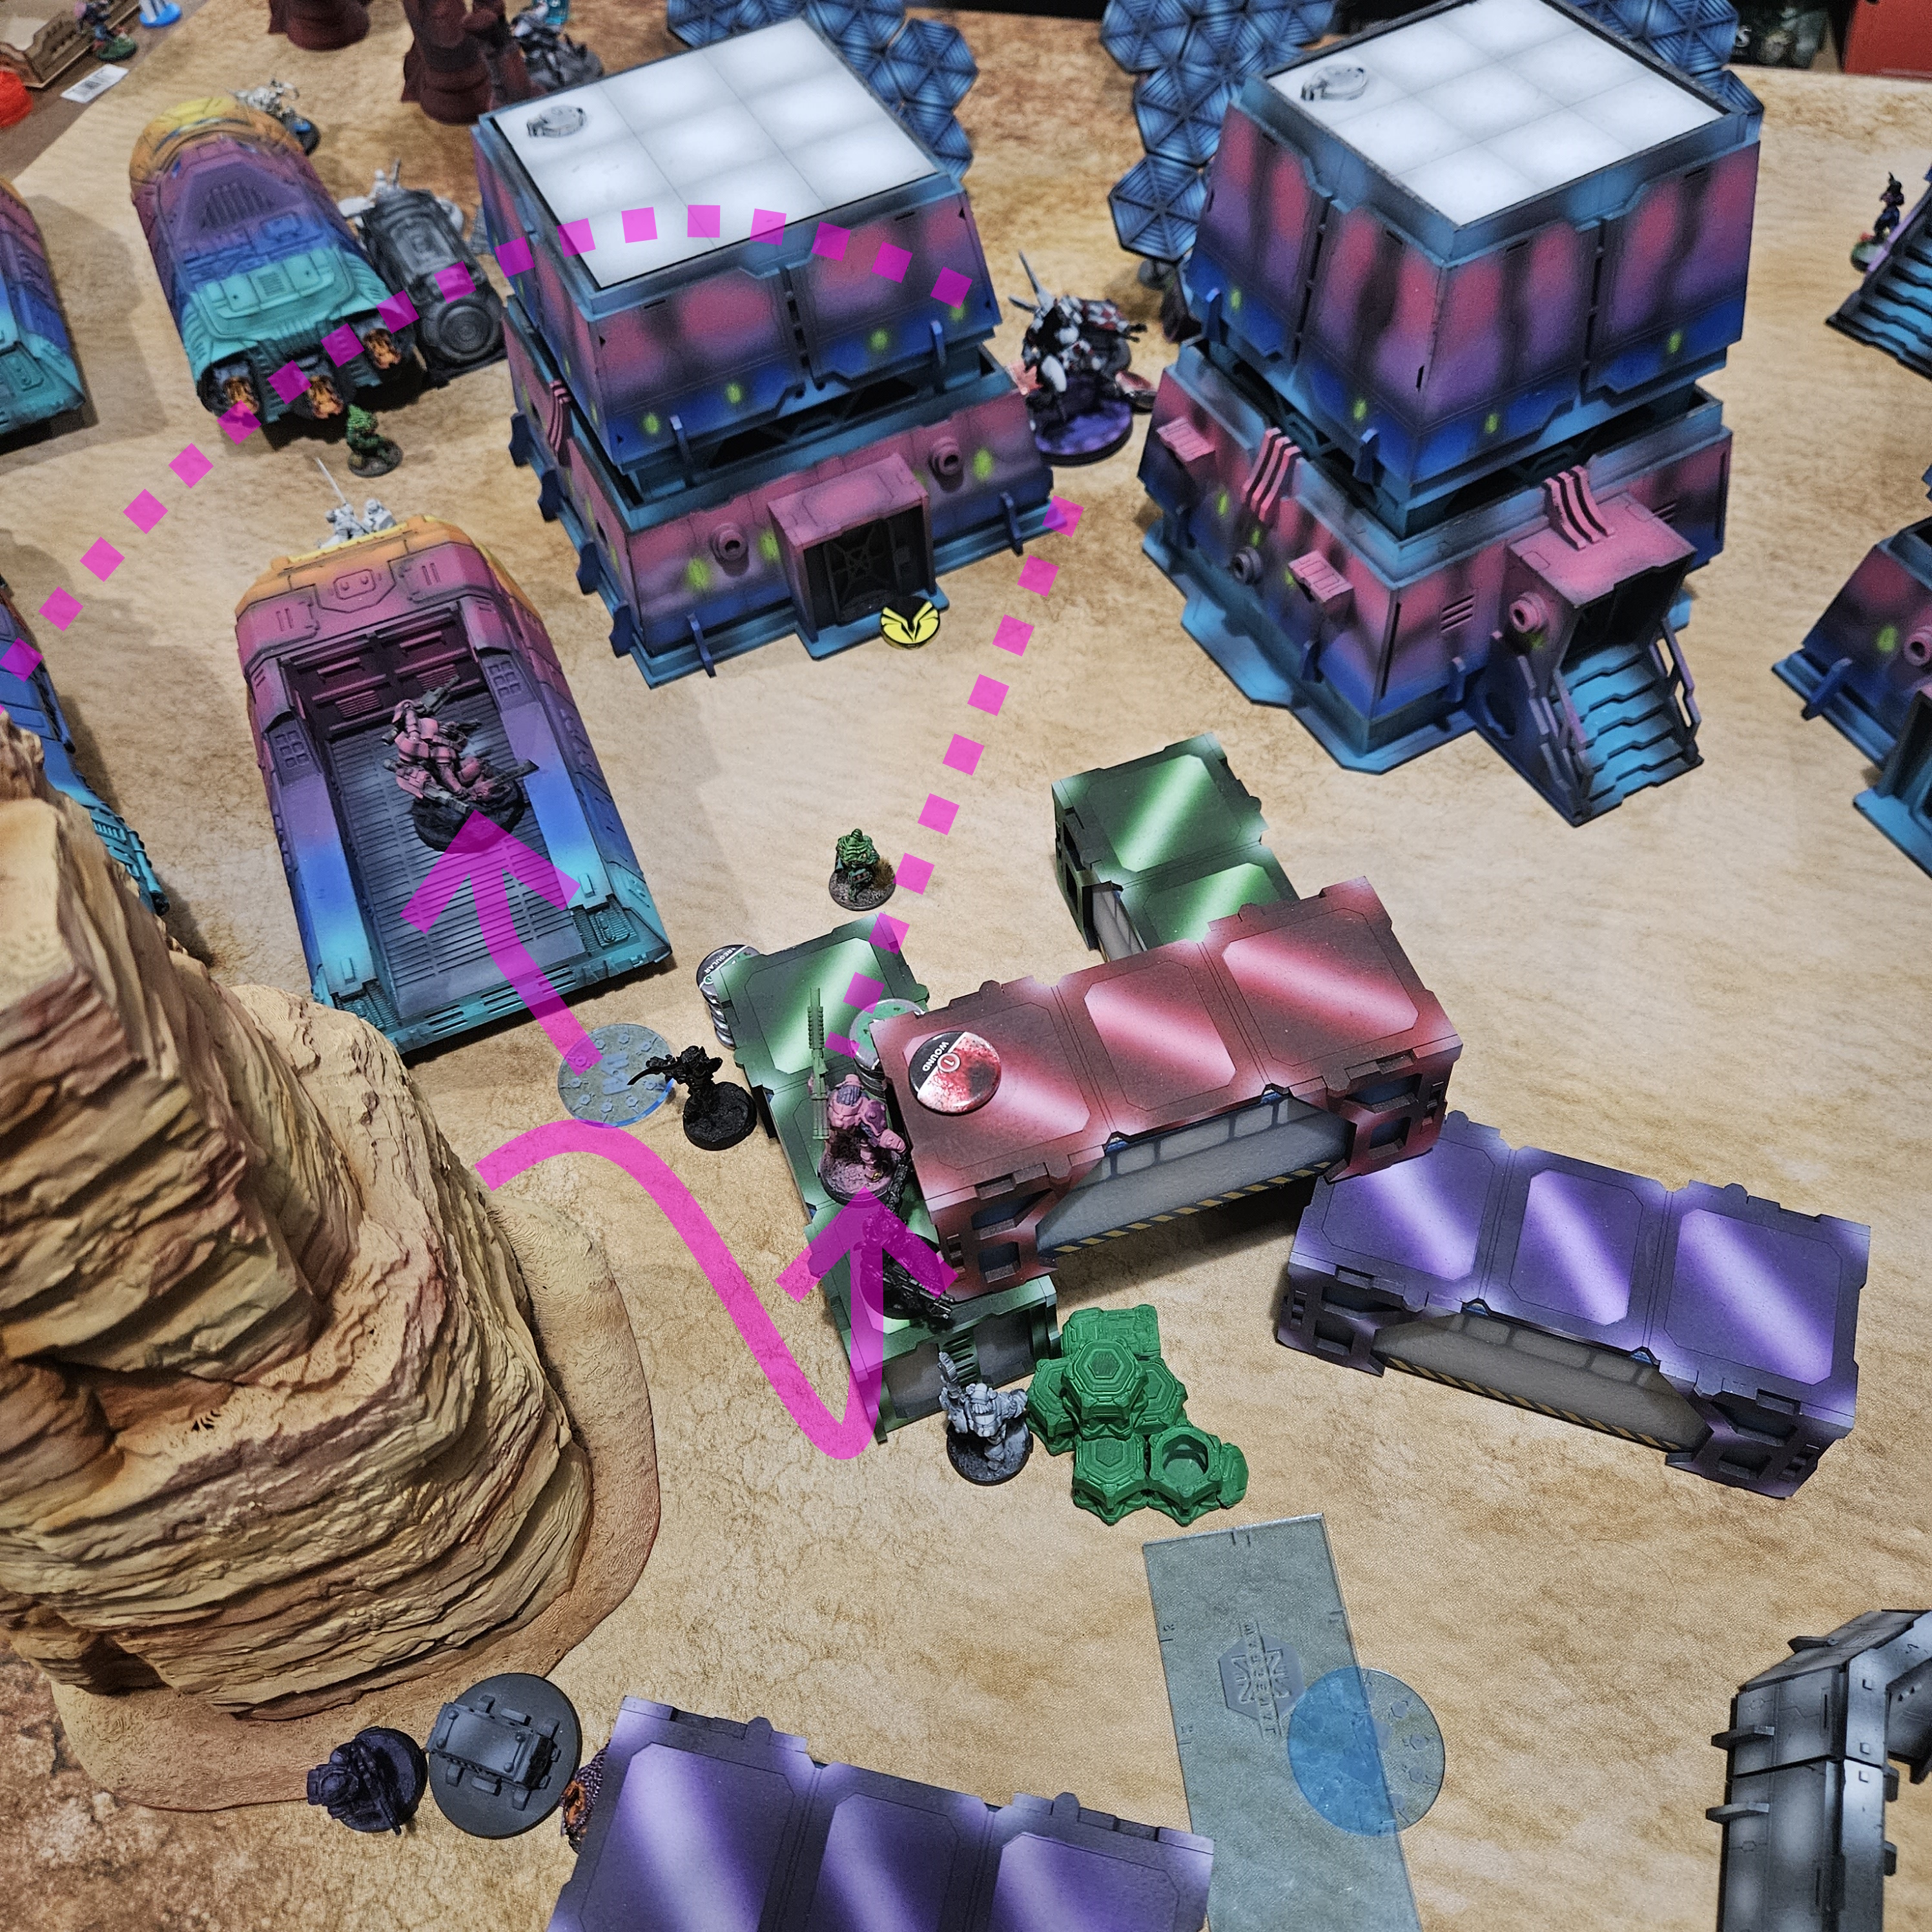
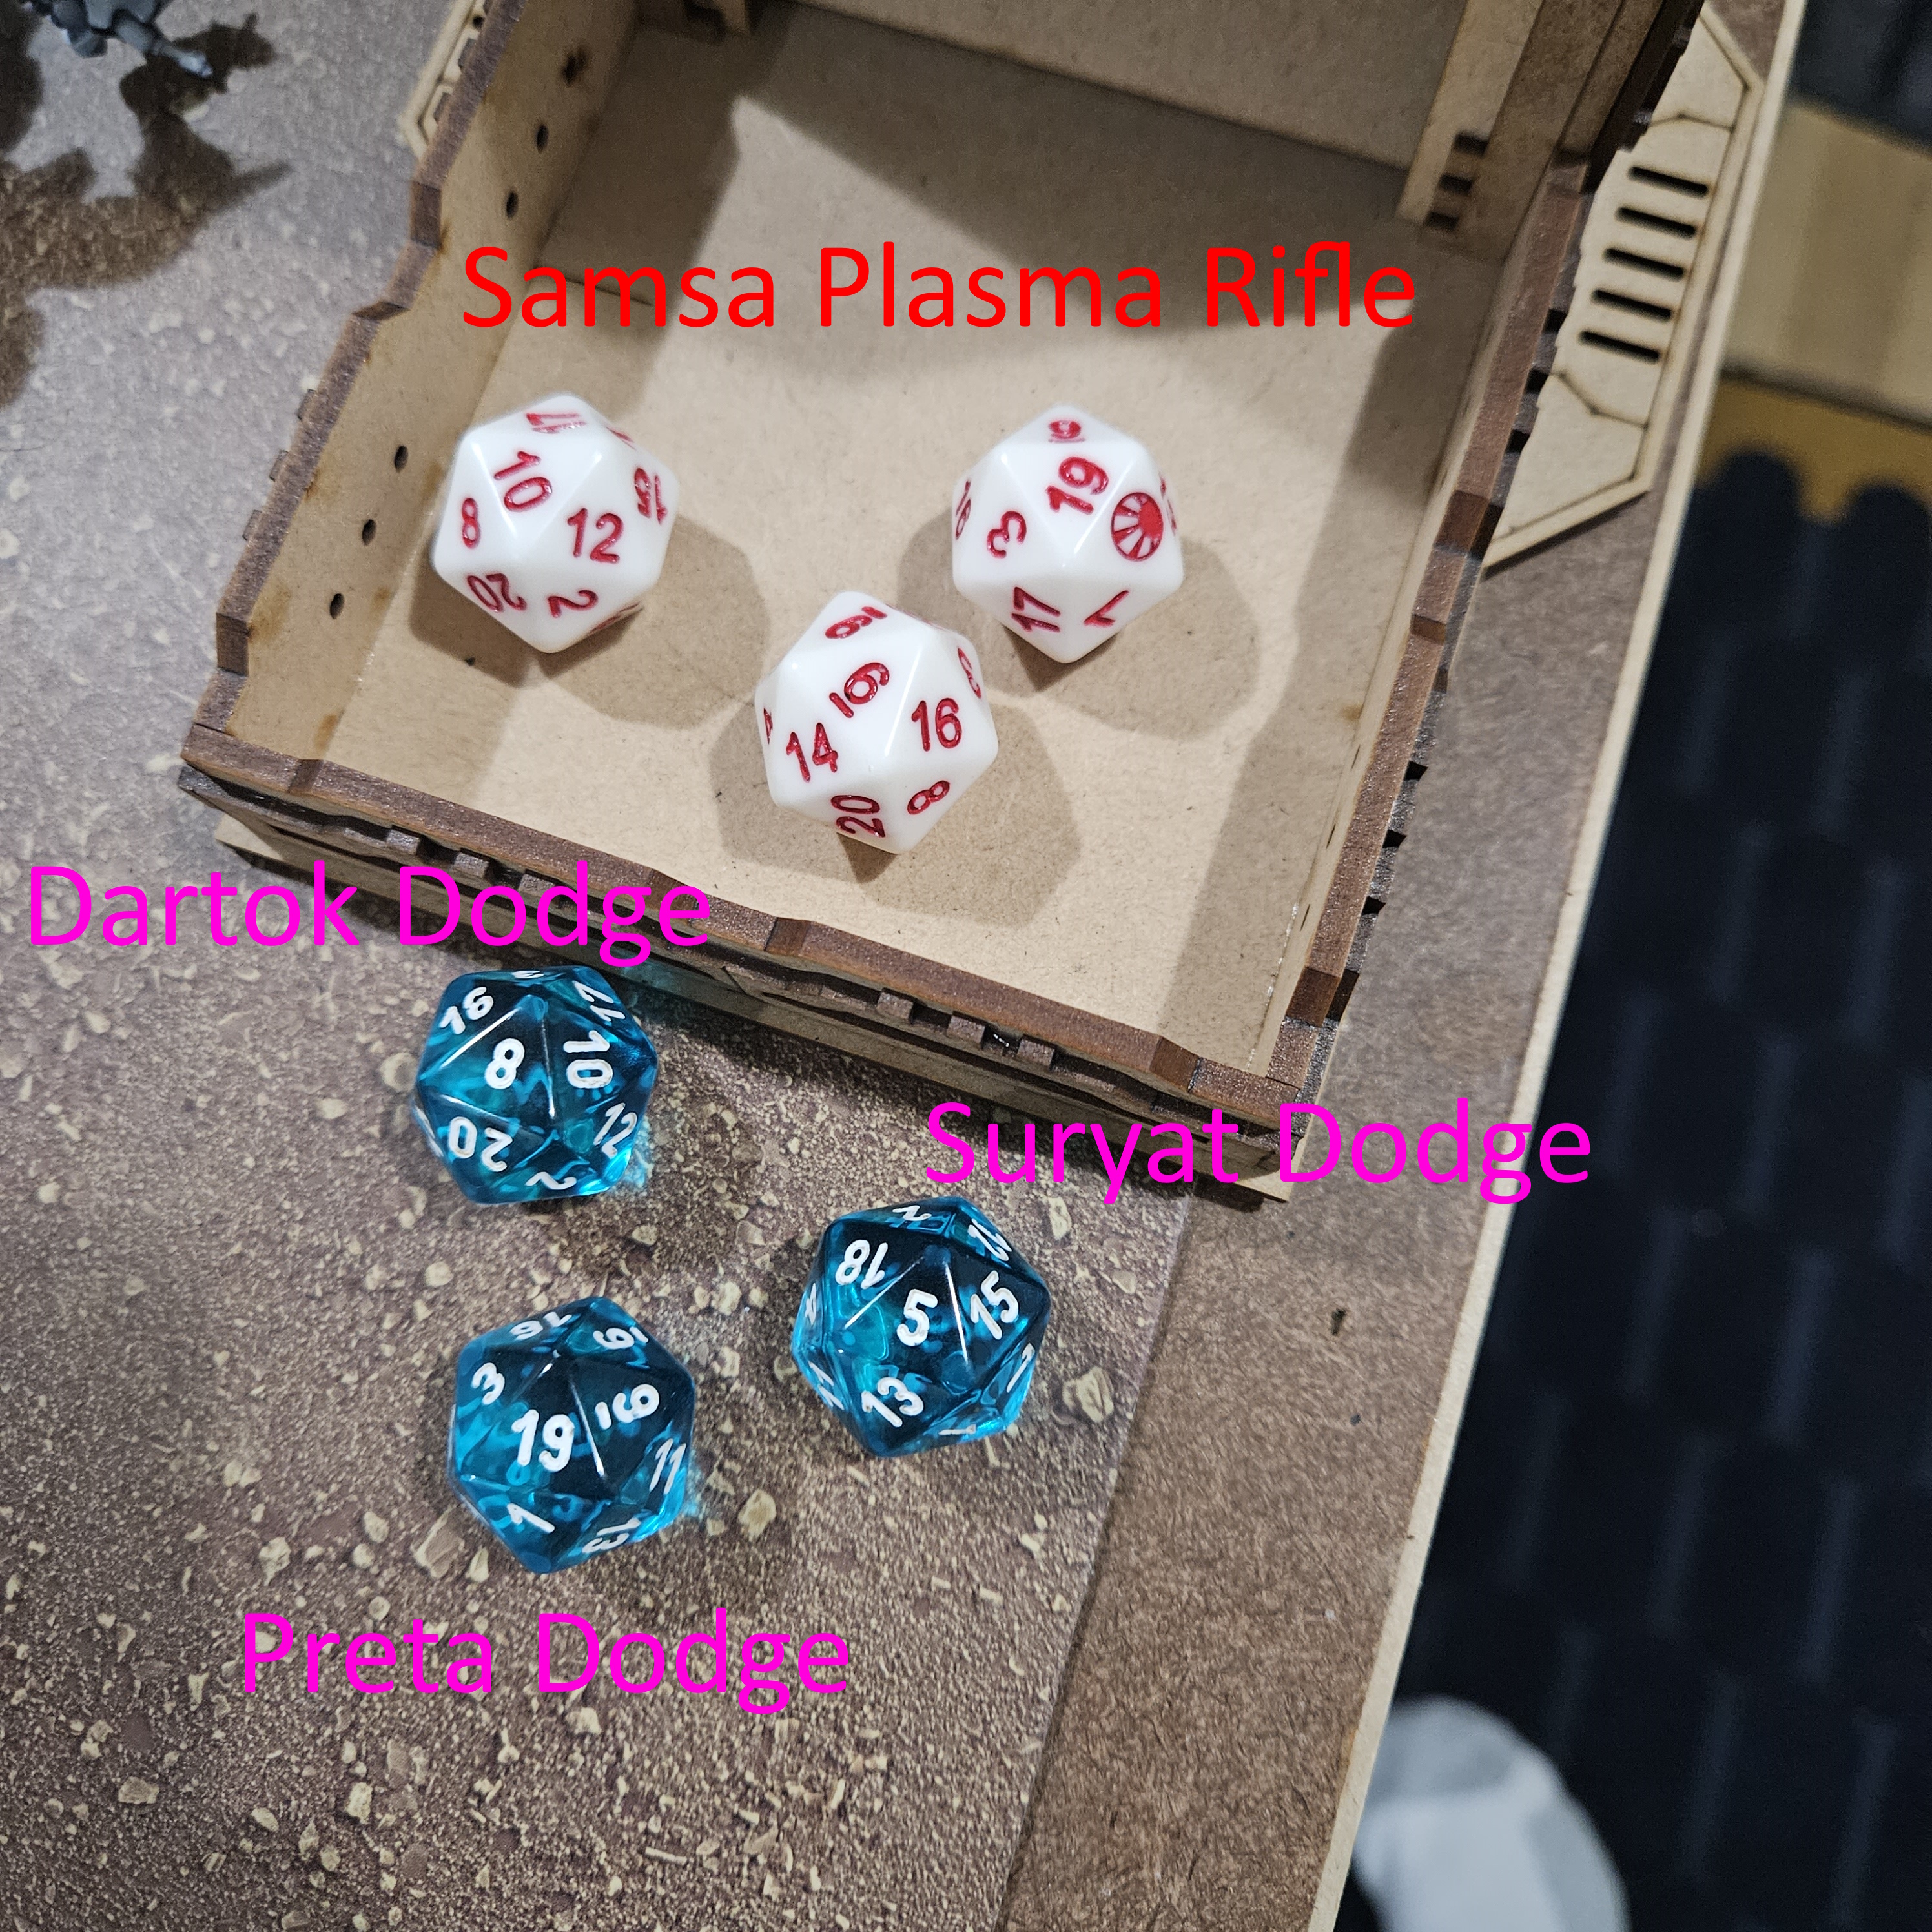
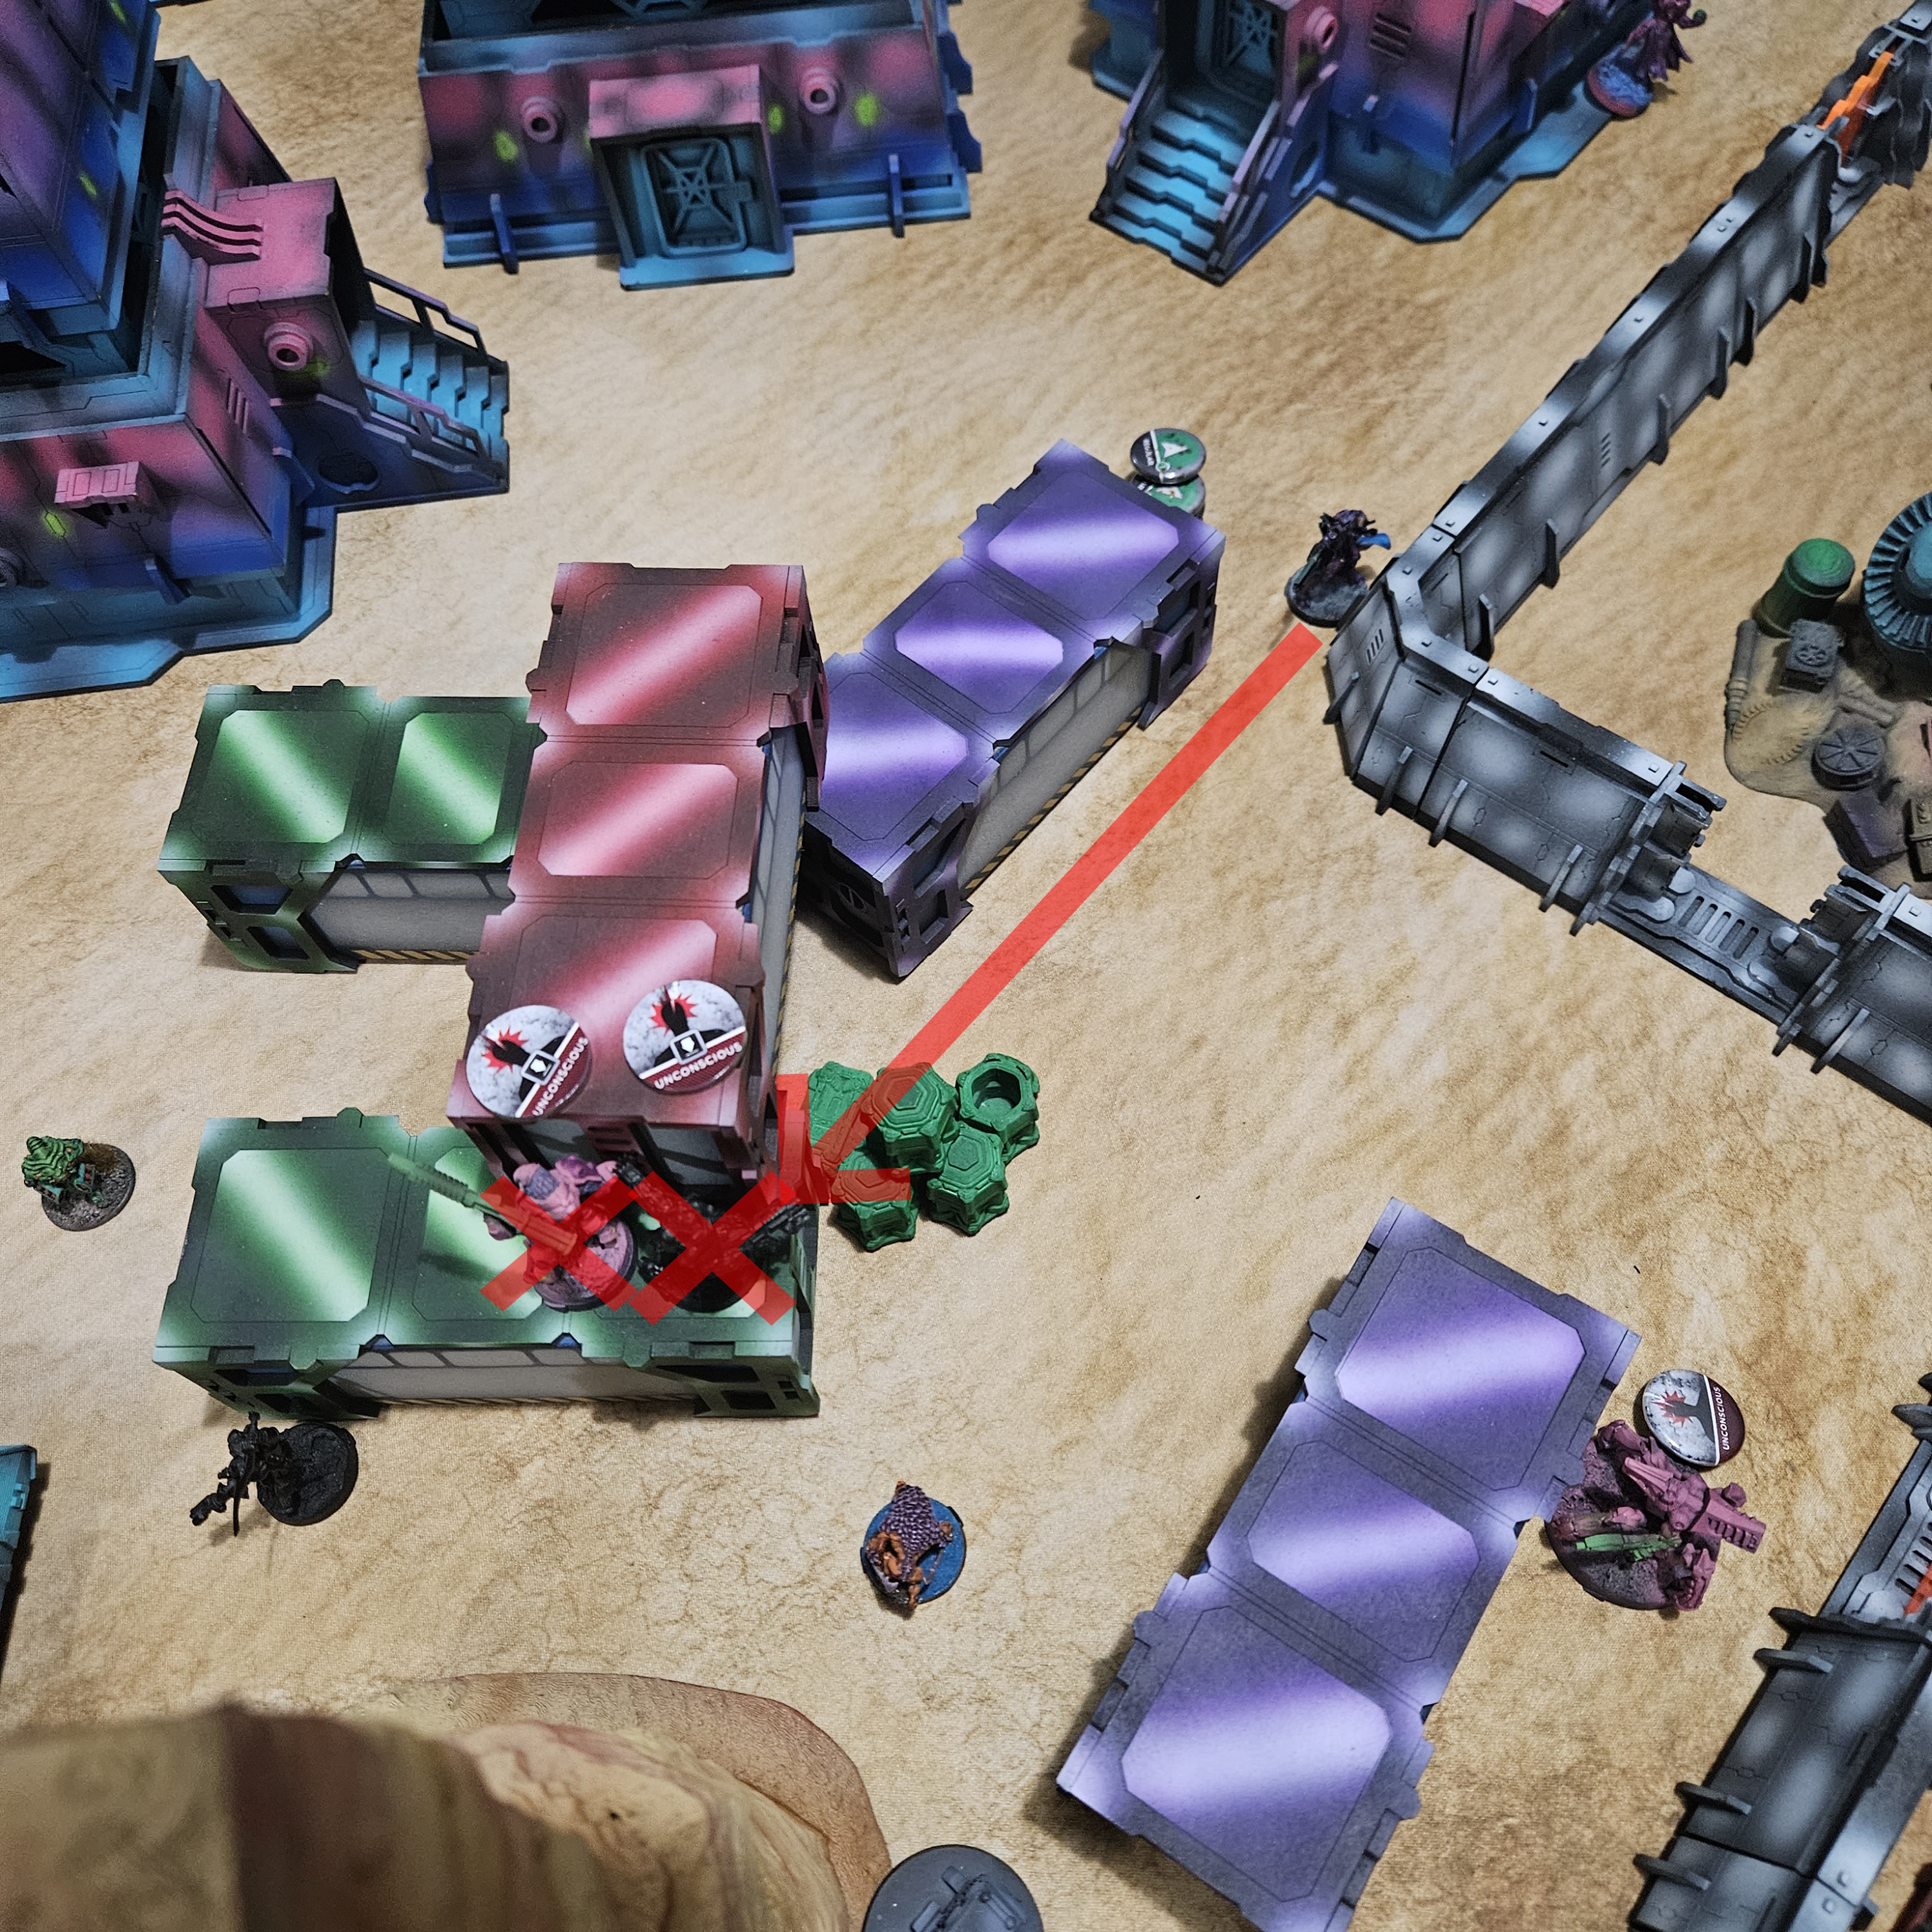
My O-Yoroi is in a sticky situation. 2 Members of a 5man Core team are staring at him and He's only at 1 STR. I start by getting Yojimbo to infiltrate on the Morat left flank to take out the T Drone. I need to do a bit of dancing to force the Rindak back and smoke his line of fire. Yojimbo remounts, takes out the T drone and runs down the Vanguard Paramedic. With the 5man now down to 4, Samsa starts to work on the right flank. Plasma Rifle Templates prove extremely lethal, as Rdrone, Kornak, Dartok, Preta and Suryat all fall. Seeing the Morat force has been thoroughly dismantled, the O-Yoroi aggressively pushes forward, hitting the repeater, Oznat and Kaitok with Heavy Flamethrower, and his ARM7 proves durable enough to remain standing at 1STR.
 Yojimbo pushes up, Rindak Dodges forward to overlook his route to Tdrone. Yojimbo dismounts, threatening to end in Silhouette contact, so the Rindak dodges back. Yojimbo Smokes in retreat, Remounts and cuts down the T drone.

Morat T2- An attempt was made
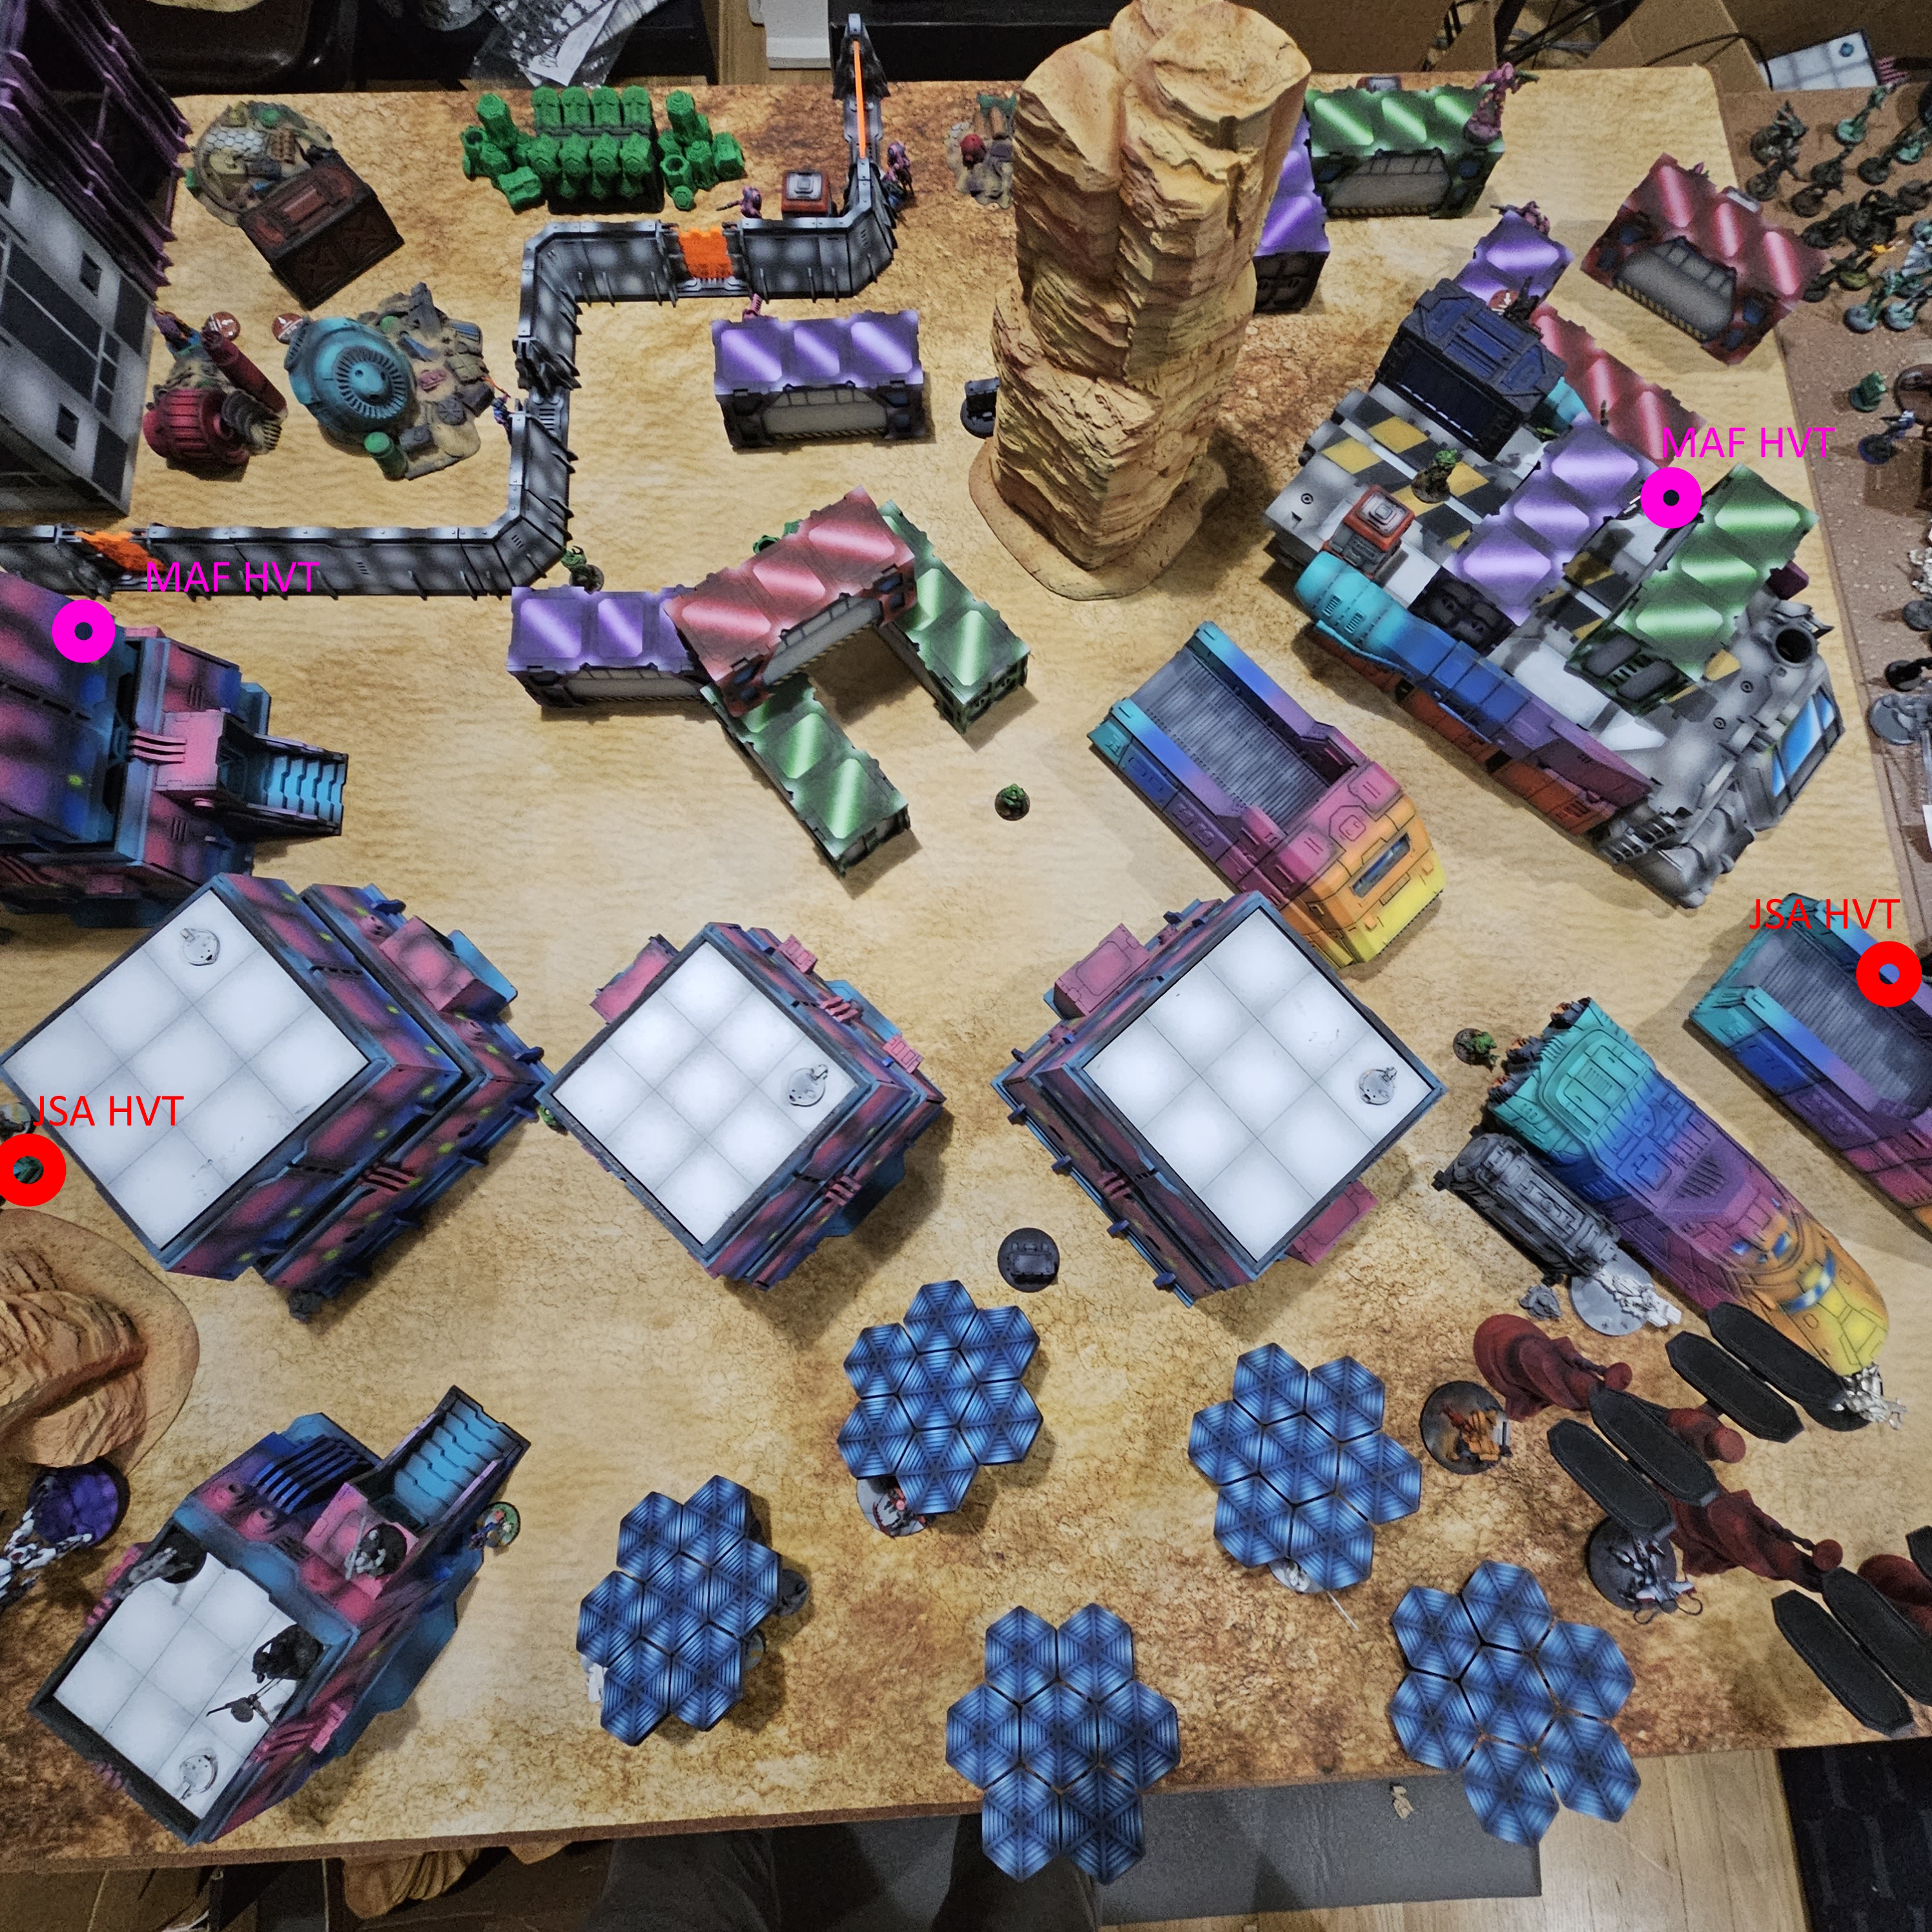
3 G1 Regular orders, one irregular Preta, and some Impets to take. Kaitok pushes up to the O-Yoroi and the TAG dodges in to melee. The Rindak attempts to grab a Civilian but fails the roll to Evac. Rasyat shows up to babysit a JSA HVT. The End is Nigh

JSA Turn 3- Cleanup and saving the HVTs
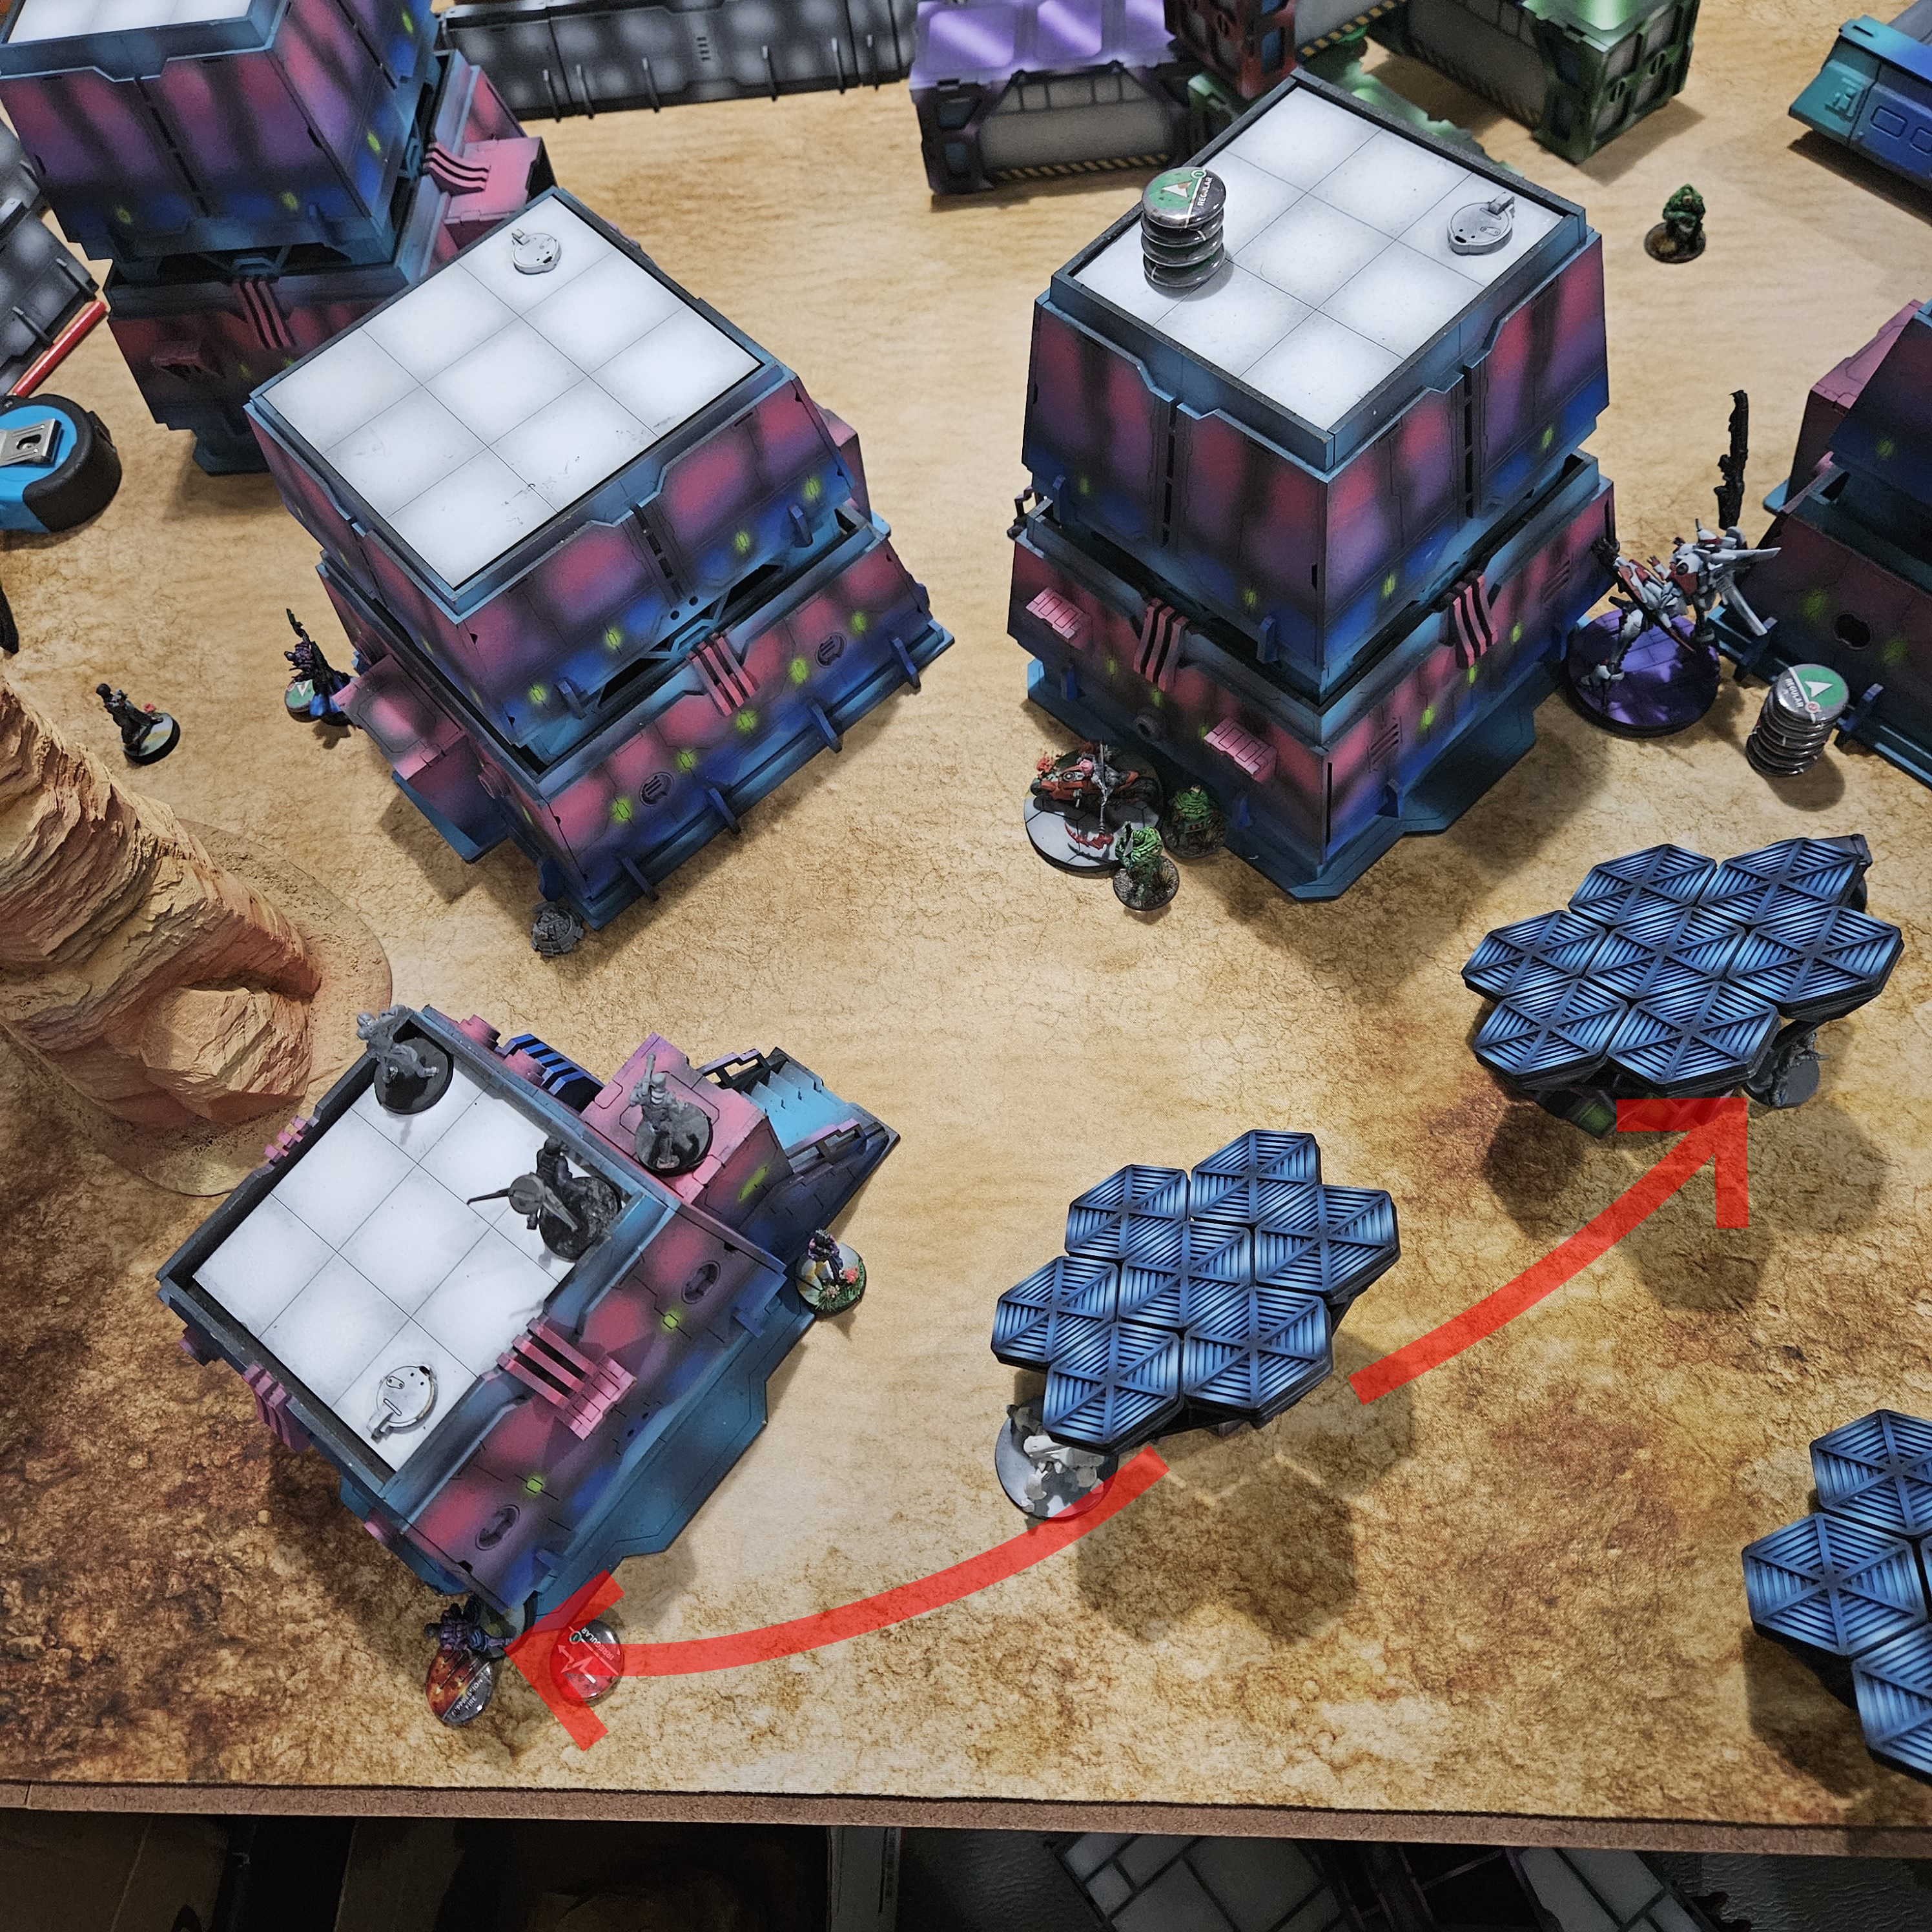
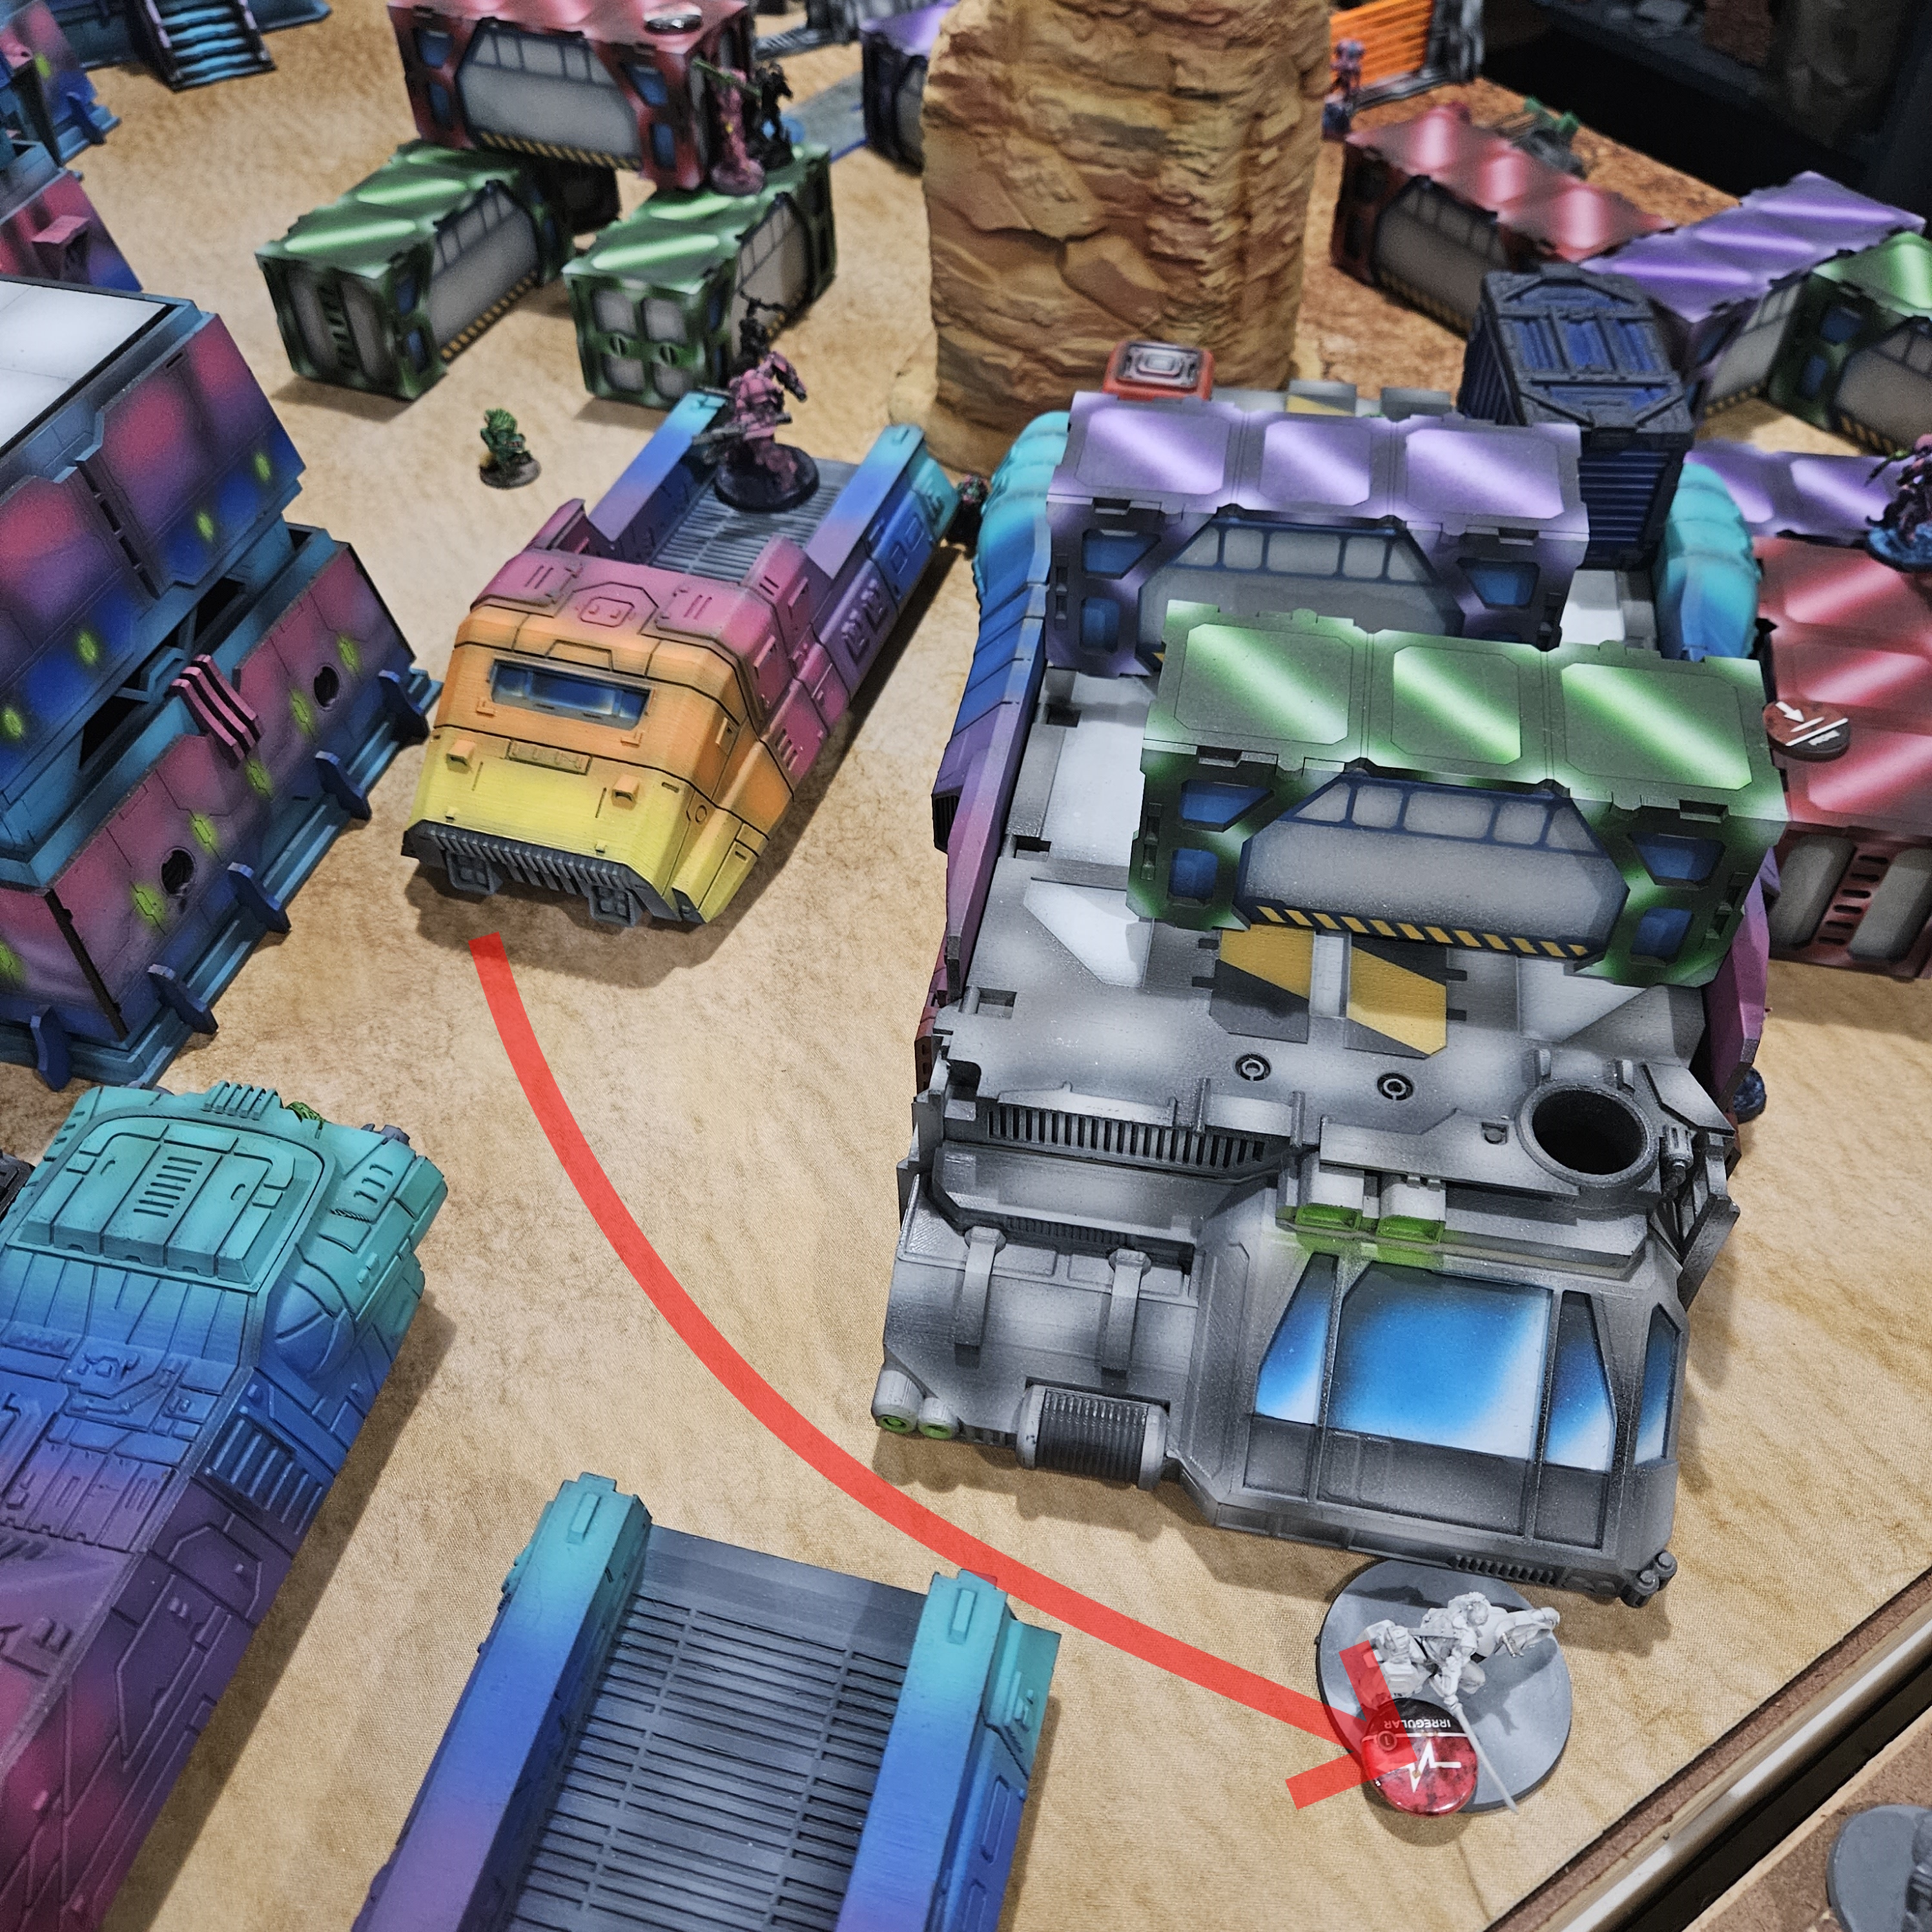
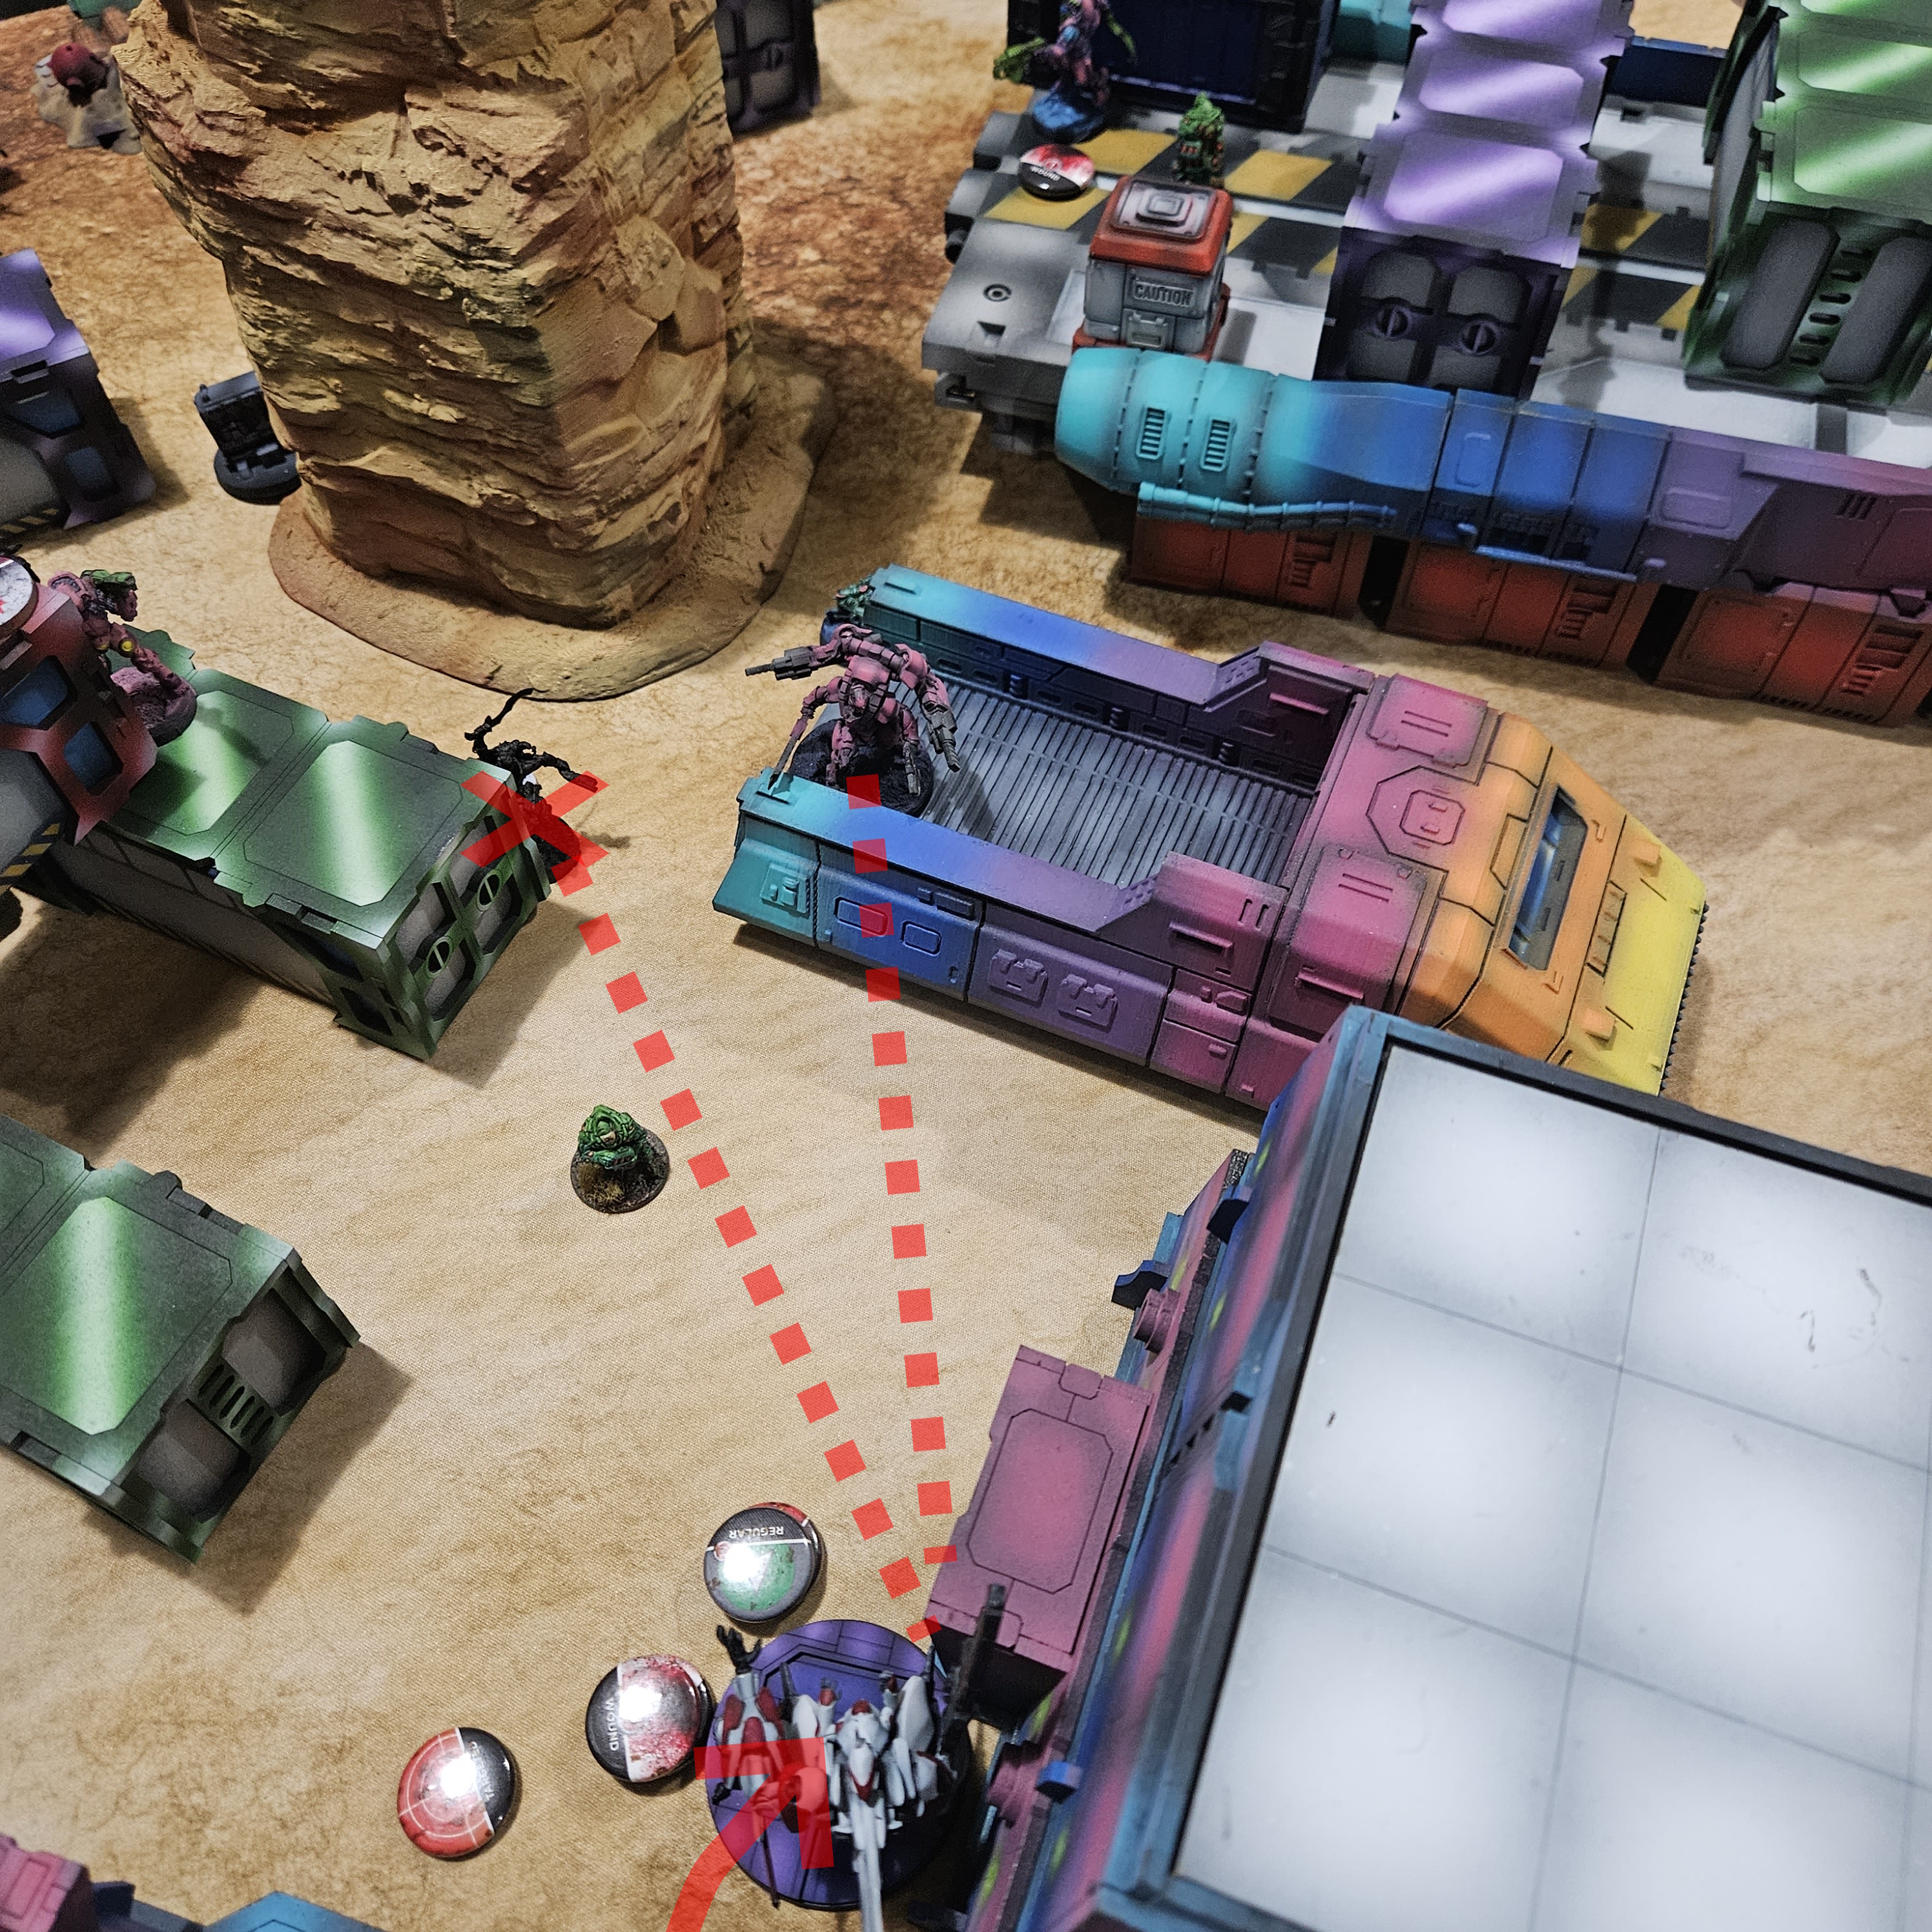
Kuroshi Evacs her two Civilians, Aragoto KHD saves one, O-Yoroi cuts the Kaitok down in CC, Guns down the Rasyat, then the Pilot dismounts to grab the Central HVT. Samsa moves up with the MAF HVT, but doesn't have enough orders to Evac him on the MAF Side Console, so he settles for killing an Ikadron and Rindak. No Enemies remain on the board.
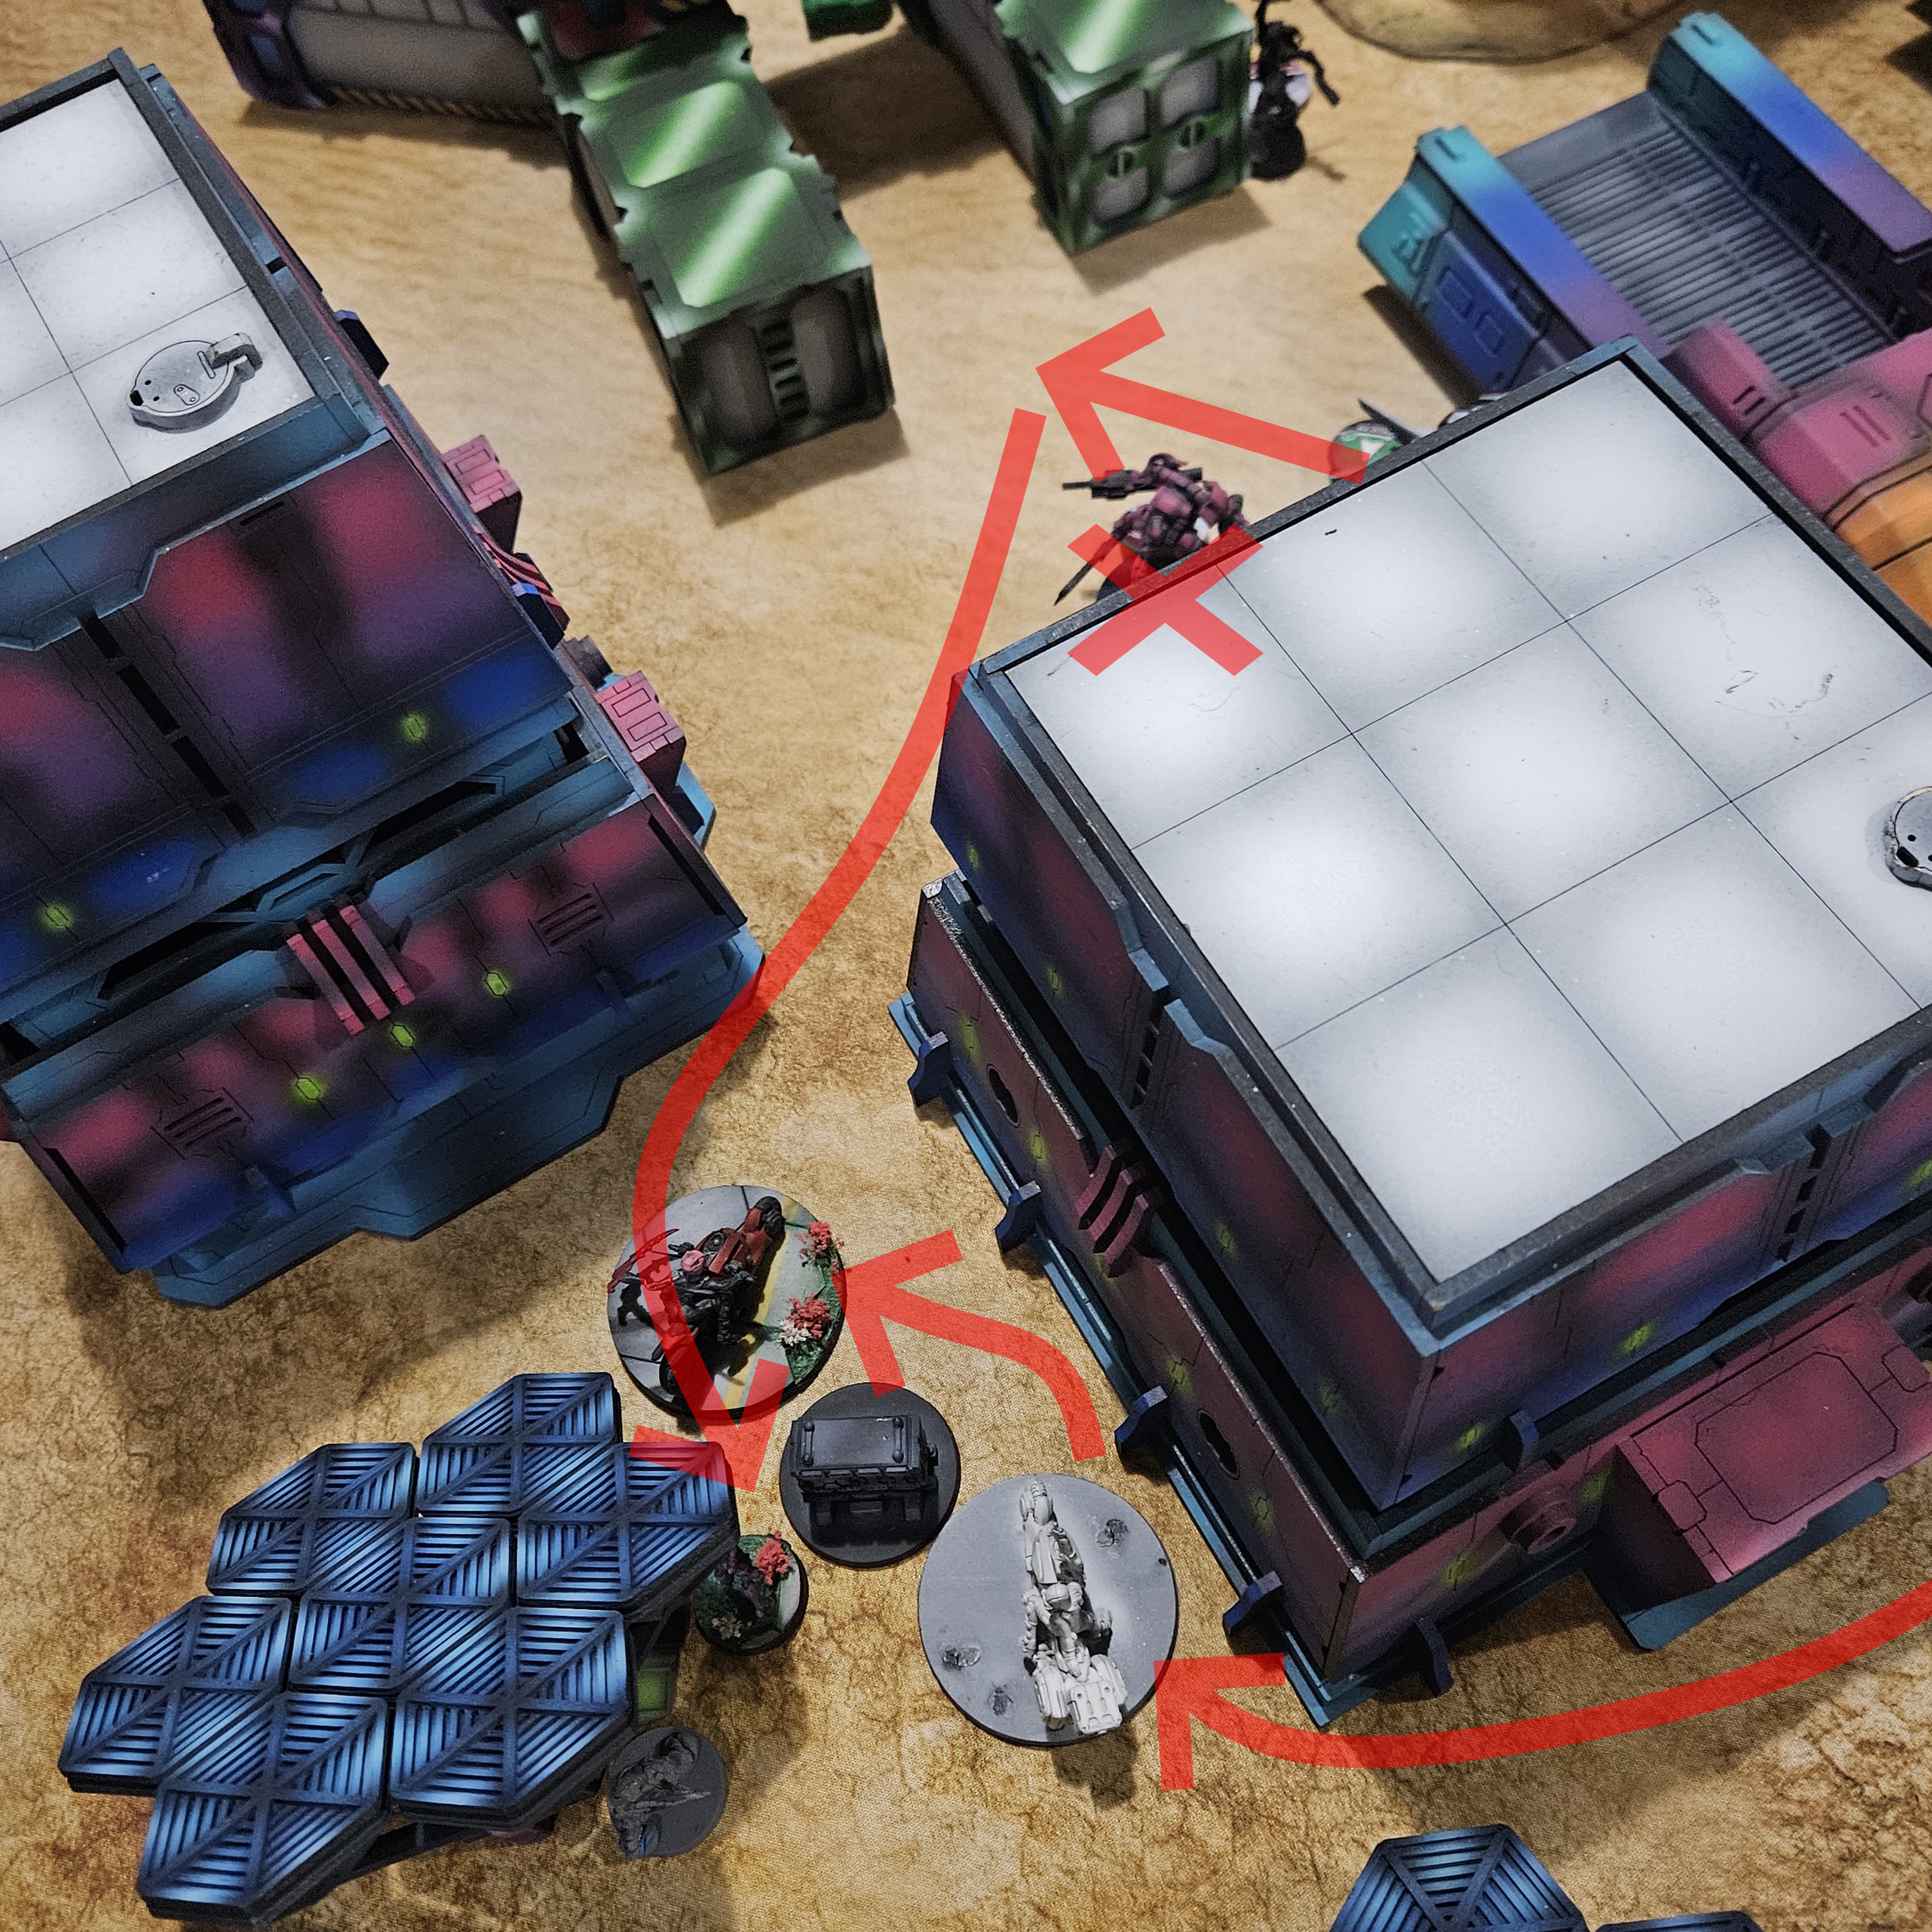 Bunch of CivEvac-ing going on. O-Yoroi CC's Kaitok and dismounts to be able to use the console to Evac the Central Civilian. Off Screen, Samsa and Lu Duan clear out all remaining MAF operatives.
Overview-
Although JSA Spent a ton of orders Turn 1 dealing with the Suryat, Morats lost too much momentum trying to take down the O-Yoroi in response. The game was won almost entirely off the TAG's above average ARM Saves, scalping 5 Short skills from the Suryat HRL, but being ARM7 will do that to you. The Fireteam being left in the midfield proved to be the bigger liability than leaving out the O-Yoroi, because JSA's ability to pick uneven fights on the flanks won the day. Once the Dartok and Suryat fell, the game was functionally over as there was no effective defense left for the Morats.
4-0 for the JSA
Battle Report Author

Army Lists Used In This Battle
Recommend Commander For Commendation
Share this battle with friends
SerrionavyrWins

(°∀°)b